The SundayGirl Company Aprons

03/16

Wow! Check out this beautiful apron by The SundayGirl Company! It matches my kitchen perfectly!

The SundayGirl Company are a creative award winning British design brand who take an innovative approach into breathing new life into the glamour of yesteryear with our beautiful Pinnies for Pin ups and Little Misses. Based on original mid century apron styling, we design our own fabrics which are screen printed on hard wearing durable cotton drill. We’re inspired by all things feminine, beautifully vibrant and engagingly kitsch. 

They have a wide range of gorgeous aprons in lots of colours and styles, all made here in the UK. The fabric feels amazing! If you want to feel like a kitchen goddess when you’re baking up a storm, go check these lovely ladies out here!

Have you got one of these beautiful aprons? I’d love to see! Send me a picture on Facebook, Twitter or Instagram!

Happy baking!

Britt xo

Instant Flower Nozzles from Iced Jems | A Review by She Who Bakes

03/16

I’ve got an exciting review for you today! It seems everyone and they grandmother has seen or knows about these Instant Flower Nozzles. Perfect flowers in one easy step! Needless to say, I was rather excited to try them out.

Iced Jems sells these in a set of 7 and they come adorable packaged in this cute pink slide out box with rainbow plastic separating them. This alone could sit on my shelf as a decoration quite happily!

I baked some vanilla cupcakes (my recipe can be found on my Cupcake Conundrum blog post here) in red and white Iced Jems Baking Cups (naturally…) and set to work making my buttercream.

I normally make quite a soft buttercream to use inside cakes but for cupcake piping I usually make a firmer version. Having spoken to Jemma from Iced Jems, she told me to use a 1:2 ratio to make my buttercream so I mixed 250g butter to 500g icing sugar. I was also told for best results, not to add water or milk as this will make it soft and that temperature not liquid, will make the right consistency.

I made up my buttercream and it was rather solid. I’m blaming the cold British weather!! So I popped it in the microwave on the defrost setting for 10 seconds and it worked a treat. I then separated this into 7 bowls ready for me to colour.

The nozzles are larger than your average, so I found disposable piping bags the way to go here.

I found this handy tip on Jemma’s website;

When piping onto a cupcake, simply spread a thin layer of buttercream over the top of your cupcake, then pipe the flowers on top. This will help the buttercream flowers to stick down and not come away with crumbs.

So, that’s exactly what I did!

As with all cupcake piping, I found it was easier to hold your piping bag directly over the top of the cupcake.

Again, I followed the instructions to the letter – You need to squeeze gently whilst your piping tip is nearly touching the cake surface, this will ensure the base of your flower sticks to the cake. Now continue to squeeze whilst lifting the piping bag upwards for about 2 seconds, then release the pressure and pull the bag away.

I’ll be honest, the first one didn’t go so well! I did get covered in red buttercream. Haha! BUT! Not to be deterred, I tried again. The second time was a lot easier. Practice, practice, practice!

I used all of the nozzles with different colours and these were my findings;

  • Temperature of buttercream is key. At the start I was struggling a bit but it was due to my buttercream being too cold and therefore too hard to push out. A quick zap in the microwave on defrost sorted that!
  • Darker colours don’t work as well. I used a very deep purple for one of the nozzles and I couldn’t see the definition of the petals very well.
  • Mixed, light colours work beautifully! One bag had a slight mix of lilac and cream (mainly due to my hasty mixing) and this looked really nice. I think a deliberate mix of two or more colours really brings these to life.
  • The roses are my favourites.

I like them! I think they are cute and add something a little special to the top of your cupcakes and cakes. A must-have for any baker! You can buy a set of 7 for just £28 on the Iced Jems website.

Have you used them? What do you think? Let me know your thoughts, either on FacebookTwitter or Instagram!

Happy baking!

Britt xo

Chick in Egg Tutorial

03/16

Equipment

  • White, orange, yellow & black icing (I recommend modelling paste)
  • Scalpel or sharp knife
  • Paint palette or something of a similar shape
  • Edible glue and paintbrush

1. You need a smooth round ball of white modelling paste, this is for the shell.

2. Squish this down into a circle. It doesn’t have to be neat.

3. Using a scalpel, cut triangles out around the edge to make the cracking shell.

4. Push this into a paint palette using a ball tool and leave to dry slightly.

5. Roll a ball of yellow modelling paste and shape into an elongated ball. (Egg)

6. Shape two teardrop shapes out of the yellow modelling paste and mark some lines into them. These will be the wings.

7. Using a little edible glue, stick then wings on.

8. With a little big of orange paste, create a beak and attach. Do the same with two small balls for the eyes and two small yellow strands for the hair!

Give it a try and let me know how you get on either on FacebookTwitter or Instagram.

Happy Easter and happy baking!

Britt xo

Thoughts From The Supermarket Aisle

03/16

Today, while in the supermarket picking up various baking goodies, I saw something that made me stop and think and has been playing on my mind since. Let me set the scene for you.

I needed supplies for a few specific posts I am in the middle of writing and while standing in the home baking aisle trying to choose between plain and milk chocolate chips (I went with plain, in case you were wondering), I noticed next to me a young girl about 10 or 11.

I specifically noticed her because she reminded me of me at her age. Same hair colour (no, not red), same height and face shape and I remember being her age and going shopping. Although, I never ventured into the baking aisle. I didn’t start baking until I was 21 and before that had only made a few uneven and biscuit-like fairy cakes with my nan.

The young girl was looking at me and watching me choose items off the shelf. She picked up the same chocolate chips as me. She had yellow icing in her hand and as I picked up the orange colour, she too, grabbed that one. She looked like she was thinking of what she could do with all of the colours.

An older woman, who I am assuming to be her grandmother came over to ask what she was doing. “I’d really like to make mum a cake” she said. I thought it was really cute. I don’t know if it was her mum’s birthday or for Mother’s Day, but I thought the gesture was adorable. My mum never tried my baking. Having died when I was 16, I could only just about successfully make toast at that age. I always made my mum a cup of coffee in the mornings though. Gold Blend, 2 sugars, white.

“No” said the grandmother, proceeding to take the baking items from the young girl and put them back randomly on the shelf, “we’ll buy her one, it’s easier.” Then took her by the hand and led her to the prepackaged cake section at the end of the aisle.

I don’t know why, but this made me a little upset. The young girl looked so disappointed, she really wanted to make her mum a cake. Ok, sure, I’m not saying the grandmother was wrong, buying a cake would have indeed been easier, but baking a cake for someone is showing you love them on a completely different level than just buying one. It comes from the heart, not from a box.

Every year for my birthday my friends tell me they are faced with the dilemma of buying me a cake or making me one. I tell them every time I would appreciate them making one. “It wouldn’t look like yours” my friend Laura said to me once, and of course she’s probably right, considering she doesn’t bake every day. But it wouldn’t matter to me what it looked like! When it comes to baking for loved ones, it really is the thought that counts.

I’ve shown in my Budget vs Premium article that you can make a pretty good Victoria sponge for around £2.63 whereas celebration cakes in supermarkets tend to start at the £8 mark so home baking is more cost effective too.

I guess, seeing this unfold in the supermarket got me thinking. This little girl may very well forget about this whole thing by the end of the day but it’s stuck in my mind. Maybe it’s because I can’t ever bake a cake for my mum, maybe I’m getting softer as I get older, but honestly, I really wanted to help this young girl bake a cake.

My first cakes, including the frankly beautiful giant cupcake pictured at the top of this post, were a mess. No other word for them. But they made me so happy, and at a time when smiles were few and far between, I was so grateful for it (You can read that story here). It’s only now, six years later that I look back and see how far I’ve come. How much I’ve learnt. How much baking changed my life.

Baking isn’t always easy, but it is fun and it is worth it. It’s made with love, and to me, that’s better than anything that you can buy in a box.

Happy baking,

Britt xo

Mother’s Day

03/16

Sorry in advance that this isn’t a baking related post, but blogging has always been one of my outlets and this week has been pretty tough.

Mother’s Day, or more specifically the lead up to the day itself, has been a tricky one for me to cope with for years. I used to be able to simply avoid it by not looking around the shops at this time of year but in the age of internet shopping, my inbox is full each day of subject headings like ‘Find the perfect gift for Mum today!’ and  ‘Don’t forget your Mum this Mother’s Day!’.

As if I could forget.

Now, I know it’s blanket marketing and for the majority of the people that open those emails, it won’t cause the pain and upset it does when it catches me off guard. The sharp pang right in my heart that sometimes makes me lose my breath when I see the word ‘Mum’ flash up on my phone.

IMG_9034

I can remember the last ever time she called me. She wanted to know what time I finished school and when I was coming home and if I could pick up washing up liquid from the shop at the bottom of the road. It all seemed rather normal. That was her last day on this earth. I would never see ‘Mum calling’ again.

I was only 16 when I lost my mum to cancer. I was a child. Granted, if 16 year old me had heard me calling her a child she would have protested, maintaining she was an adult, capable of making her own choices, her own decisions and her own way in this world. The fact of the matter is, she, or I, wasn’t.

You need your mum for so much in this life and there is never a good time to say goodbye. You need her for as long as you can hold on to her. She is your first teacher and friend. If you’re happy, you call your mum. Sad, you call your mum. Need advice, mum. No matter who else you have in this world to help you through it, they aren’t her, and that’s really bloody hard. Sometimes, her opinion is the only one that really counts.

My mum never saw the woman I have turned out to be. She will never know all of the things I have accomplished. That hurts me every day.

Every award, every accolade, every bit of success, I do it all in her memory.

IMG_3088

I visit the crematorium where my mum rests several times a year, Mother’s Day is usually one of those times. It’s also one of the only times I am surrounded by people that know what I’m going through. Other people who are laying flowers for their own mums who left too soon. This year, I will be away and not in the UK, more by accident than by design, the timing just coincided. I will visit her when I return and I know she would understand my need for a holiday after working 24/7.

It may have been 11 years this year, and some days it really seems like I’ve not seen her in that long and even longer, but sometimes, occasionally, it feels like she was just here.

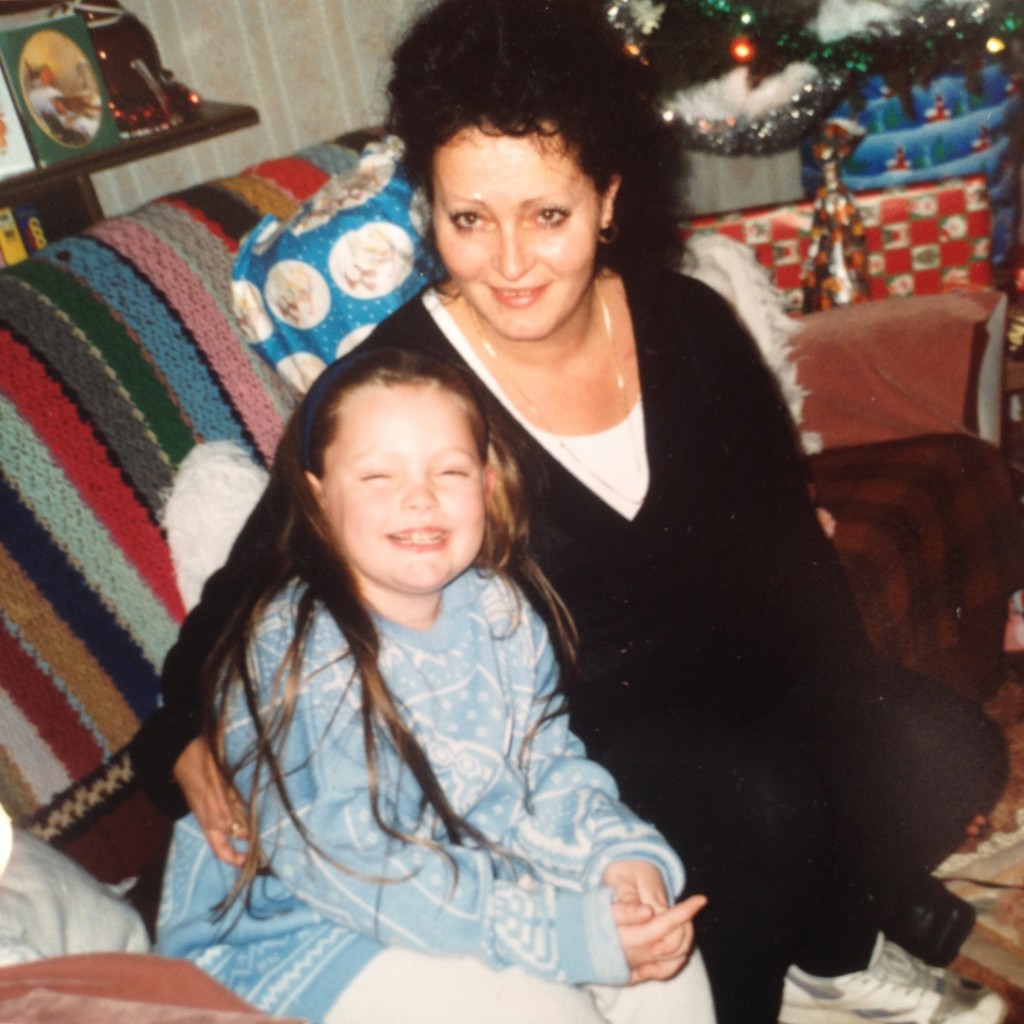
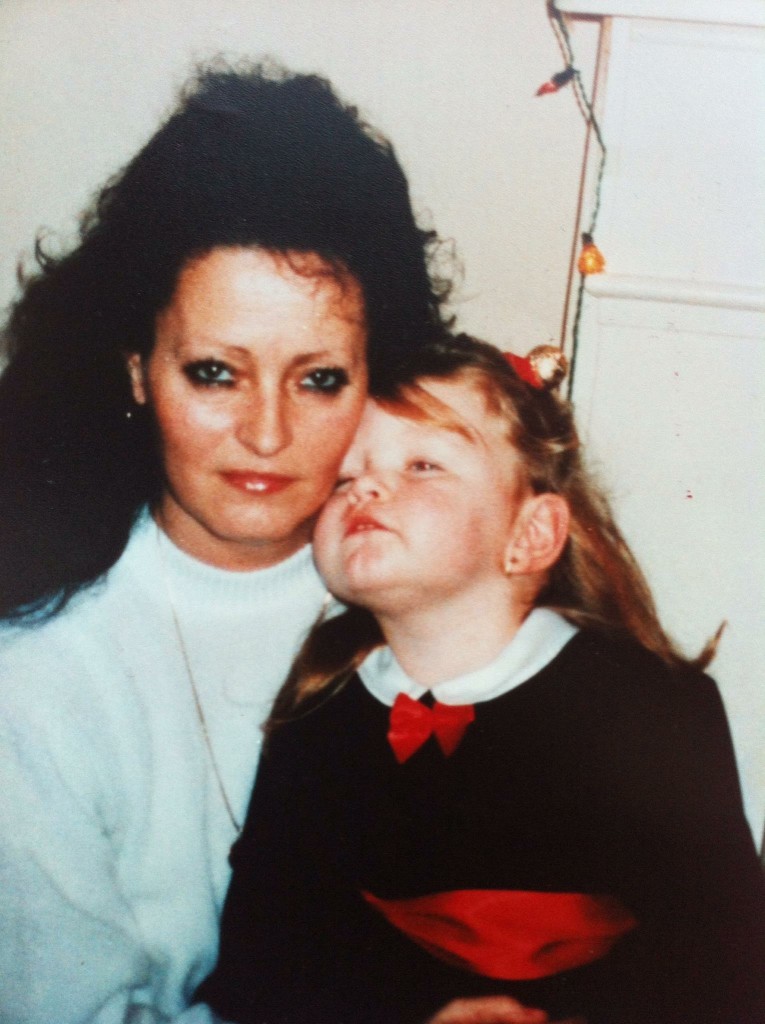
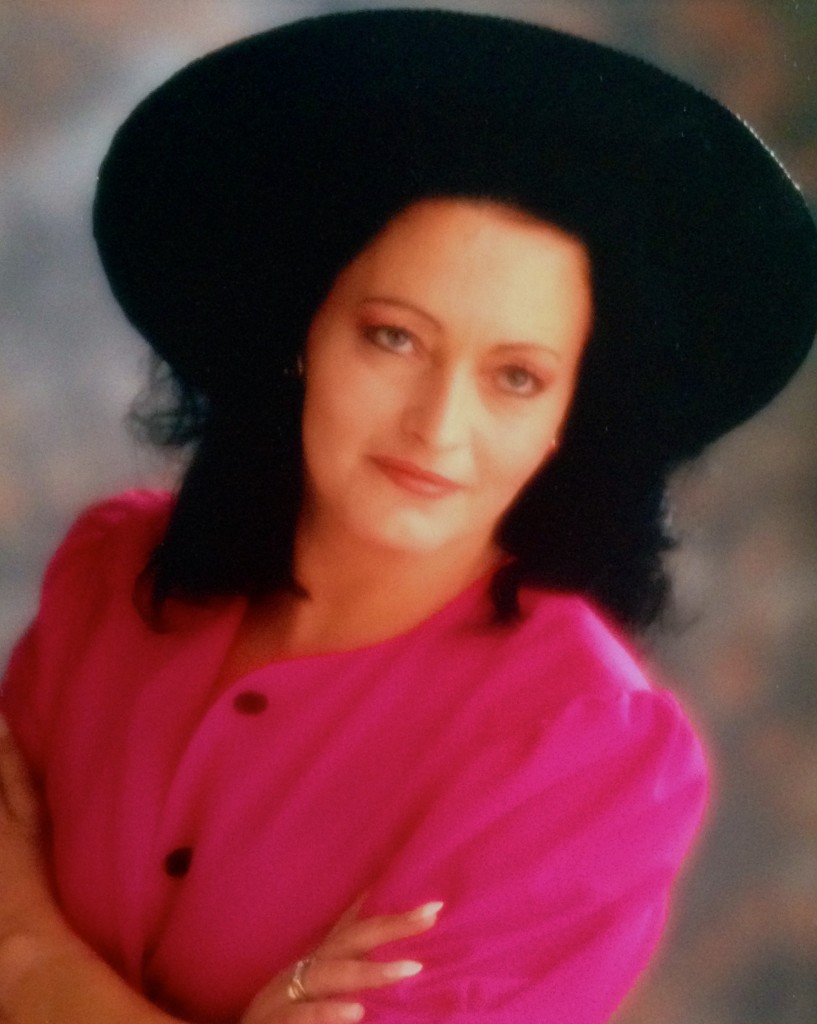
It saddens me that I don’t have as many photos with my mum as people might have nowadays, we didn’t have camera phones when I was growing up and so the only pictures of us were taken on disposable cameras. Sadly, the last photo I took of my mum was on a device that was damaged beyond repair some years ago. She had a face mask on and slices of cucumbers under her eyes. I loved it.

When I was clearing out the old house before I left it I found hundreds of photos of me growing up, but only a select few of my mum and me, and rarely any of my mum on her own.

IMG_3485

April 2005, when I tragically lost my mum to cancer, was a simpler time. Before the iPhone, before Facebook and before we lived our lives online.

Sometimes I feel lucky that my mum never had a Facebook page purely so I don’t have to see it. I am, however, jealous of the interaction that social media has brought families, specifically mums and daughters. Don’t get me wrong, I often joke to my friends that if my mum DID have a Facebook page, she would no doubt be the sort of woman to friend request anyone tagged in photos with me, get lured into Facebook scams by constantly sharing status updates pleading with Mark Zuckerberg not to share her information and be partial to a ‘what leaf would you be?’ kind of quiz.

I often wonder if my mum would have had a twitter page, or if she would have turned to internet dating to find someone. I can make a fair assumption however she wouldn’t have been on Tinder. The thought of my mum ‘swiping’ her next date is comical for me to say the least.

I have no doubt I would cringe at every emoji, every humble brag and every comment of ‘look at my beautiful girl!’ underneath any new photo I post. Which makes me so jealous of those who have it.

I would give anything to smile at my mum’s text messages, roll my eyes at her naivety online, laugh at her comments, add her to groups, send her funny memes.

Then again, I would give anything to hear her voice again, to see her one more time. To tell her I love her.

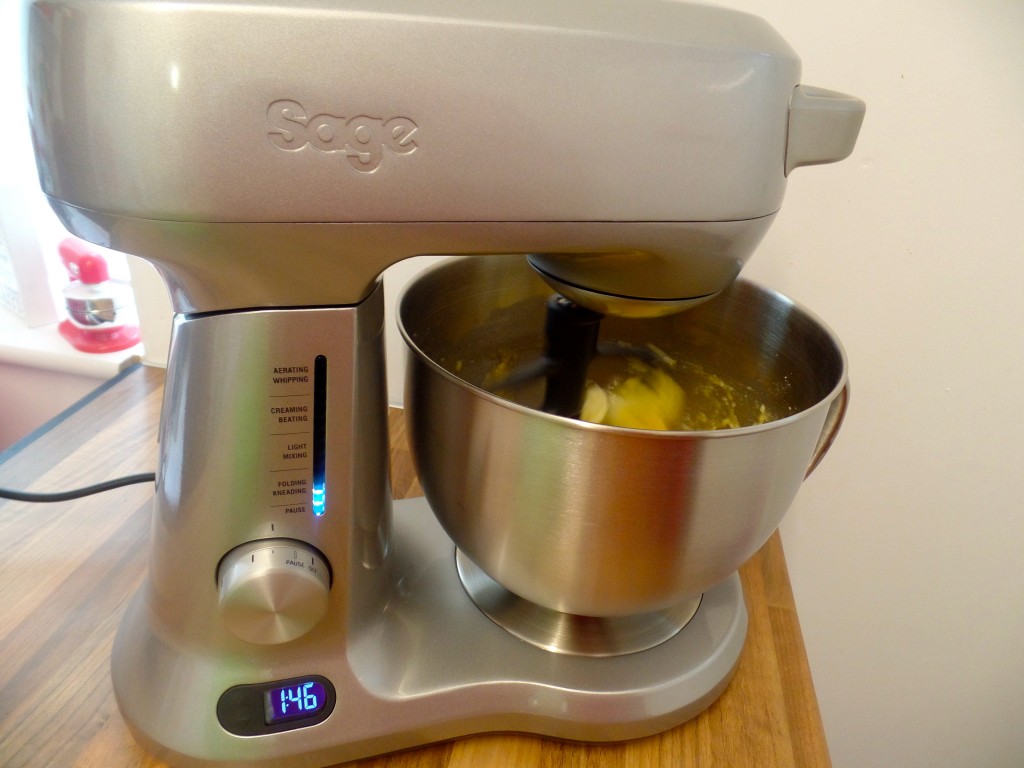
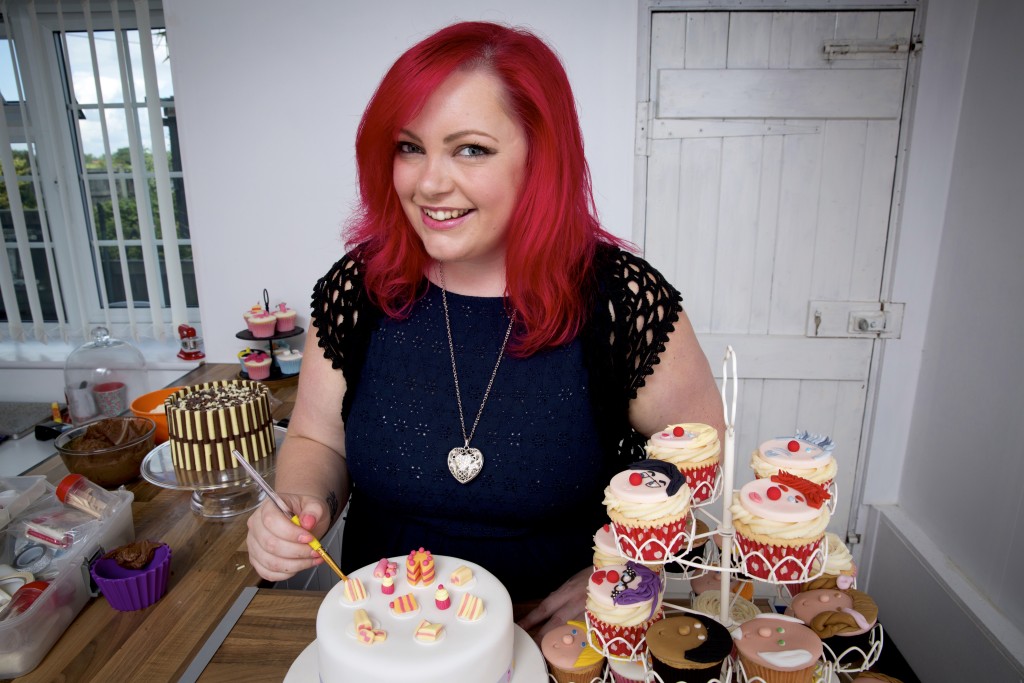
Mother’s Day advertising has seemed particularly heavy to me this year. On television, in shops, on the internet and social media, it’s everywhere. I don’t know if I’m just sensitive to it more due to the fact that the past year has been a pretty amazing one for me and for my business and there are so many awesome things that have happened that I am just desperate to tell her. But since I can’t, I’m writing this post. Thank you to all of my readers for your continued love and support over the years, it really does mean the world to me and I know my mum would be really proud of it all.

Treat your mum like the queen she is, not just this Sunday, but every day.

Happy Mother’s Day.

Britt xo


Renshaw Microwave Fondant Icing | A baking review by She Who Bakes

02/16

Renshaw Microwave Fondant Icing. I first saw this stuff on Twitter last week and was very curious indeed.

I did a little research and found this information on the Lakeland website;

Forget the ‘perfect’ finish – if you’re after on-trend, colourful drips and splashes, get the look with Renshaw’s range of pour-over fondant icing. Simply heat in the microwave, stir, then drizzle, feather and flood over your cakes. In a host of tasty flavours, they’re great for dipping biscuits too – and for making your very own fondant fancies.

Skip forward a few days and a successful Bluewater trip later and I have it in my possession! I had some left over dough from my Giant Jammie Dodger recipe so I’ve made some heart biscuits as my test subjects!

They nearly didn’t make it to the testing arena, mind. I told Tim what I was doing to which he replied “OH! I nearly ate those biscuits earlier. You should have said.” It seems tasty treats in my kitchen need to be nailed down or they risk being scoffed!

First Impressions

It’s nicely packaged and has a distinct red branded lid in uniform with other potted Renshaw products, like their ready to use Royal Icing and Colour Melts.

At £2.48 for 400g, it’s more expensive than buying fondant icing sugar to make up yourself, but it’s already flavoured and at the right consistency to use so I can see why it would be popular on the shelf. The full flavour range includes: Chocolate, Lemon, Vanilla and Caramel.

I’ve bought the vanilla flavour to try today.

Trying It Out

The instructions are clear; “Remove lid and heat on full power for 30 seconds, then stir for 30 seconds. Hey for a further 15 seconds and sir until fully combined.”

After heating it for the time stated, it still looks rather thick to me. It also has on the back; “If a thinner sauce is required, heat for a further 15 seconds” so I opt for this.

I do notice that it smells VERY sweet. Not like the slightly ‘alcohol’ smell a vanilla pod would give off, but a sugary sweet smell. (Not very shocking, I mean it IS sugary fondant icing after all…)

I hadn’t really thought about what design to do on my biscuits so I go with my instinct!

The first two, I decided to flood. I pour on the fondant icing and it’s still really thick. I can get a nice covering though by giving it a bit of gently persuasion with the back of my spoon.

The next two, I decided to drizzle. This was slightly tricky as it’s not the best consistency for drizzling, so I let the fondant icing fall off the spoon, back into the pot for a few seconds before going back and forth over my biscuit. It looks quite cute and I’m pretty pleased with it. I then decided to do a thinner, criss cross drizzle. If you work quickly using a little bit on the spoon, it’s easy to create this style.

The last two I decided to dip. By having a strong biscuit, I could easily plunge it into the fondant icing and back out again, but I wouldn’t fancy my chances dipping cake into this. I think the cake would break apart unless it was frozen.

If you want to sprinkle your biscuits, you’ve got to be quick! By the time I decided to sprinkle these and get my decoration out of the cupboard, the fondant had almost dried too much for the sugar to stick. Luckily I was just in time for a few to stay on but bear that in mind; if decorating with sprinkles or sticking on other decorations, do it as soon as you’ve covered/dipped the biscuit.

I left them on the cooling rack to dry and it took only a few minutes to become ‘touch’ dry but about an hour to fully set.

I have decorated 6 large biscuits and used about half a pot.

Verdict

The Renshaw Microwave Fondant Icing was easy to prepare in the microwave and really easy to use.

In less than a minute I have fondant icing ready to pour. A few of my recipes call for fondant icing, (such as my Lemon & White Chocolate Slices) and I know from making that, it can take a lot longer to get a liquid fondant icing by using the standard fondant icing sugar, water and flavouring.

It’s a little on the thick side in consistency but that is easy to fix with a bit longer in the microwave. I would be interested to test out the other flavours to see if they are as thick. It tastes super sweet too.

I like it! I’d say this product would be great for using at home with the kids, and if I needed a quick decorating fix to flood some cupcakes or drizzle on biscuits, I would totally buy this again!

You can buy this from Iced Jems here.

Have you used it yet? What do you think?

As always, let me know how you get on, either on FacebookTwitter or Instagram and make sure to subscribe to my YouTube channel where you can check out my latest videos!

Happy baking,

Britt xo


Scraper Mixer Pro by Sage & Heston Blumenthal | A Review by She Who Bakes

02/16

2017 UPDATE

Unfortunately this mixer is no longer being sold which is a shame as I really like it. Having spoken to Sage they have advised me there are two alternatives to it –

Scraper Mixer RRP £249.95: https://sageappliances.co.uk/collections/mixers/products/the-scraper-mixer-pro?variant=40454818948

And the Bakery Boss, RRP £399.95:https://sageappliances.co.uk/collections/mixers/products/the-bakery-chef?variant=40399794884

I cannot, however, advise what either of these mixers are like as I haven’t used them. That being said, I believe the Scraper Mixer is pretty similar to the one I use and have reviewed below.

________________________________________________________

This week, I’m reviewing the Scraper Mixer Pro by Sage & Heston Blumenthal.

Scraping down the bowl is a necessary evil when it comes to baking the perfect cake. If you forget, as I have done many times in the past, you pour your mix into your lined tin and… what’s that? A lump of flour/butter/sugar that simply hasn’t been fully incorporated. This mixer claims to eliminate those problems once and for all by taking away the need to scrape down the bowl.

How? The answer is actually quite simple and also rather brilliant. One of the attachments included in the box is a scraper beater. A normal beater with plastic, flexible edges to scrape the sides of the bowl as it mixes.

So, let’s take a closer look.

Scraper Mixer Pro Attachments

As well as the scraper beater, the Scraper Mixer Pro also comes with a wire whisk, a flat beater, a dough hook, a splash guard and a spatula. These are the kind of attachments you can expect to find with a premium mixer like this one, however, one aspect I think is really rather clever, is that there is a guide on the inside of the mixer telling you what attachment to use for what recipe. I know for a fact that when I first started, I used my one flat beater and the rest stayed in a drawer untouched. I had no idea what to do with them and when it was appropriate to use them. Granted, this information would have possibly been inside the instruction manual but I’m the WORST for putting those away, never to see the light of day. I thought the visible guide was a nice touch.

I LOVE a kitchen gadget and two features of this mixer I was particularly fond of were the electronic speed control and countdown timer.

Instead of having speed numbers on the side, there’s specific speed settings including folding & kneading, light mixing, creaming & beating, aerating and whipping and pause. This lights up and not only looks pretty, but is really rather practical.

The timer lights up as well, making you feel a bit like you’re on the space station. (I assume, I’ve never been…)

In fact, there’s quite a ‘spacey’ theme throughout the mixer, from the stainless steel grey, curved ergonomic aesthetic and pretty lights, I feel Matt Damon would be happy with this one.

There is a tilt release button on the top and also a handle on the front. This is rather cool as I’ve ended up getting mixers covered in cake by manhandling the top section to lift it.

Another thing I liked, was the internal cord storage. If there’s too much cord on show, you can simply push it back in! Really good for when you are tidying away.

Putting It To Work

So, it looks pretty and has some great functions. Let’s put it to good use. As soon as there is power to it, the timer comes on and the lights flash up the side to let you know it’s awake.

I fill the 4.7 litre bowl with cake mix and start it on the ‘folding’ setting. Then I switch it up to the ‘light mixing’ setting. It’s fast. With a 1000W motor, and Planetary Mixing Action, it replicates a similar mixing action used by commercial mixers in bakeries. The planetary mixer achieves 360 degree coverage around the bowl for evenly mixed batter, creamy icing and pliable dough.

It was also a lot quieter than I thought it was going to be, (which is really handy as my kitchen is right next-door to Tim’s office!) even on the highest setting. It also has internal sensors, which detect when heavy batters are being mixed and automatically adjusts the power to maintain the selected speed. Kind of like a gear change!

As you can see, it was scraping all of the butter down as it went round. By the time I was done, the mixture was light,  fully incorporated and I didn’t have to scrape the bowl down mid-mix once. Very cool!

It’s got some great functions that I haven’t seen on other mixers and with an RRP of £299.99 and 2 Year Repair Warranty with 5 Year Motor Warranty, it’s an investment for your kitchen.

All in all, I like it! I think it looks good and it does good. Definitely a contender if you’re in the market for a new stand mixer.

Check out my Unboxing Video of this Scraper Mixer Pro on my YouTube channel.

As always, let me know your thoughts, either on Facebook, Twitter or Instagram!

Happy baking!

Britt xo

Mixer provided by Sage Appliances to review, but my views are my own, impartial and honest.

New – Online Classes

02/16

Oh wow! I’ so excited to share the news with you!

I am now offering brand new online classes for three of my most popular topics; Professional Finish, 2D Carved Owl Cake and Pretty & Pink Cupcakes!

The classes are filmed in sections so you can pause, rewind and re-watch as many times as you like!

I take you through the process of making these beautiful cakes!

All information and classes can be found on the brand new Online Classes section of my website, or click the pictures below to be taken to that specific class!

Happy baking!

Britt xo

Professional Finish Cake Decorating Online Class

2D Carved Owl Cake Online Class
Pretty & Pink Cupcakes Online Class

I proved them all wrong…

02/16

This is just a short, heartfelt blog post on a rather important milestone in my life, and one that a few years ago, I thought I would never see.

After being medicated for most of my adult life I’m thrilled to say that today marks two years being off any and all anti-depressants.

After mum died, I was told I would be on strong medication for the rest of my life, just to be stable and to be able to carry on.

I proved them all wrong.

Through my baking, my blogging and the love and support from my friends, loved ones and my darling Tim, I have never been happier. The last eleven years have been hard and I’ll be honest, I didn’t think I would make it out alive.

But here I am. Stronger than ever. I know my mum would be smiling today.

Thank you to everyone reading this for your constant belief and support in me.

Love, Britt xoxo

You can read my full story here – Baking My Way Out Of Depression.

Quitting Cakes

01/16

“THAT’S IT!” I cry. “I quit.” My eyes welling up with tears, my hands shaking with frustration. “I’m clearly not cut out for this. I can’t do it.” I open my laptop and go to the CV uploading website I had visited the previous week. Once again, I start re-writing my resume with both disappointment and regret.

I had only been running my business for two weeks and already handed in notice to myself three times. Before this, working a 9-5 admin role was what filled my days and baking and cake decorating for friends and family was just a hobby that filled my evenings.  Well… took over my nights. “Another 2am finish” I had thought just a month ago, “Something’s gotta give.” And so it did, I had taken the stupid brave decision to leave the safety of full time employment and spread my entrepreneurial wings. The only trouble was, all of a sudden, everything was different. I was different.

There was an added pressure on me to get this perfect. Now, if I made a mistake, my reputation was on the line. The last thing I wanted was to ruin my career before it had even started. Yet,the tasks that had once been so simple to me were becoming problematic. “Calm down, Britt. Breathe.” I say to myself as I re-bake the batch of vanilla cupcakes for the fourth time that evening. The first batch had no sugar, I had simply forgot to put it in. The second had cases peeling away and this time I had mistaken plain flour for self-raising and essentially made dry scones. Not the light and fluffy cupcakes expected for the Christening tomorrow. “Vanilla cupcakes are a basic staple of a baker. If I can’t get this right, what’s the point in trying to run a business?” Talking out loud to myself.

In the time between handing in my notice at the 9-5 and right now, my self-esteem, confidence and belief had hit an all time low. The week before when I had decided to create a recipe for my new blog, I had mistaken ‘pink lemonade concentrate’ for just normal pink lemonade. I thought being creative would make me feel better. So 24 hours after I left my pink lemonade cheesecake to set, I took it out of the fridge. Serving plate and camera at the ready, I unclipped the tin and WHOOOOOSSSSSHHHHHH. Pink lemonade spilled out from the metal ring and covered the entire kitchen. “I can’t even get this right.” I thought. “I have no business being in business.”

I took a few days out. I walked, I wrote, I chilled. I went to the park to have a word with myself. “This is what you want to do. This is what makes you happy” I mused. I was taking every mistake as a personal failure. Each time I messed up, I sank deeper into doubt. Then, I realised. I’m making mistakes BECAUSE I’m stressed out. I’m putting far too much pressure on myself. “That’s what you have to do though, isn’t it?” I thought. When you are running your own business, the buck stops with you. Every mistake costs YOU money. If you aren’t worried about it, you don’t care, and if you don’t care you don’t make money. Those thoughts spiralled so fast in my head. But it was those thoughts alone causing me to slip.

I sat in the park and cried. I cried for so long in fact, I cried until I laughed. The reality was that I had two options, give up before I’d even begun and get a ‘proper job’ or give it another go. I couldn’t walk away from it. Not now. “You’ve sacrificed so much to get here” I thought, “don’t quit.”

So I dusted myself off and got back in the kitchen. There were tears, there was laughter and there was being so broke that dinner was a 17p pack of noodles. But more importantly, there was a sense of achievement I had never felt before. I was the only one standing in my way and it was time to step aside. I am baker, hear me roar.

I’m so glad I stuck to it. It wasn’t easy and there were bad days and bad weeks of course, some worse than the ones that led me to the park in the first place. But good days too, and fantastic days, and spectacular days and days when I felt like the luckiest girl in the world. Joys which I would have never experienced if I quit when it felt like everything was against me.

It’s now a few years later and here I am. An award winning business woman. I’m really very proud of myself and of She Who Bakes. I’m far from perfect though. I still make mistakes now, I’m only human. I make more mistakes some days than when I first started out. But, I don’t hate myself for it like I used to. I’m learning every day and I’ll never stop learning. I’m smiling every day and I’m loving it! I guess the moral of the story is, in the words of Winston Churchill – “Never, ever, ever give up.” 

Britt xoxo


Sign Up to my Newsletter

Subscribe here to my newsletter!

Designed by Clockwork Moggy