Engagement Party Cupcakes!

08/17

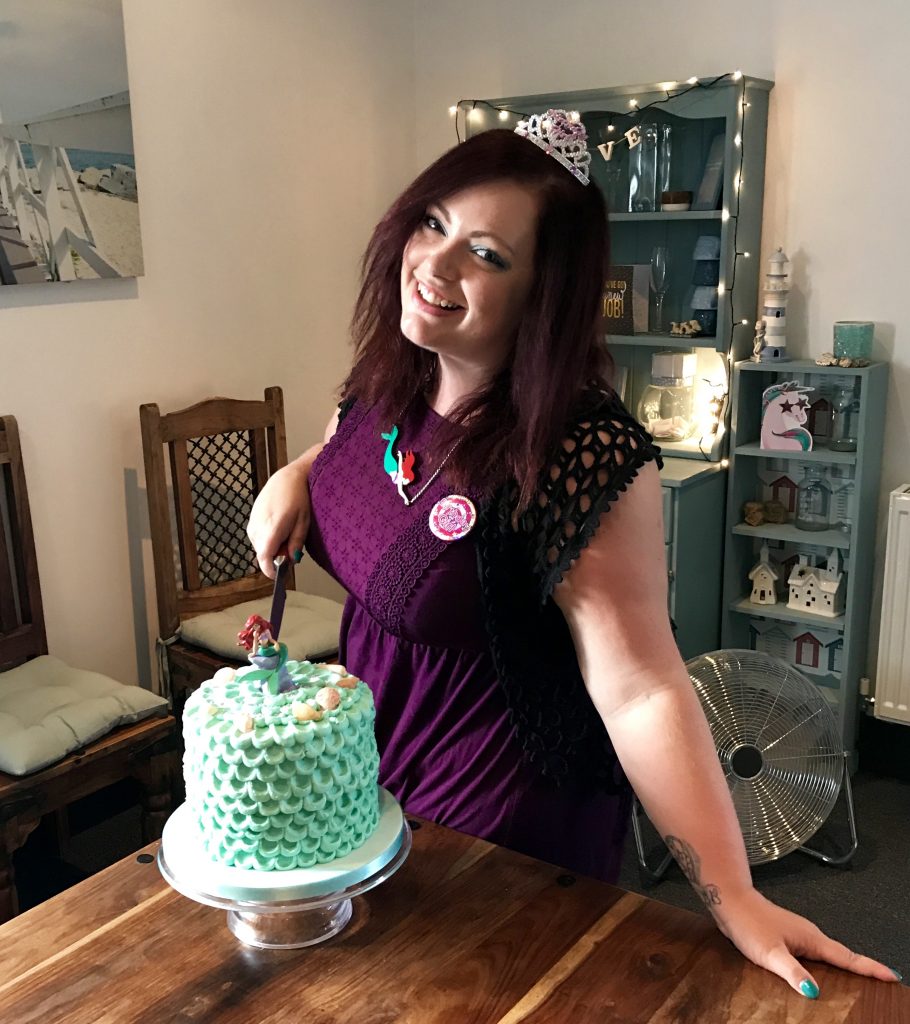
This weekend, Tim and I had our Engagement Party! 💍 You can read all about our evening over on my lifestyle blog; She Who Blogs

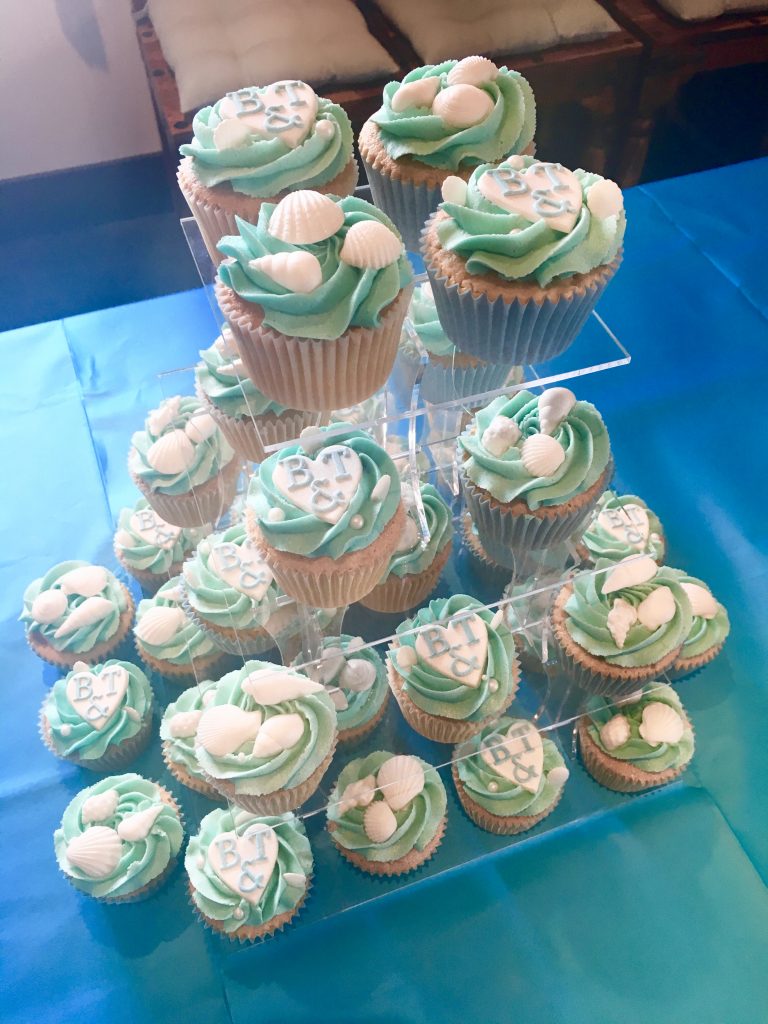
I wanted to do some baking for the party but I knew I didn’t have time to make a big cake with everything else we were organising, so instead I took my time over the days and made cupcake toppers in advance and made the cupcakes on the Friday afternoon.

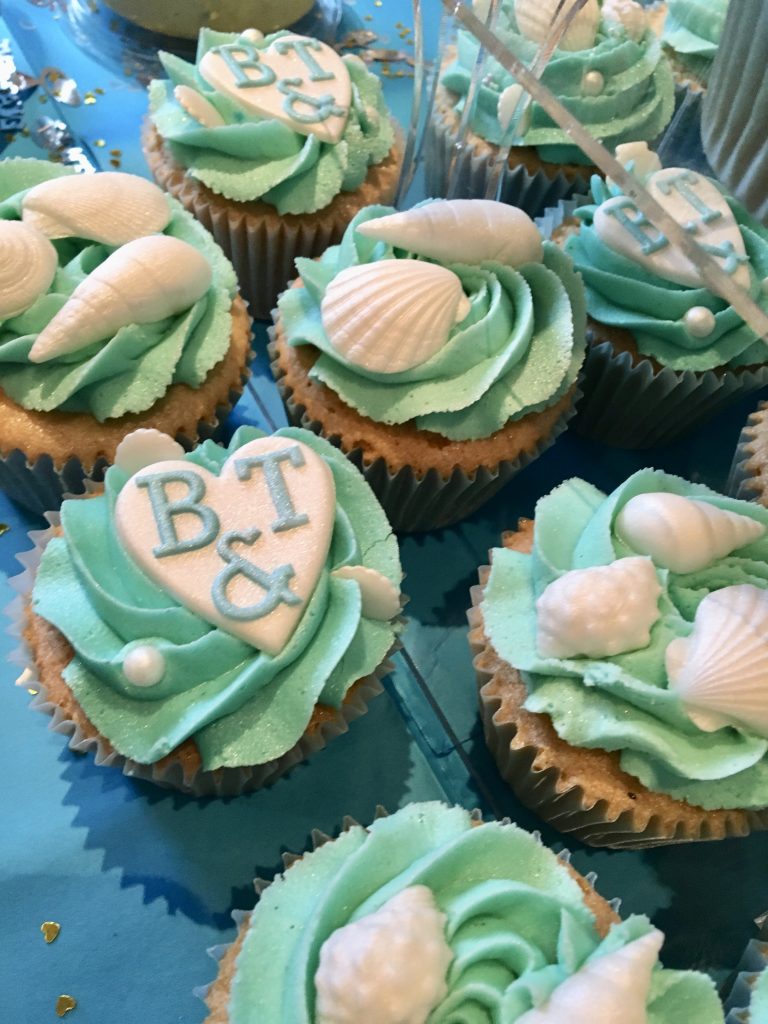
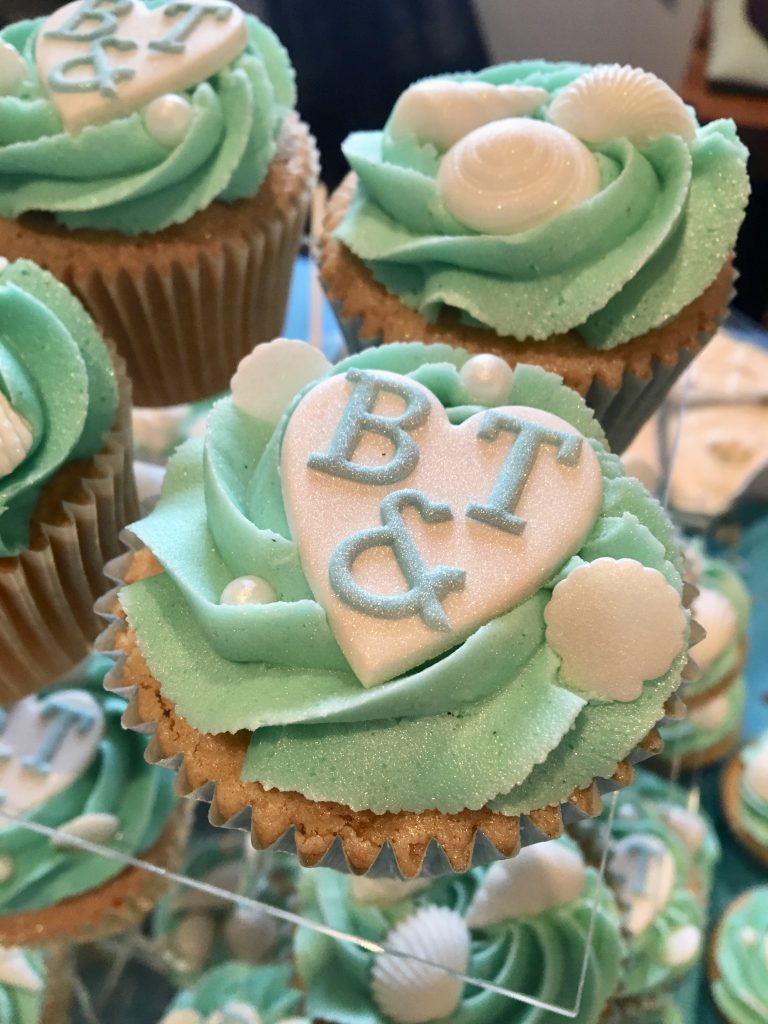
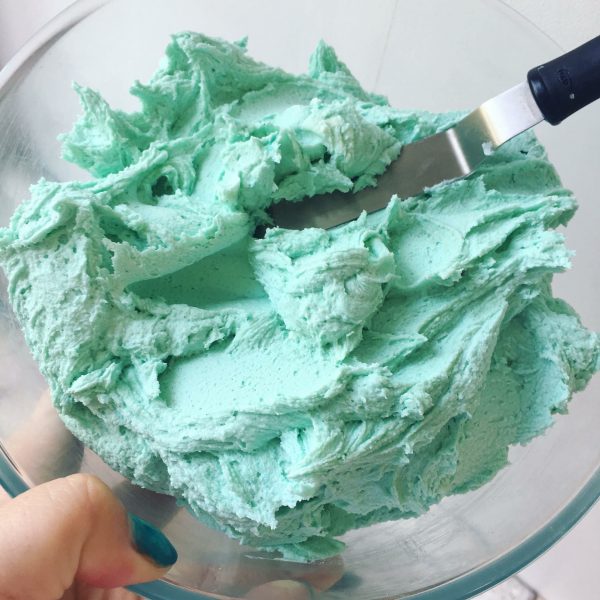
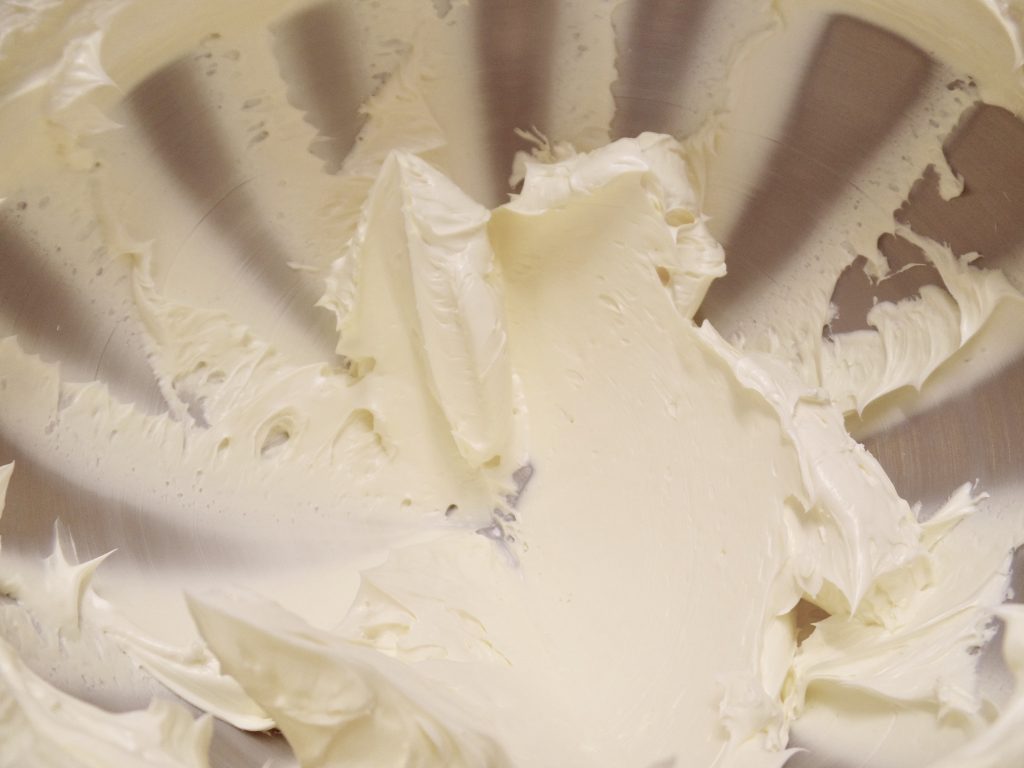
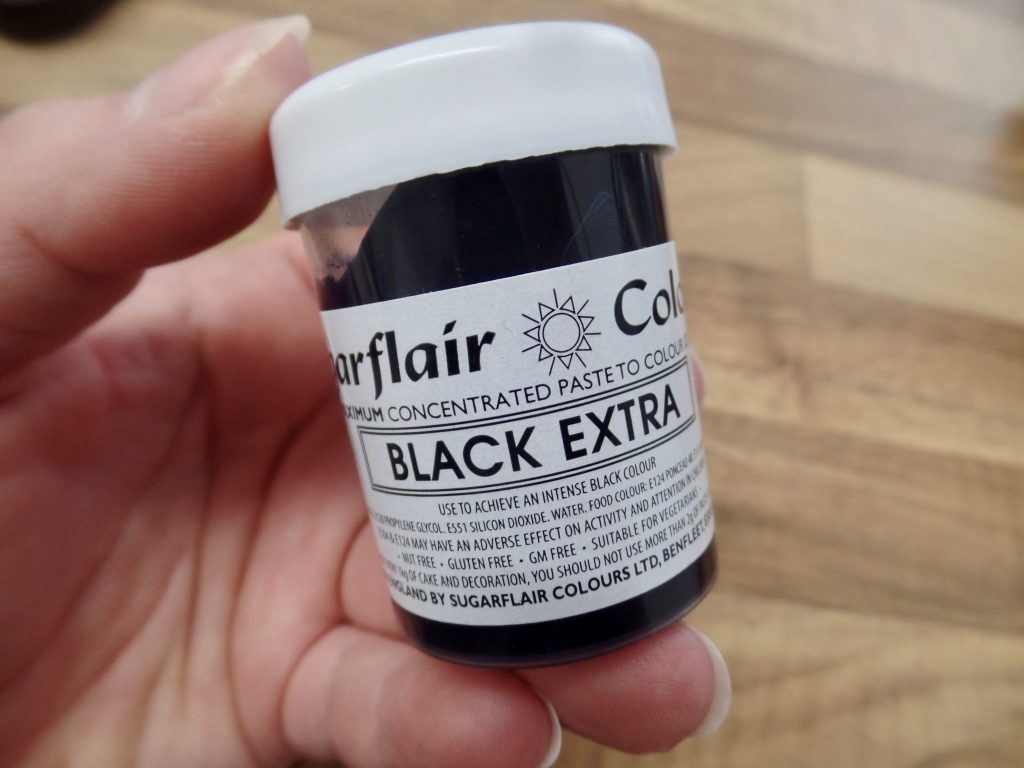
I went with three different flavours; classic vanilla (one to please everyone!), salted caramel and dark chocolate chips and lemon and white chocolate chips (my favourite!). I made them in blue and white cases and topped them all with an aqua blue vanilla buttercream to match our colour scheme. Coloured with Sugarflair Aqua concentrated food colouring.

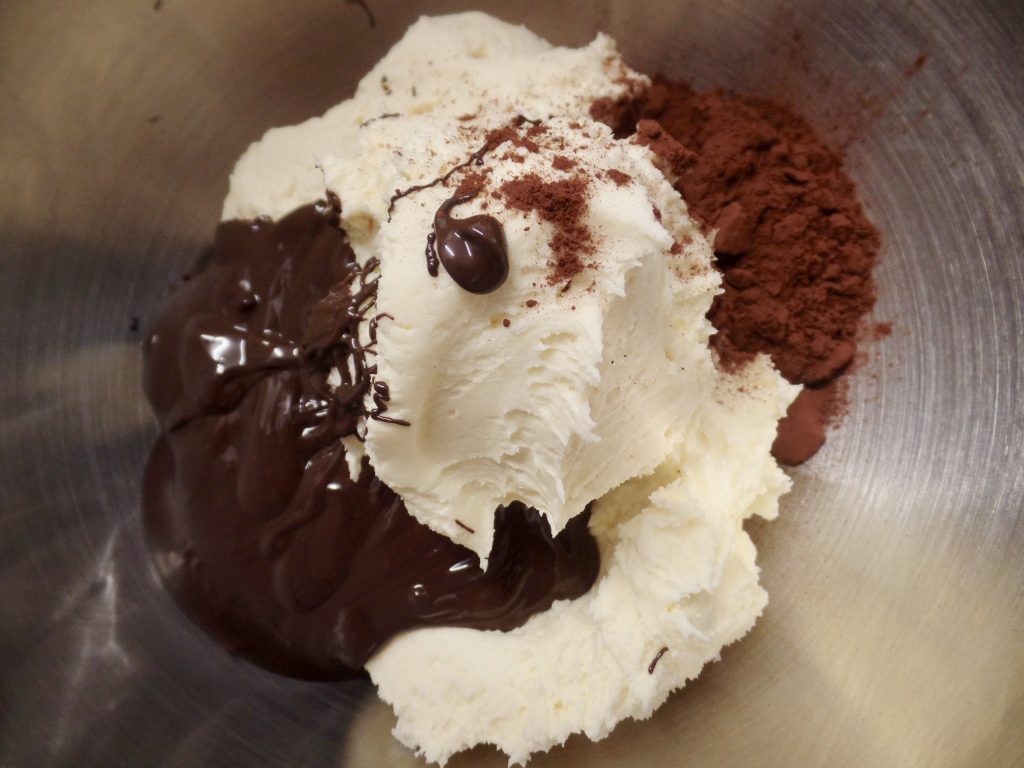
For all three flavours, I started with a classic vanilla cupcake recipe, (you can find the one I use here as well as the buttercream recipe I use) and I then added either lemon or salted caramel flavouring and 100g of dark or white chocolate chips. Nice and simple!

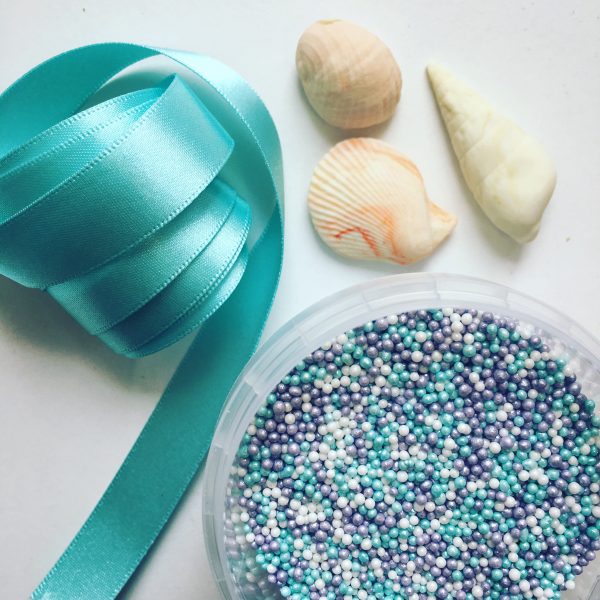
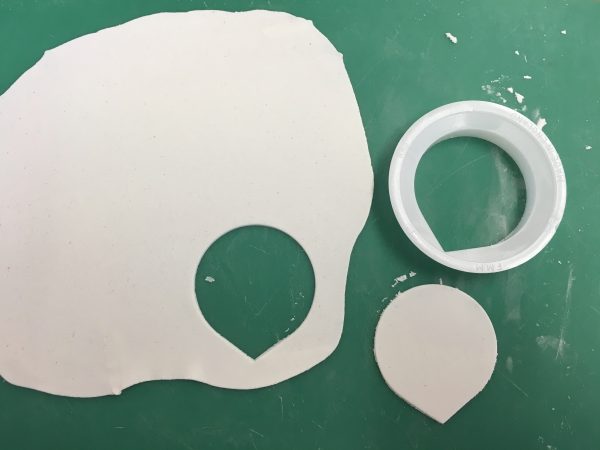
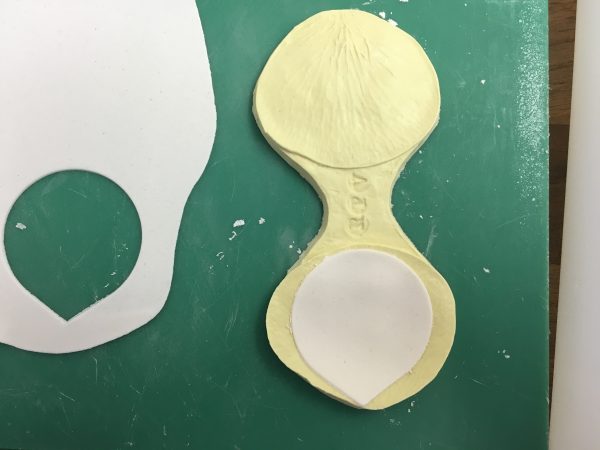
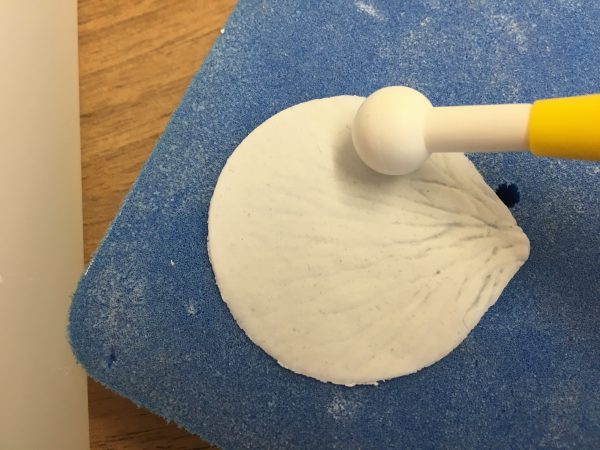
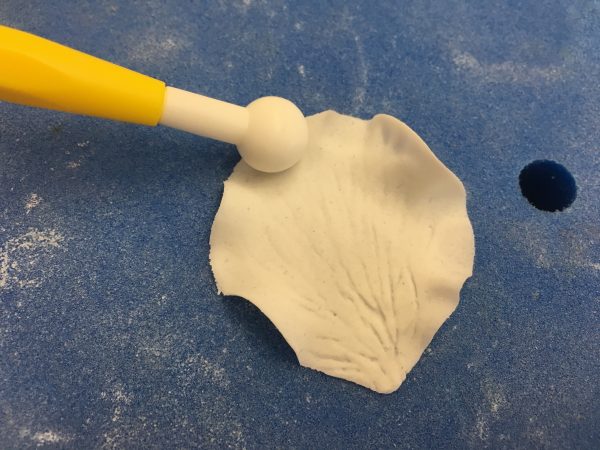
For the toppers, there were two designs. One of white shells made from Karen Davies Marshmallow Sugarpaste, which is my favourite thing to model with, in a silicone shell mould from Iced Jems sprayed with a pearl lustre spray. The second was a heart, also cut out from the Karen Davies paste, ‘B&T’ letters made from Mexican paste and Tappit cutters (read my blog on these beauties here) and little shell and pearl sprinkles also from Iced Jems. The mermaid tail cupcakes were made using a mould from Iced Jems and Karen Davies sugarpaste, coloured with Sugarflair Aqua and sprayed with pearl lustre spray.

I was super pleased with the end result! They were delicious and fit the beach theme perfectly! I showed them off on a square perspex stand I hired from The Unique Cake Company in Rainham.

Hope you like them as much as we did!

Happy baking,

Britt xo


New SundayGirl Company Apron!

08/17


New blue apron to go with my new blue tipped hair! By The SundayGirl Company!

The SundayGirl Company are a creative award winning British design brand who take an innovative approach into breathing new life into the glamour of yesteryear with our beautiful Pinnies for Pin ups and Little Misses. Based on original mid century apron styling, we design our own fabrics which are screen printed on hard wearing durable cotton drill. We’re inspired by all things feminine, beautifully vibrant and engagingly kitsch. 

They have a wide range of gorgeous aprons in lots of colours and styles, all made here in the UK. The fabric feels amazing! If you want to feel like a kitchen goddess when you’re baking up a storm, go check these lovely ladies out here!

Have you got one of these beautiful aprons? I’d love to see! Send me a picture on Facebook, Twitter or Instagram!

Happy baking!

Britt xo

Essential Tools For Icing A Cake

08/17

No matter where I am, in my kitchen, teaching or demonstrating, if I’m icing a cake there a few essential tools I have got to have with me so I know I’m going to get the best results. These tools are so well used when I am decorating that I can get them out of the drawer and lay them out like this, pretty much without looking!

I know everyone will have different ways they get the best results, but these tools have never failed me and I recommend them to anyone looking to up their icing game.

If you want to turn your baking hobby into a career, check out my book Cakes, Bakes & Business for everything you need to know about running a successful baking business, including pricing, marketing, insurance and much more!

You can buy the tools below from Iced Jems.

essential tools numbered

  1. A large non-stick rolling pin. I recommend using these kind of rolling pins over wooden ones or a few reasons. Wooden rolling pins can sometimes leave a grain effect on your icing (which is great if that’s part of the design!) and they can be tricky to keep clean. With one like this, it’s non-stick, so perfect for sugarpaste/icing and by having a large one it’s easier to roll out the sugarpaste and get it on to your cake, as I generally use the rolling pin to lift the icing off the surface.
  2. Spacers. These little beauties have been a life saver in my career as a cake decorator. They ensure you roll out your sugarpaste to the optimum thickness, ¼”. Years on from when I started, I can roll out sugarpaste to ¼” thick without too much bother but I still use these as a back up. They are also brilliant for rolling out marzipan and cookie dough.
  3. Cornflour. I use cornflour in a shaker to stop my sugarpaste from sticking to the side. I know using icing sugar may be the standard in kitchens but I much prefer using cornflour. I find it doesn’t make my sugarpaste grainy, I don’t have to use as much, it’s easier to dust off once I’m finished, easier to clean up (sticky surfaces anyone!) and it’s cheaper. Win.
  4. Smoothers. You can buy these individually but I recommend using two. They are for smoothing the sugarpaste onto and around your cake and board. I use two so that I can hold the cake in place with one and smooth with the other, that way eliminating any fingerprints or hand marks.
  5. Cake leveller. If you’ve ever tried cutting the top off a cake with a knife, you will know it’s seemingly impossible to cut in a straight line, I can’t do it to save my life! So, by using a cake leveller, you can level the top with ease and also split your cake into as many layers as you like knowing they will be nice and even!
  6. Cranked pallet knife. With the cranked shape of the knife, it makes spreading buttercream in and on your cakes so much easier and gives a nice, smooth finish and is easier on your wrist!
  7. Cake! It seems obvious I know. But what I mean by this is a good quality, sturdy cake for decorating. Whenever I ice a cake, I use my Madeira cake recipe. It bakes at 3″ deep which is great for splitting into layers, it’s nice and even and has a great crumb structure which lends well to carving, too. Something like a Victoria sponge is really light and I wouldn’t recommend icing it. You will get a better finish with a stronger cake, like a Madeira.

As well as this I use good sugarpaste/icing, buttercream, a thin cake card for underneath the cake and a 12mm thick cake drum (iced too, of course!).

For more information on the different types of icing available and what they are best for, check out my article Which Icing Should I Use?

Also, check out my ebook How To Start A Cake Business From Home for everything you need to know about running a successful baking business, including pricing, marketing, insurance and much more.

Happy baking!

Britt xo

It’s My Birthday!

06/17

Today is my birthday and once again I’ve made my own cake!

I’ve made my own birthday cake since I first started baking back in 2011 and I have loved every one of them! It’s always something I look forward to.

This year, I was busy making my friends wedding cake most of the week as well as prepping for my birthday holiday, by the time you read this, I will be sitting on the beach with a cocktail in hand!

As I wasn’t having a party this year, just a few friends over for some nibbles, and I was flying early (5am!) the next morning, I made a simpler cake this year, one that could be easily sliced and popped into some foil for my nearest and dearest to take away with them!

I still love it though. Five layers of coloured vanilla sponge, soft velvety buttercream and coated in aqua buttercream ‘scales’. Topped with edible handmade shells, sprinkles and a Little Mermaid keepsake topper.

Here are a few pictures while I was making it and to answer a few questions;
The cake and buttercream recipes can be found on my classic madeira cake recipe page.
The sprinkles by Scrumptious Sprinkles.
The buttercream and sponge was coloured using concentrated Sugarflair colours.
The buttercream ‘scales’ on the outside of the cake was made by piping dots and using a palette knife to create the pattern.
The board was made using a marbelling technique I talk about here.

Happy baking!

Britt xo


How To Make Icing Rose Petals

05/17

Edible icing rose petals are a gorgeous addition to any cake, and the great thing is they are relatively quick and easy to make.

I’ve used a pink colour for my petals on this wedding cake but you can use any you like.


You will need;

Roll out the flower paste very thinly onto a surface duster with cornflour.

Cut out a petal using the chosen size cutter.

Place this petal into the silicone veiner.

Press firmly and evenly down onto the petal veiner, open and remove the petal carefully onto the shaping pad.

Using a ball tool, go around the petal with half of the tool on the pad and half on the petal, use enough force to bend the petal into shape.

You need to press quite firmly to manipulate the petal but not so hard that it tears.

Once shaped, leave to dry completely (preferable overnight) on drying foam.

Once your petals are dry, use a large dusting brush to gently brush your chosen colour onto the edges of the petal, adding as much or as little as you like.

When you’re finished, your petals are ready for use! If you’re sticking to the side of a cake, like I’ve done in the wedding cake above, I advise to use royal icing. If adding to cupcakes, push into the buttercream. If you’ve allowed the petals to dry overnight, they shouldn’t go soft in the buttercream.

Once the petals are made, they will last for ages.  Pop them in a cake box or a tupperware box with the lid off covered in a single layer of kitchen roll (to keep any dust off) for safe storage. Make sure air can get to them otherwise they may go soft. They will be relatively fragile so be careful when handling.

To find out more about how to make this tiered petal wedding cake, check out my online course here. Currently half price!

Come find me on FacebookTwitter or Instagram.

Happy Baking!

Britt xo

If you want to turn your baking hobby into a career, check out my book Cakes, Bakes & Business for everything you need to know about running a successful baking business, including pricing, marketing, insurance and much more!

Renshaw Baking’s Recipe of the Month

04/17

This month I’m pleased to announce I’m judging Renshaw Baking’s Recipe of the Month competition. Enter your Easter or Spring themed recipes and cake decorating guides by Wednesday 12th April on the Renshaw website and you could win a Spa Break for 2! I can’t wait to see your entries! Click here to enter!

For a bit of inspiration, check out my below recipe and tutorial video ‘Four Ways To Decorate An Easter Egg Cookie with Renshaw Baking​’ including my best no-spread sugar cookie recipe!

Happy baking!

Britt xo


None More Black

03/17

This week, I made a birthday cake for my friend’s husband. The brief was a very black cake with hints of purple, skulls and other black decorations but with a surprise inside. The surprise was a bright, 6 layer rainbow sponge with white buttercream, a complete contrast to the outside. Scroll to the bottom for a picture my friend kindly sent me when the cake was cut into!!

I absolutely love how this cake turned out! All relevant info on how I made it can be found below –

I used Sugarflair colours inside and out, to find out more about how to make a rainbow cake click here.

To find out more about how to make black buttercream click here.

To find out more about how to make white buttercream click here.

The drips and shards were made with black Candy Melts.

The skulls and other decorations were made with Renshaw black modelling paste and silicone moulds.

Hope you like it as much as I do!

Come find me on FacebookTwitter or Instagram.

Happy Baking!

Britt xo

If you want to turn your baking hobby into a career, check out my book Cakes, Bakes & Business for everything you need to know about running a successful baking business, including pricing, marketing, insurance and much more!

How To Make Black Buttercream

03/17

Whether it’s for a space themed cake, Halloween, a specific colour theme or just because, black buttercream can look stunning. However as it’s right at the end of the colour spectrum, it can be a tricky colour to achieve without using a TON of food colouring which leaves a bit of a funny taste but using enough colour so you don’t end up with grey!

This is the best way I’ve found to get black buttercream while still having it super tasty and firm enough to decorate with.

If you’re interested in how to make white buttercream, check out my blog here.

Cut your butter into cubes and pop it in your mixer bowl. Then beat it on a high speed for about 4-5 minutes. This will aerate the butter and create a neutral colour.

Next, add in your icing sugar and make your buttercream as usual. I use 250g butter to 500g icing sugar. Try not to add liquid as it will make it too soft, instead just keep mixing until you get a nice consistency. You want a firmer buttercream for piping onto cupcakes so they hold their shape and a softer buttercream for filling and covering cakes so it doesn’t rip the cake apart. If it’s too hard, put the mix in the microwave in 10 second bursts until you get the consistency needed for your bake.

Then, we’re going to turn it into a chocolate buttercream as it’s a lot easier to get from brown to black than yellow to black!

To your buttercream, add in 100g melted and cooled dark chocolate and 50g cocoa powder.

Once you have a nice chocolate buttercream, then it’s time to add the colour. With black, (as well as red and navy) I’ve only found one colour to get a true black, and that’s this stuff! Sugarflair Black Extra. Add a small amount and then keep adding until you have achieved your desired colour.

*TIP* – The colour will darken over time so I suggest adding a small amount, mixing it in, covering the bowl with cling film and popping in the fridge for 30 minutes to an hour. Once you take it out of the fridge, pop it in the microwave in 10 second bursts and mix well until it is a good consistency to spread.

You can see the awesome black cake I made using this buttercream here!

Give it a try and let me know how you get on either on FacebookTwitter or Instagram.

Happy Baking!

Britt xo

If you want to turn your baking hobby into a career, check out my book Cakes, Bakes & Business for everything you need to know about running a successful baking business, including pricing, marketing, insurance and much more!

Creme Egg Hunting Lodge

03/17

When I got the email inviting me down to the Creme Egg Hunting Lodge in London at the weekend, I knew there was only one person I wanted to take with me, my baking bestie and fellow Creme Egg connoisseur, baking blogger and all round amazing lady, Jemma from Iced Jems.

The Creme Egg Hunting Lodge is the ultimate hunting experience for any Creme Egg fan! Set up in the back of a purpose built trust, this lodge has travelled around the country for the past month with all proceeds generated at the lodge being donated to the Prince’s Trust Charity.

The travelling lodge gave people the opportunity to hunt Creme Eggs in a Crystal Maze style game as well as sampling some of the amazing delicacies from the cafe including Gooey Creme Egg S’mores: Gooey Cadbury Creme Egg pieces and a giant marshmallow, sandwiched between two biscuits, toasted for added gooeyness, Creme Egg Black Forest Toastie: A hot and crispy Cadbury Creme Egg Toastie, this time with a black cherry twist and Creme Egg Hunters’ Hot Choc: Mouth-watering Cadbury hot chocolate, with melted Cadbury Creme Egg added in for goo-d measure. It all sounded perfect!

The lodge was set up along the South Bank in London opposite the London Eye and looked pretty epic even from the outside! With the Creme Egg banners, outdoors garden set up and giant binoculars it was a great spectacle!

When we went into the lodge we were greeted by a super friendly member of staff who told us all about Gregg the hunter who owned the lodge and who was their main man when it came to hunting Creme Eggs! We were shown around his home which included a cosy fireplace, tons of awards, Creme Egg butterflies on display and specially made books such as Romeo & Juliegg and Goolivers Travels!

We were put into a team of 6 and were told to put our hunter skills to the test in The Ultimate Egg Hunt, deep inside the Creme Egg Hunting HQ room! We had to work together to solve the clues and crack the safe! I was told to knock on the bookshelf and out of nowhere a secret door opened and a moustached man scared the life out of me! We were given our first clue with a number on it and had to find the further four clues and corresponding numbers to get to our goodies! I’m happy to report we did so successfully and in record time so we were told!

We then got to go to the cafe and enjoy a treat! I went for the Gooey Creme Egg S’mores and Jemma had the Cadbury Creme Egg Toastie. They were delicious!

You can read more about the Creme Egg Hunting Lodge here.

We had a fantastic afternoon hunting eggs and it’s now put me in the mood to do some more baking (and eating) of them this Easter! In the meantime, check out my popular Creme Eggs Cookies which are easy to bake and easier to eat and my Creme Egg Cake.

Did you go to the lodge? Let me know on FacebookTwitter or Instagram.

Happy baking!

Britt xo


My Day At Candy Mechanics!

02/17

This week, I was invited to Candy Mechanics HQ. Found deep in the heart of Somerset House in the ‘Makerversity’ workspace, filled with exciting and creative start up businesses, was a modern day chocolate factory!

Candy Mechanics have introduced the world’s first 3D consumable product created from a smartphone – and it’s your own head made in chocolate!! When I got the invitation a few weeks ago, the idea of making my own head on a chocolate lollipop (or lolpop as they are called) both fascinated and excited me.

Founded by Sam Part and Ben Redford back in 2015, the food tech startup collaborated with confectionery developer William Leigh, former chief taster at Green & Blacks, to produce their range of chocolate products. Developing the technology with engineer Chris Tait, the team have created a completely unique process to create incredible customised candy products.

It’s worth noting that this is not 3D printing. Candy Mechanics use 3D scanning and then carve the heads using a customised CNC mill. So I went along and was very excited to check it out!

Even though it’s in Somerset House, this part of the building felt akin to a secret underground laboratory from Despicable Me! I was fascinated. The machine set up was the Candy Carve – that bit of kit under the plastic box, a laptop and a 3D scanner. By having all of this in one easy to transport area, Candy Mechanics are able to take this technology out and about so anyone can have their head made from Belgian white, milk or dark chocolate. If you’re not in front of the machine itself, you can upload a 30 second video of your head, or anyone’s head for that matter, and send it in via their website to get your mini chocolate sculptures sent by post.

I sat still for 30 seconds, which was actually really tricky for me, so the scanner could build up an accurate image of my head. It then loaded it to the laptop so I could get a peek at me in blue 3D! Then it was cropped to fit the lollipop shape and we were good to go. They popped in a milk chocolate pop into the machine and away it went! Check out the video below to see how it carved me out of chocolate! I’ve sped up the process but in real time it only took about 5 minutes.

There I am! I’m so impressed!! I thought there would be a vague resemblance but I can 100% see it’s me! I look good dusted gold. Haha! I think it’s an awesome idea, perfect for a unique present!

Priced at £20, the Lolpops come in a box of 3 with one to eat, one to keep and one to share. These currently come in a selection of white, dark or milk chocolate and are dusted with edible gold lustre.

To find out more about Candy Mechanics, their Lolpos and the other products they offer, check out their website here.

Massive thank you to everyone at Candy Mechanics for a fantastic day. I don’t want to eat chocolate me! I think I’ll keep her forever!

Britt xo

Sign Up to my Newsletter

Subscribe here to my newsletter!

Designed by Clockwork Moggy