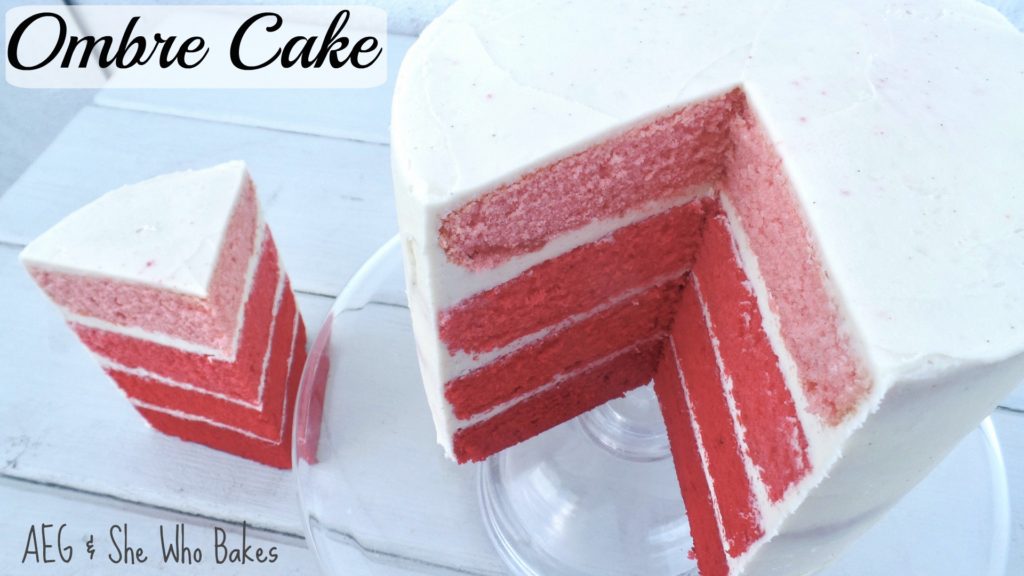
This week, in celebration of the final of The Great British Bake Off 2016, I’ve partnered with AEG to create this stunning Red Ombre Cake Showstopper!
I created this recipe which makes a 7″ round, baked wonderfully in the AEG oven! Check out the video below for how it’s made.
Earlier this year, I received an AEG SteamBake oven, (you can read my review here) and I absolutely love it! The steam cooking keeps the dough moist on the surface to create a golden colour and tasty crust on your bakes. As well as an excellent oven for baking, the SteamBake oven is also a great all-rounder multifunction oven (with up to 13 functions) that grills, roasts and bakes. Mine also features pyrolytic cleaning, a food probe and soft close door! It was awarded The Good Housekeeping Institute seal of approval after rigorous testing and SteamBake is now available on all AEG single built in ovens at no extra cost.
As mentioned on the website here AEG’s exclusive ThermiC° Hot Air cooking technology ensures higher performance for precise heat circulation for even cooking, temperature control and energy efficiency, meaning I can bake more than one cake at once and still get great results!
I’ve used the SteamBake function on my oven for so many different things including Sun-Dried Tomato & Parmesan Loaf, Lemon & White Chocolate Muffins, Baked Raspberry Cheesecake, Apple & Blackberry Pie and Yorkshire Puddings and the SteamBake function provided excellent results!
Red Ombre Cake;
- 350g caster sugar
- 350g butter
- 350g self raising flour
- 95g plain flour
- 6 eggs
- 1 tsp vanilla
- red food colouring (gel not liquid)
Vanilla Buttercream;
- 250g butter
- 500g icing sugar
- 1 tsp vanilla
Method;
- Preheat the oven to 140C
- Cream together the butter and sugar
- Add in the eggs
- Add in the self raising and plain flour
- Add in the vanilla
- Mix well
- Divide the mix into four bowls
- Add colour into the bowls in varying amounts for different shades
- Mix to get your desired colours
- Pour your mixes into lined tins
- Bake at 140C for 40 minutes
- Leave to cool on greaseproof paper
- Make a buttercream filling by mixing together the butter and icing sugar, adding in the vanilla
- Spread buttercream onto your darkest layer
- Top with the second darkest and repeat
- Add the third darkest sponge and repeat
- Top with the lightest sponge and chill for 10 minutes
- Once chilled, cover with a layer of buttercream
- Chill again and repeat
- Smooth the edges with a scraper
- Cut into slices and enjoy!
This cake will last 4-5 days once covered in a layer of buttercream and 2 days once cut into. Make sure to wrap any exposed sponge in cling film to help keep it fresher for longer. It doesn’t need to be stored in the fridge as this will dry out the cake, just a cool dry room.
Give it a try and let me know how you get on either on Facebook or Twitter or Instagram.
If you want to turn your baking hobby into a career, check out my book Cakes, Bakes & Business for everything you need to know about running a successful baking business, including pricing, marketing, insurance and much more!
Happy baking!
Britt xo
All of my online cake decorating courses are currently HALF PRICE! Grab a bargain here.
This is a sponsored post in partnership with AEG. All views and opinions are my own.

