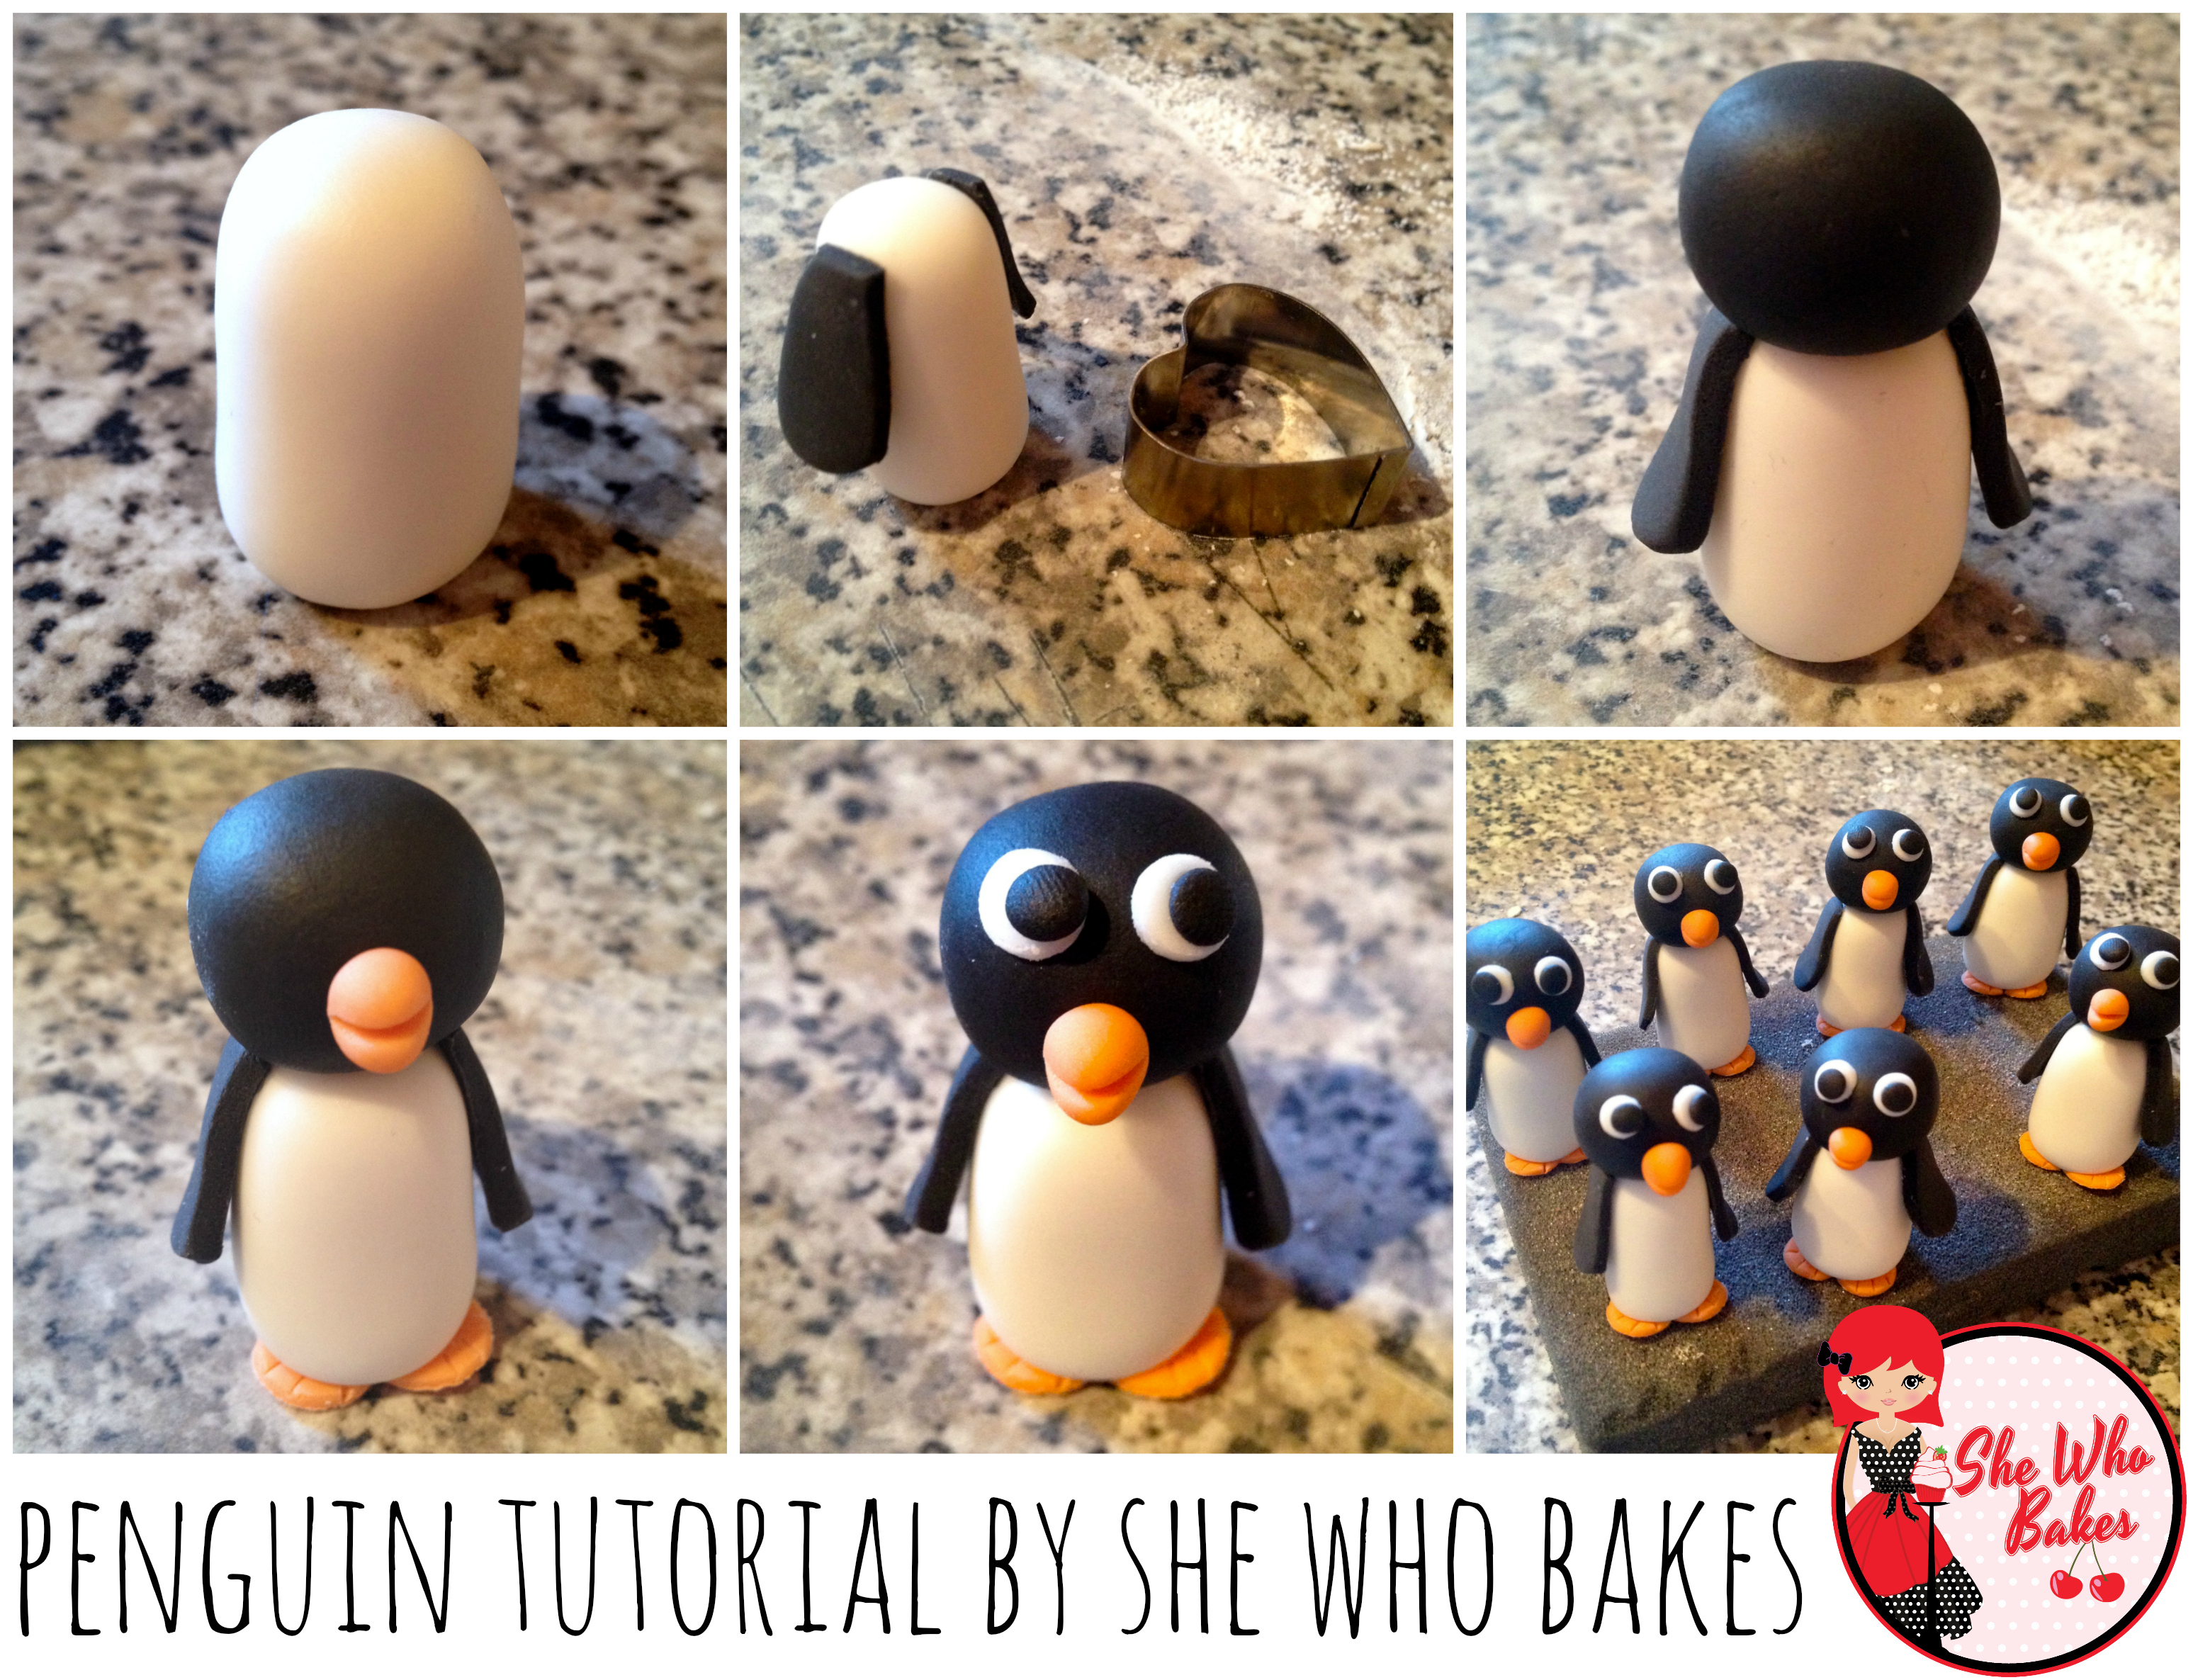
For a fun and unique Christmas centrepiece, follow this step by step tutorial to make your own Igloo Cake with adorable penguins!
Equipment
- 6” hemisphere cake tin or small pyrex bowl.
- 6″ round thin cake card.
- 10″ round drum.
- 1kg white sugarpaste.
- White modelling paste.
- Black modelling paste.
- Orange modelling paste.
- Blue flowerpaste.
- Paintbrush.
- Edible glue.
- Large rolling pin.
- Icing spacers.
- Smoothers.
- Royal icing.
- Set of small circle cutters.
- Quilting tool.
- Scriber.
- Scalpel.
- Small snowflake plunger cutter.
- Piping gel.
- Ice blue food colouring.
Equipment can be bought from Iced Jems.
For the cake;
Bake your favourite cake in a hemisphere cake tin or bake a 6” round and carve into a domed shape.
Split and fill your cake with your desired buttercream or ganache and secure your cake to the thin board using buttercream.
Prepare cake by lightly coating with buttercream or ganache.
Before rolling out your sugarpaste, knead until it’s a workable consistency. If the sugarpaste is sticky or your hands are very warm, sprinkle lightly with cornflour. Lightly dust your smooth work surface also to prevent it sticking.
Roll out your sugarpaste to a 1/4 of an inch thickness. If it helps, you can use icing spacers which are perfect for this.
To keep the sugar paste from sticking, lift and move it around as your roll. Add more cornflour if needed.
Gently lift icing over rolling pin to move and lower it onto your cake.
Shape sugar paste to sides of cake using your hands and then your smoothers. I recommend using a smoother because the pressure of your hands may leave impressions on your sugar paste.
Beginning in the middle of the cake top, gently rub the sugar paste onto the cake. Start on one side and by a process of gently lifting any creases out and lifting down onto your cake, you can secure the sugar paste all the way around. If an air bubble appears, use a scriber to gently pop the bubble and smooth the air out.
Use your smoother to mark the sugar paste at the base of the cake and trim the excess using a palette knife or sharp knife.
Fix this to your cake drum with a little royal icing.
Using the pointed end of your quilting tool, mark out the lines around the cake for the ice blocks.
For the tunnel.
Roll a ball of white modelling paste and elongate slightly. Cut both ends off and affix to the front of your igloo with royal icing.
Roll a strip of white modelling paste 1cm thicker than your tunnel and wrap over the top. Stick down with edible glue.

For the penguins.
Roll a small ball of white modelling paste and shape into a sausage with flat ends. This will be the body.
Roll out some black modelling paste and cut out a small heart shape. Cut this in half and also cut the pointed end off. Glue these on to the body to create wings.
Roll a small ball of black modelling paste for the head and fix onto the top of the body with edible glue.
Roll a small ball of orange modelling paste and shape into a cone for the beak. Use a scalpel to cut ¾ of the way into the cone to open up the beak. Fix on with edible glue.
Roll out your orange modelling paste and cut out a small circle, cut the circle in half using your scalpel, these will be the feet. Mark out three lines on each for toes. Glue these to the bottom of your penguin.
For the eyes, roll out white modelling paste and cut out small circles, do the same with the black modelling paste but use smaller circles. Glue these on to the head of your penguin.
Leave the penguins to harden.
For the drum.
Spread a thick layer of royal icing over your cake drum, making sure it goes up to your igloo and tunnel. Then, using a pallet knife, stipple the royal icing to make it look like snow.
Whilst the royal icing is still wet, stick your penguins down. Use a little royal icing to stick a penguin to the top of the igloo.
For the pond.
When your royal iced board has dried, colour some piping gel with ice blue food colouring. Spoon some of this onto your royal iced board to create your ice pond.
For the snowflakes.
Roll out blue flowerpaste very thinly on a dusted surface. Cut out snowflakes using a small plunger cutters. Leave these to dry. Once dried, stick to the igloo using a little royal icing.
If you want to turn your baking hobby into a career, check out my book Cakes, Bakes & Business for everything you need to know about running a successful baking business, including pricing, marketing, insurance and much more!
Give it a try and let me know how you get on either on Facebook or Twitter or Instagram.
Merry Christmas and happy baking!
Britt xo


