So, a bit of a funny story in case you didn’t know. I’m a baker who is allergic to eggs. I know, I know, how on earth do I cope? Well, I have quite a specific egg allergy (because, of course I do). Sadly as of a few years ago I can no longer have tasty scrambled egg, poached egg, omelettes or quiches, even mayonnaise is out of the question for me! But I can indulge and enjoy cakes, cookies and biscuits.
This is because the type of allergy I have unfortunately developed is to uncooked egg proteins. If you get an egg and throw it in a pan for a few minutes it will very probably make me sick, but if you bake it at a high temperature for a longer period of time (as you do in baking and also known as ‘baked’ egg), the higher temperature changes the nature of the proteins enough that my body can tolerate them. Which is pretty cool.
Basically it means that eggs in my breakfast is a no (unless I just have cake for breakfast), but eggs in baking are thankfully a yes!

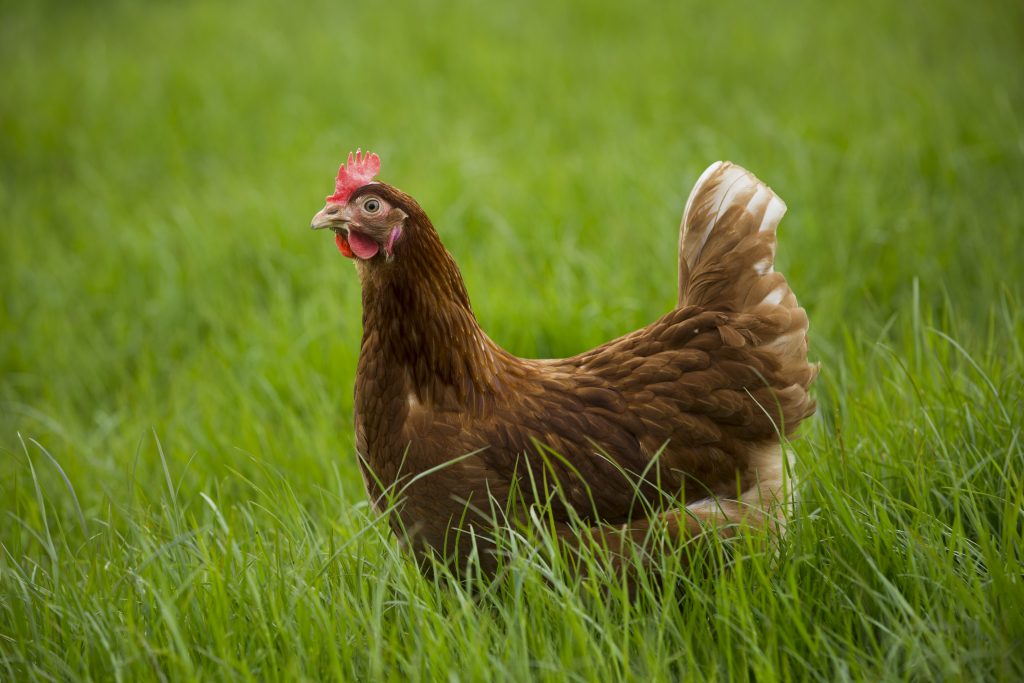
Laying hen farm. High Park Wall Farm. Barnard Castle. Co. Durham. United Kingdom.
Eggs play such a big role in traditional baking. The fats and proteins in eggs provide flavour, create structure and stability to cakes, add moisture, bind biscuits and cookies, help thicken and emulsify sauces and custards, act as a glue or glaze and even create delicate meringues.
But have you ever really thought about where your eggs come from and what kind you are using in your kitchen?
When I first started baking (and didn’t really know what I was doing) I was using the cheapest ingredients, and to be honest with you, this included using caged eggs. I’m not proud of it now but back then I couldn’t see a difference between the stacks of similarly shaped egg boxes in the supermarket, except for the price. I’d heard of ‘free range’ and ‘high welfare’ eggs but I didn’t really understand what that meant for me, my bakes, or for the chickens.
As my knowledge of baking and the importance of quality ingredients grew, but I learned about the truth of ‘caged eggs’.
The tiny spaces the chickens are confined to sometimes for their entire life makes living conditions uncomfortable and even physically painful. Having such a poor quality of life is not only cruel and unfair, but of course, it impacts the quality of eggs they are able to lay.
When the hens are looked after and cared for properly, given room to roam around, fresh air as well as decent food and living conditions, the eggs they lay are naturally more nutritious and tasty (based on research by Compassion in World Farming on the nutritional value of higher welfare eggs vs. battery/ caged hens. The main benefits seem to be more omega-3, antioxidants and Vitamin E). They are generally deeper in the colour of the yolk and richer with a buttery flavour which makes for a much better and more consistent bake.
But sadly, around 50% of egg laying hens in the UK are still kept in battery cages.

So how can you be sure you’re buying good quality, high welfare eggs?
There are a number of phrases and logos to look out for on packages. The Lion Mark that you see on most eggs shows you that they were laid in Britain and that they keep to food safety standards. Free-range, ‘woodland’ and barn are all phrases you will see on egg boxes, but to know that the chickens have truly been looked after, you need to look out for the RSPCA Assured logo as well.
RSPCA Assured is an ethical food label dedicated to farm animal welfare. It sends assessors and farm livestock officers out to the farms to make sure that they meet strict welfare standards, which lays out the kind of food, shelter and environment that the chickens must have access to. This includes things like plenty of space, perches and litter for dustbathing and foraging.
Once the assessors are sure the farm is following these practices to give the chickens their best life, the eggs are given the special RSPCA Assured mark. This mark can be found on 90% of non-caged eggs sold in the UK, and 50% of all UK eggs, so they are very easy to get hold of. They are only just pennies per egg more than the low quality, low welfare alternatives.

L to R: Graham Atkinson (Contract Supplies Manager, Noble Foods), Stuart Richardson (farmer), Rob Howorth (Freedom Food Assessor). Laying hen farm. High Park Wall Farm. Barnard Castle. Co. Durham. United Kingdom.
I stopped buying caged eggs many years ago and I believe that my bakes have vastly improved in quality and taste since then. As someone who buys eggs regularly as a baking ingredient, it’s important to me to buy the right ones and doing so gives me a sense of doing something good. By buying higher welfare eggs and spending our money wisely, we can all show large corporations (retailers, farmers and the food industry) that happy hens are important to us as consumers.
I implore every baker out there to do their own independent research when it comes to where their ingredients come from and the ethics and welfare standards which surround them. If I could go back in time and use higher welfare eggs sooner, I would.
Happy hens lay better quality eggs, which make better quality bakes. Better for you, better for the chickens.
Happy baking!
Britt xo
Laying hen farm. High Park Wall Farm. Barnard Castle. Co. Durham. United Kingdom.
This is a sponsored post in partnership with RSPCA Assured. All views and opinions are my own.