Cakes, Bakes & Business – OUT NOW!!

11/17

Today is the official release date of my debut book ‘Cakes, Bakes & Business’. The practical guide to starting your home baking enterprise.

It is available to buy now from Amazon here!

I am so excited about this. It has been a long time in the making and I am so so proud of it and cannot wait for you all to read it, I hope you love it as much as I do!

I want to say a massive thank you to everyone who has followed my work, made my recipes, used my advice, read my stories. If you’ve been here since the beginning, joined me in the past few years or only saw my page this week, none of this would have been possible without you. I stared She Who Bakes as a way of expressing myself, and working through my depression and anxiety after I lost my mum. Baking and writing about my baking journey saved my life, there’s no doubt about that, and for that I will be forever grateful. I started my blog which transformed into something I never imagined. I moved into the world of business and started my cake career which has been successfully running for years. Putting it all into words and passing on my advice, tips, tricks and stories along the way has been an absolute joy to write.

Back in 2015, I started writing a series of blog posts on how to start a cake business from home. It was a question I had been asked on a weekly basis for such a long time that I wanted to do my best to help people and answer it. I started writing and realised with all of the information I wanted to share, it was bigger than a blog post. On the advice of Tim and my very good friend Jemma from Iced Jems, I turned my post into an ebook. Then, two years later, in the summer of 2017, HypnoArts Publishing wanted to work with me to turn it into a real life book. I worked for months on it. I tripled the content, introduced brand new chapters, added lots of stories and many more pages of help and advice to turn it into a brand new for 2017 updated version which is the perfect gift for anyone who wants to make money from their cakes and bakes.

I want to say a massive thank you to Jon & Jane from HypnoArts for believing in me and working with me on this project which I’m so very proud of. I want to say thank you to Jemma, without whom, the idea for the book wouldn’t have existed in the first place. I want to thank my mum, it breaks my heart that she will never see this book but I do it all in her memory and am grateful every day for everything she taught me. Finally, I want to thank Tim. My fiancé, my partner in crime, my everything. His love and support mean the absolute world to me and he inspires me every day.

So! If you or someone you know wants to start their own cake career, just like I did, check out my new book Cakes, Bakes & Business!

It’s an easy to follow, useful and practical guide that shows you how to start a cake business form home, from someone who has done it!  Written with the UK market in mind (but with stacks of helpful tools and tips for those wanting to start a business outside of the UK)  this book covers all the topics you need to know to get your business up and running.

For all the information you need to hit the ground running including;

  • Getting your kitchen ready
  • Registering as self employed
  • Insurance
  • Pricing your cakes
  • Marketing advice that is both relevant and easy to implement

and much, MUCH more! There are also lots of stories, pages of advice and templates on accounts, cake pricing and terms & conditions for you to customise and use in your business.

This guide is the ‘one stop shop’ for your information and is perfect for anyone who wants to make money from their cakes and bakes.

Order your copy from Amazon here today!

The book is also available from Waterstones, WH Smith and Barns & Noble.

Happy baking!

Britt xo

Classic Madeira Birthday Cake Recipe

05/22

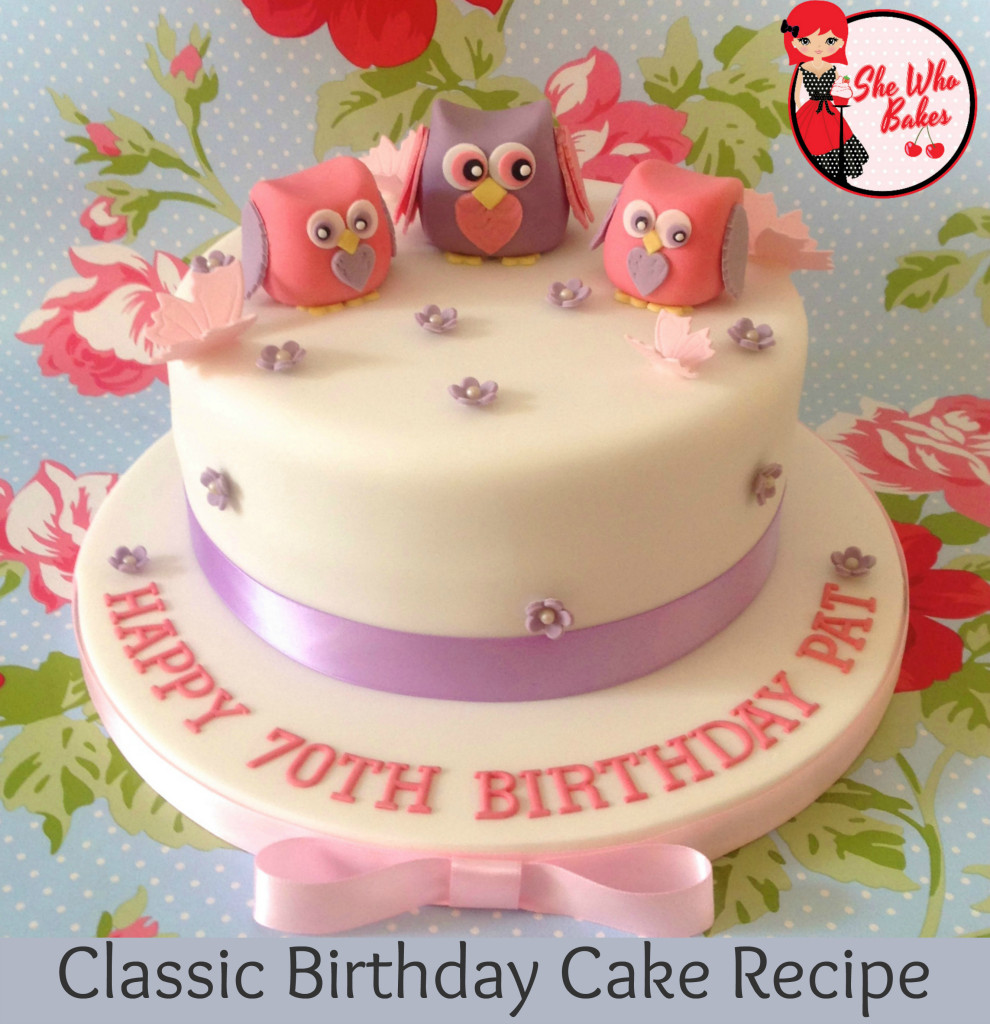
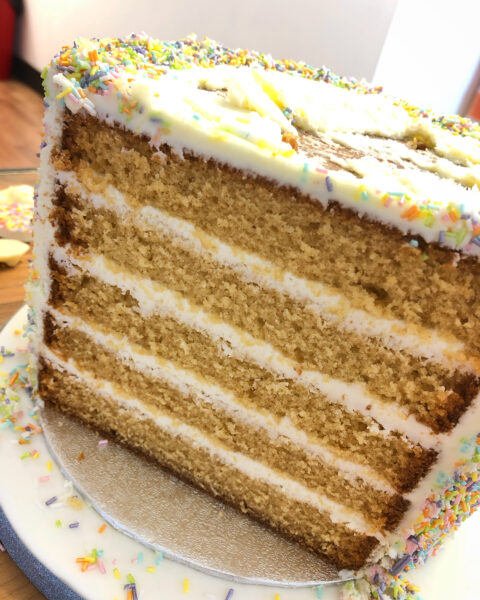
A classic birthday cake will have a few elements to it. A soft vanilla sponge, tart seedless raspberry jam, smooth vanilla buttercream and a layer of sugarpaste (ready to roll icing).

Contrary to popular belief, most birthday cakes aren’t a ‘Victoria sponge’. A Victoria sponge is a soft light sponge, baked in two sandwich tins then put together with jam and fresh cream. Lovely for an afternoon tea, but doesn’t lend itself well to be covered in sugarpaste (ready to roll icing). For this, you are better off using a madeira recipe. It’s close textured and firm, whilst still being light and soft to eat. The inclusion of plain flour makes it stronger and better for decorating.

It’s also perfect for carving cakes too, although if you are carving, I recommend popping the cake in the freezer for about 15-20 minutes before starting work. This will reduce crumbs and make your life a lot easier! For more about freezing cakes, click here.

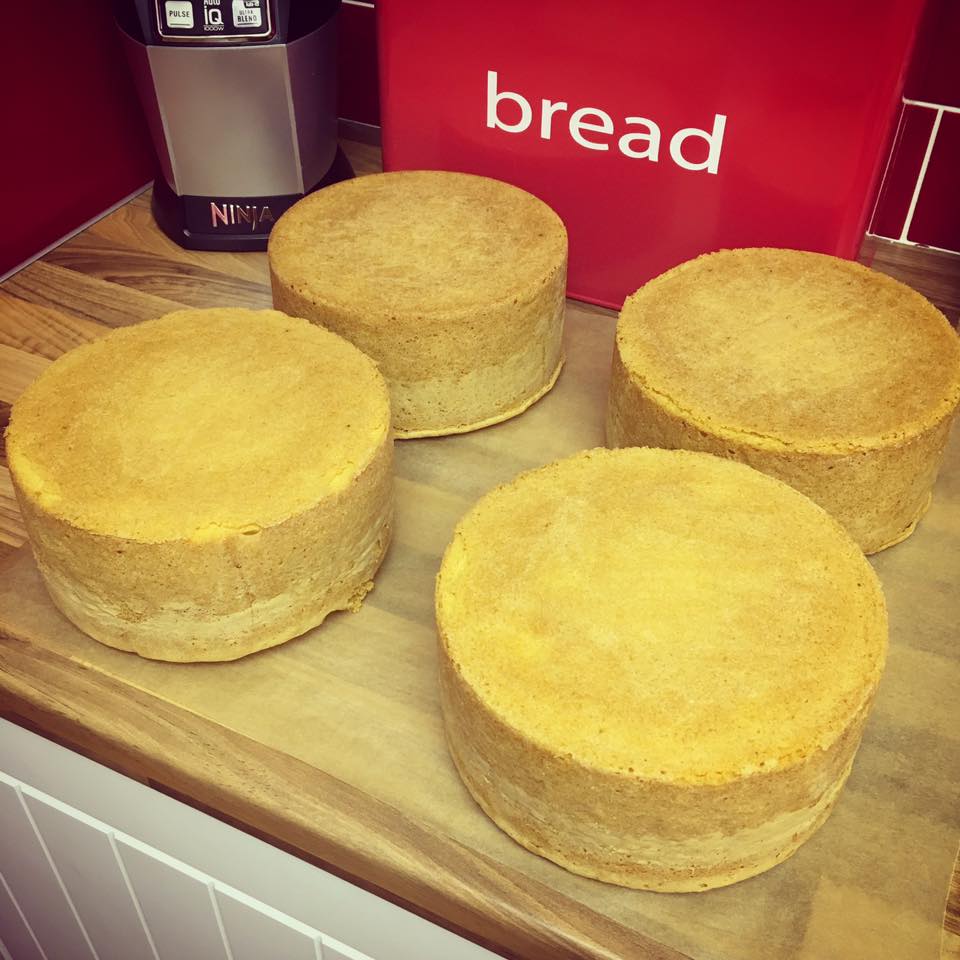
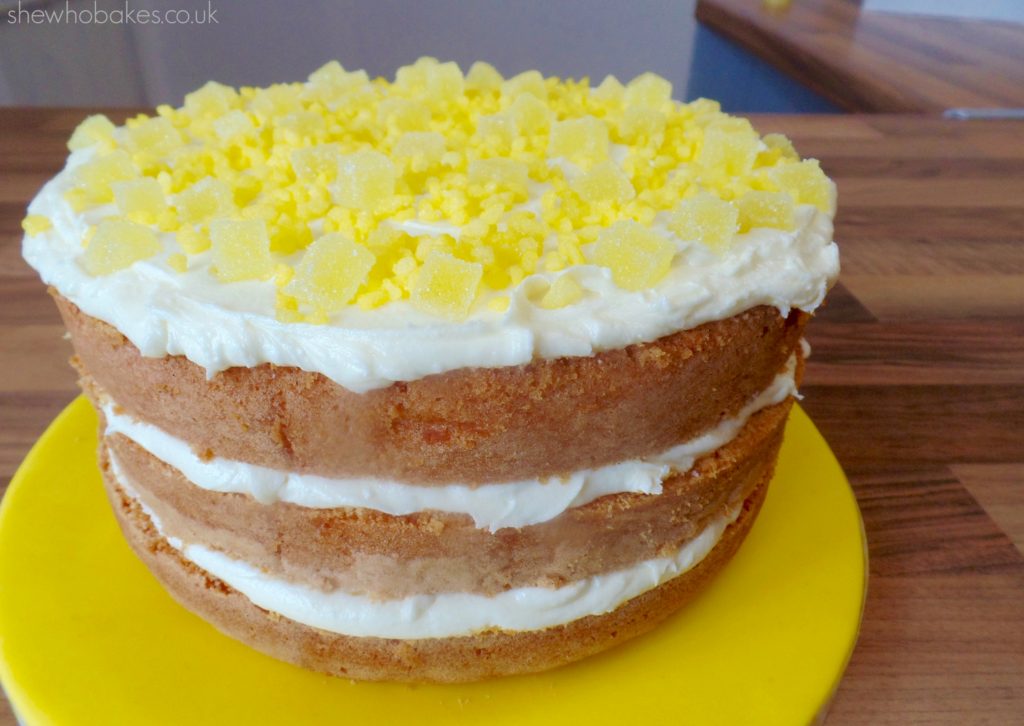
Below is my 7″ round (my most popular size of birthday cake ordered) vanilla madeira recipe and vanilla buttercream recipe. It also is perfect to make 12 cupcakes, for more on cupcakes click here. Make sure all of your ingredients are room temperature as this will help make a better bake! I also recommend lining your tins. I bake one deep cake and use a cake leveller to cut my cake into there sections (see lemon cake below) as opposed to using individual tins, however, this recipe can be used in sandwich tins, just lower the baking time to 35-40 minutes. I use 3″ deep PME tins that are seamless tins made from professional quality anodised aluminium.

If the cake isn’t baked fully when you cut into it, or it’s squidgy in any way, it needed longer in the oven. Ever oven is different and these timings are an approximation. If in doubt, leave it in a further 10 minutes. Due to the low temperature it won’t dry the cake out and will ensure it’s fully baked. The cake needs to spring back to the touch, be golden brown and a skewer come out clean. This will come with experience, the more you bake, the more you’ll know a fully baked cake on sight.

Should you wish to scale the recipe up or down, a number of helpful charts to work this out are easy to find with a quick google. The convertor on CakeFlix is great and they also have a handy app.  I also like this one found on The Pink Whisk or you can use the water trick I explain here.

To make the cute owl toppers in the above picture, check out my tutorial here.

For more information on how to decorate your cake and go from home bake to showstopper, check out my list of latest online cake decorating courses here.

Madeira cakes

Vanilla Madeira Cake Recipe

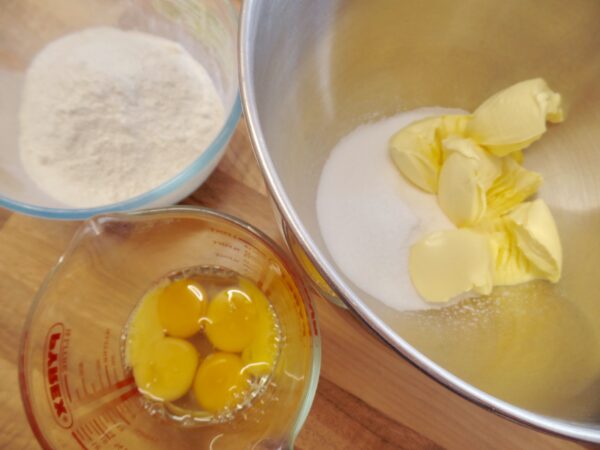
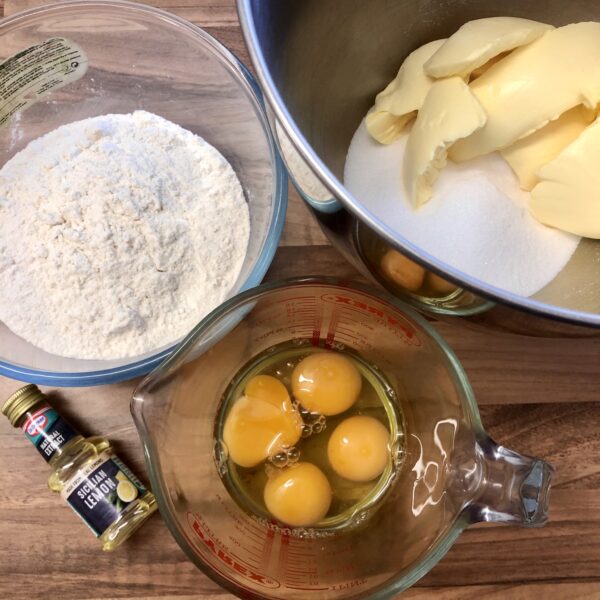
  • 200g self raising flour
  • 200g caster sugar
  • 200g Stork/butter
  • 50g plain flour
  • 4 medium eggs
  • 1 tsp vanilla
  1. Cream together the Stork and caster sugar.
  2. Add in your eggs and mix.
  3. Add in your flour and mix.
  4. Add the vanilla and mix again.
  5. Mix the whole thing for 2-4 minutes on a high speed.
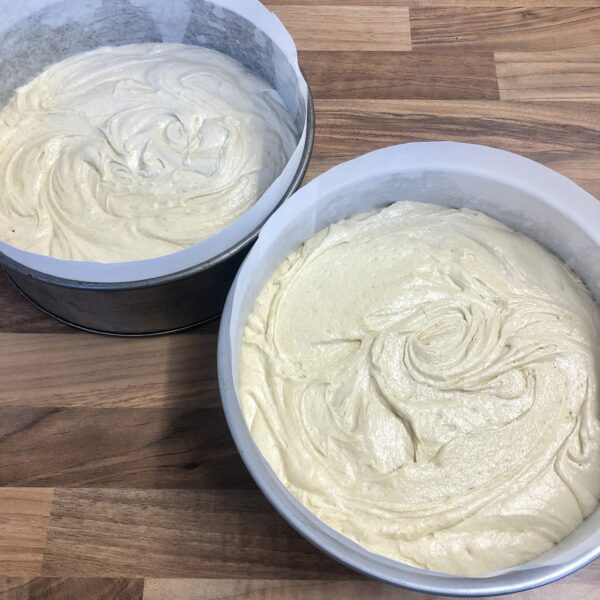
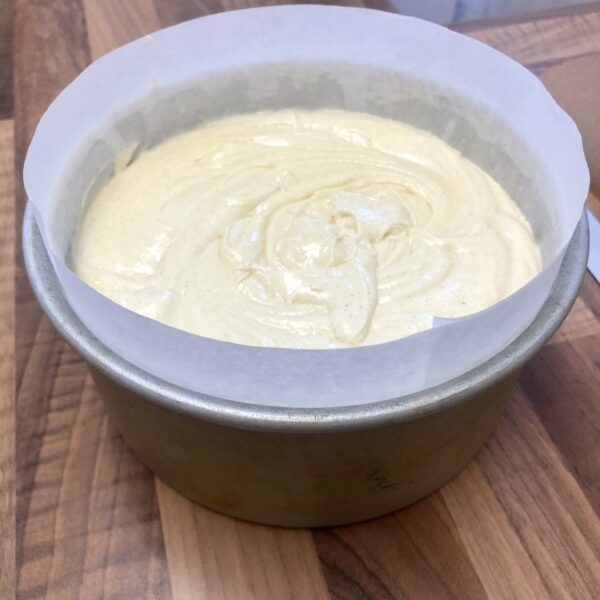
  6. Pour mixture into a greaseproof paper lined, 7″ cake tin. 
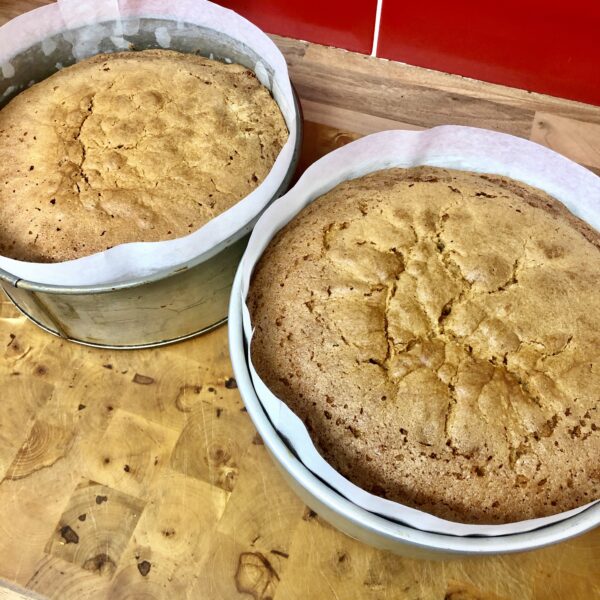
  7. Bake at 140C (fan assisted) for 1 hour 40 minutes or until a skewer comes out clean, the cake is golden brown and springs back to the touch. (Check after 1 hour)
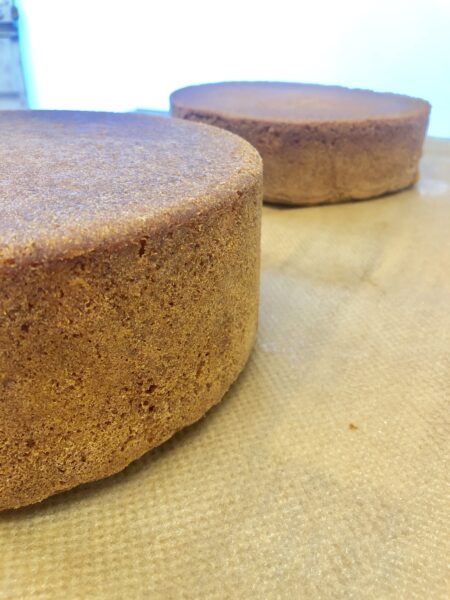
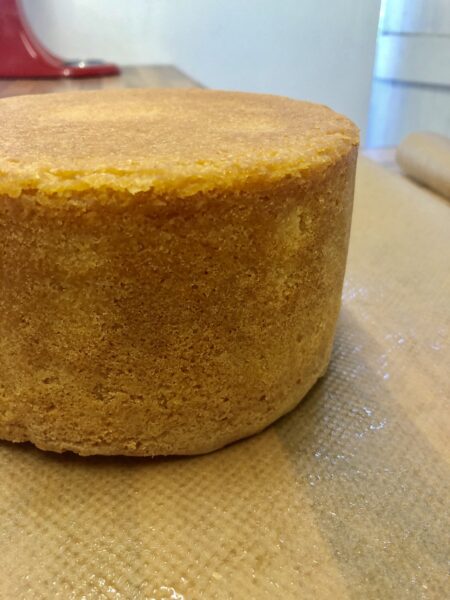
  8. Once baked, after 5 minutes on the side, turn out onto a sheet of greaseproof paper and leave upside down to cool. This ensures a nice flat top.
  9. Once cooled, wrap in clingfilm overnight to ‘settle’.
  10. Once split, filled and iced, this cake will last 7-10 days and will freeze well for 3 months.

NOTE: This recipe is for a 7″ round tin. It is not enough mixture for bigger tin sizes. For this, you will need to convert the recipe here.

For a chocolate madeira;

Follow the recipe above and replace the plain flour for cocoa powder and add 100g melted dark chocolate. For chocolate buttercream, follow the recipe below and add two tablespoons cocoa powder and 50g melted dark chocolate.

For a lemon madeira;

Follow the recipe above and add the zest of one lemon plus two teaspoons of lemon extract. For lemon buttercream, follow the recipe below and add two teaspoons of lemon extract and the zest of one lemon.

Vanilla Buttercream Recipe

  • 250g unsalted butter
  • 500g icing sugar
  • 1 tsp vanilla
  1. Cream the butter on it’s own for a few minutes.
  2. Add icing sugar.
  3. Add vanilla.

You can watch me bake this cake in real time on my Facebook page here; PART 1. PART 2.

Give it a go and let me know how you get on, either on Facebook or Twitter or Instagram.

For more information on how to decorate your cake and go from home bake to showstopper, check out my list of latest online cake decorating courses here.

If you want to turn your baking hobby into a career, check out my book Cakes, Bakes & Business for everything you need to know about running a successful baking business, including pricing, marketing, insurance and much more!

Happy baking!

Britt xo

Lemon Madeira by She Who Bakes

Topped with Scrumptious Sprinkles Lemon Crunch & Lemon Jelly Squares! I LOVE them!! xo

Salted Caramel, Fudge & White Chocolate Cake

05/22

[AD] Well, baking season is well and truly upon us! I know for some of us, myself included, baking is a year round joy but with The Great British Bake Off returning to our screens we turn our attention away from the sunny BBQ’s of summer and on to the falling leaves, cosy nights, tasty home bakes and all the joys of Autumn!

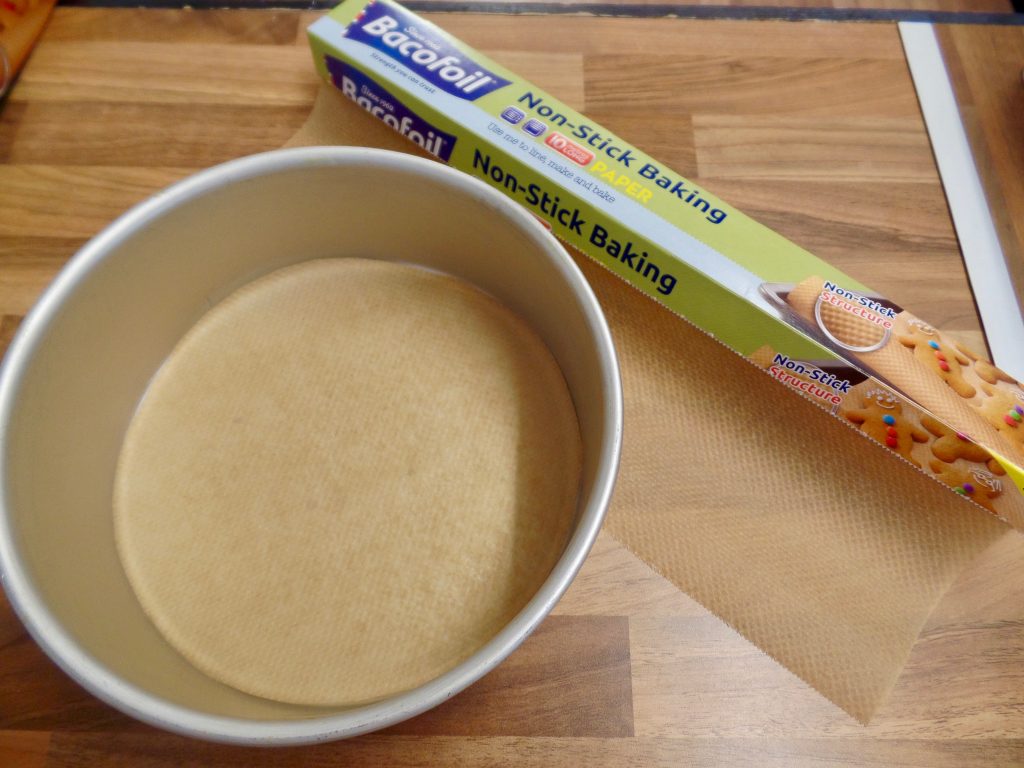
This week, I partnered with Bacofoil® to try out their Non-Stick Baking Paper.

I had never used it before but had seen it on the supermarket shelves so I was both intrigued and excited to try it. I wanted to create a recipe that included super sticky ingredients, notorious for sticking to the tin. So I went with three of my favourite flavours; fudge, salted caramel and white chocolate.

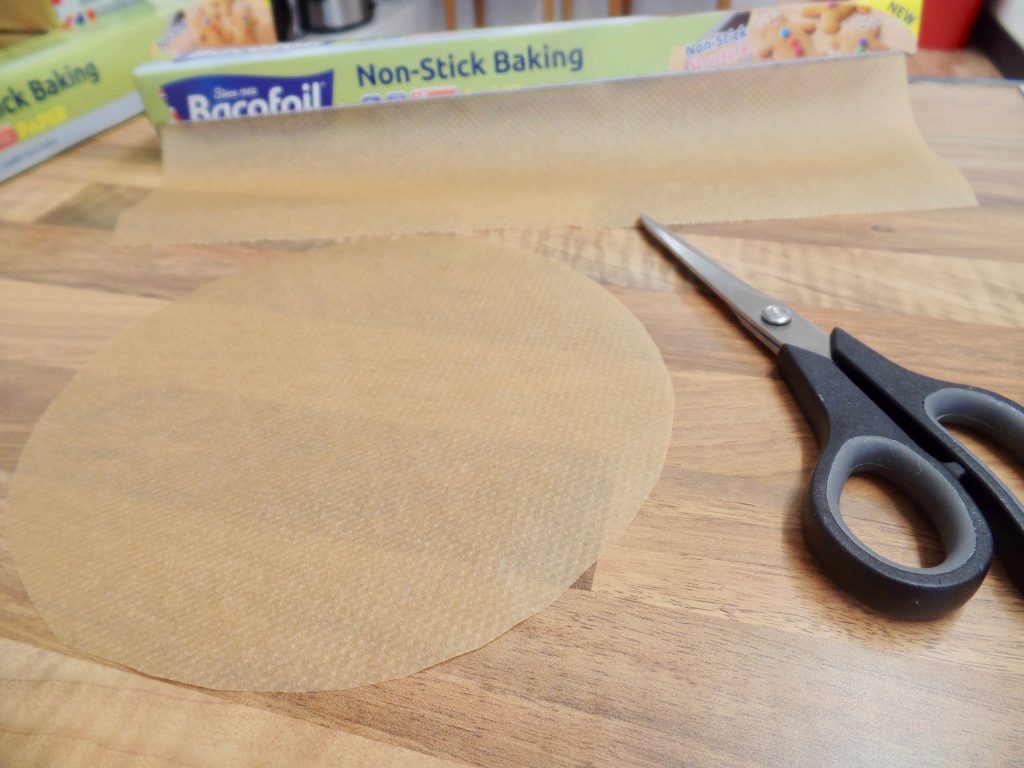
With all three ingredients included in the cake, I felt it was a good way to put this product to the test! The Non-Stick Baking Paper felt different to other baking papers I’ve used in the past. This is because it has an innovative and unique Non-Stick textured surface – the little dimples on the paper mean there is less surface area in contact with the bake so everything bakes evenly and food just slides off, making cake mess and cookie disasters a thing of the past! It’s also non-stick on both sides which makes quick baking much easier!

I’m lining my cake tin with Bacofoil® The Non-Stick Baking Paper and as it’s non-stick, there’s no need to grease the tray! This also means it saves on the washing up. Win!

For this bake, you have a choice. Depending on how adventurous you feel.

You can make your own salted caramel, which is actually really simple, the biggest worry is not letting it burn, and if you would like to I have included the ingredients and method below. Or you can use store bought salted caramel sauce. The results are the same, so it’s completely up to you!

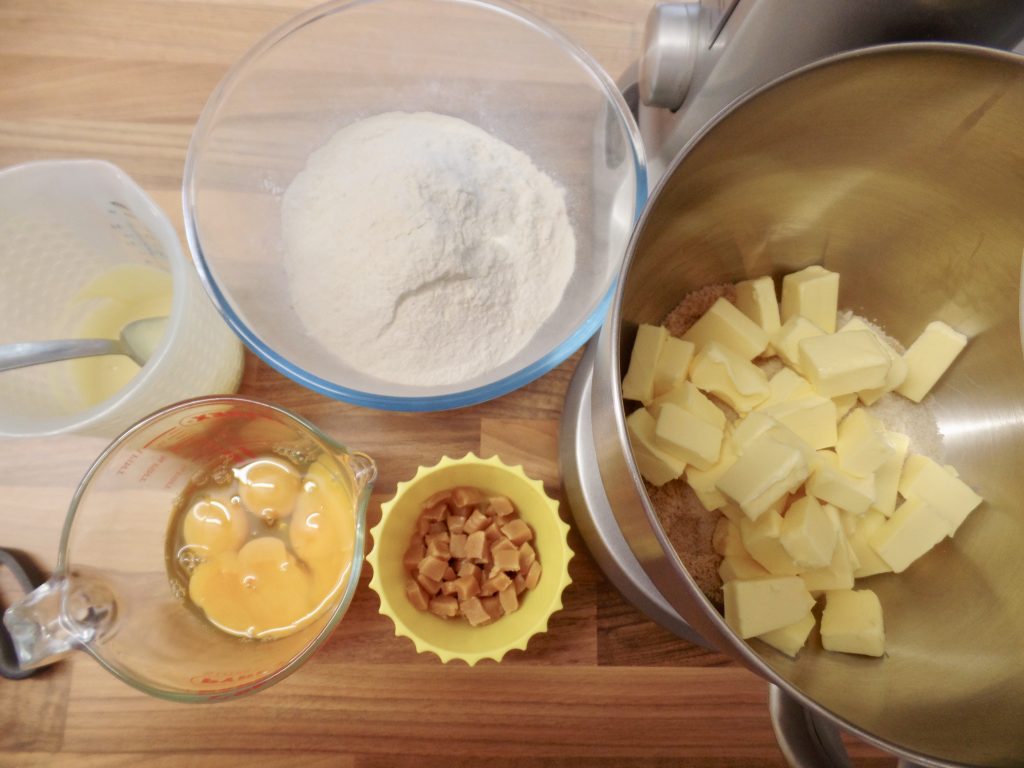
Salted caramel ingredients –

  • 225g golden caster sugar
  • 60ml water
  • 175ml double cream
  • 50g unsalted butter
  • 1 ½ teaspoon sea salt

To make the salted caramel:

  • Mix together the water and sugar on a medium heat. Shaking the pan every so often.
  • When it starts to bubble, take it off the heat.
  • Mix in the butter, pour in the double cream and whisk well.
  • Add in the sea salt and leave to cool.

Cake ingredients –

  • 300g self raising flour
  • 140g golden caster sugar
  • 140g light brown sugar
  • 285g unsalted butter
  • 75g plain flour
  • 5 eggs
  • 50g melted white chocolate
  • 50g fudge pieces
  • 4 tablespoons salted caramel sauce

To make the cake:

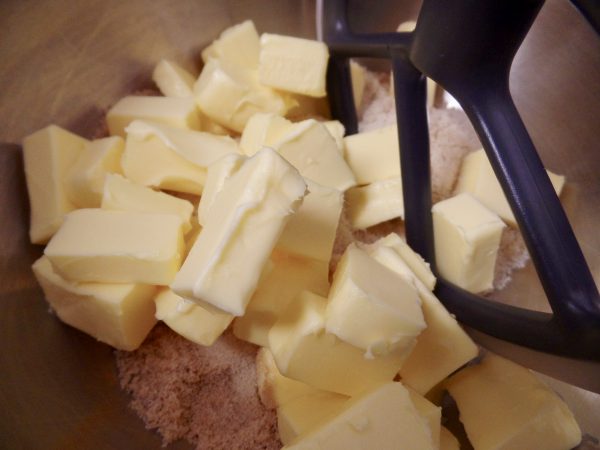
  • Cream together the unsalted butter and sugar.
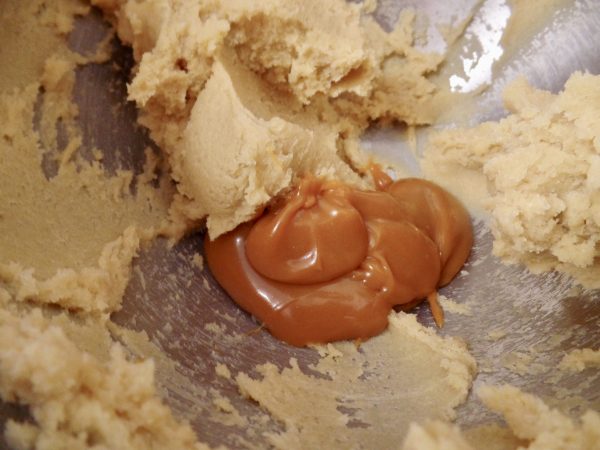
  • Add in the salted caramel and mix well.
  • Add in the eggs and mix again.
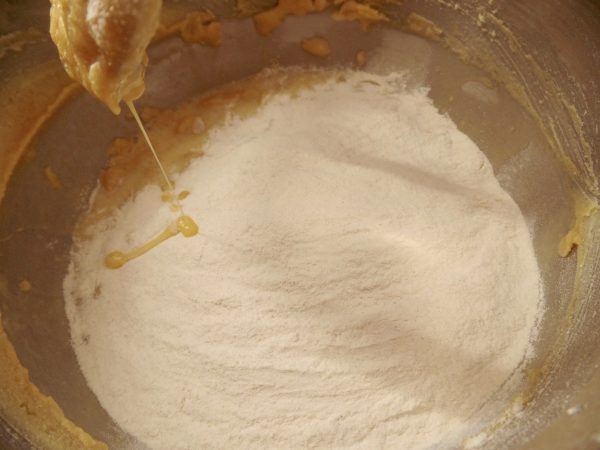
  • Fold in the self-raising flour and plain flour.
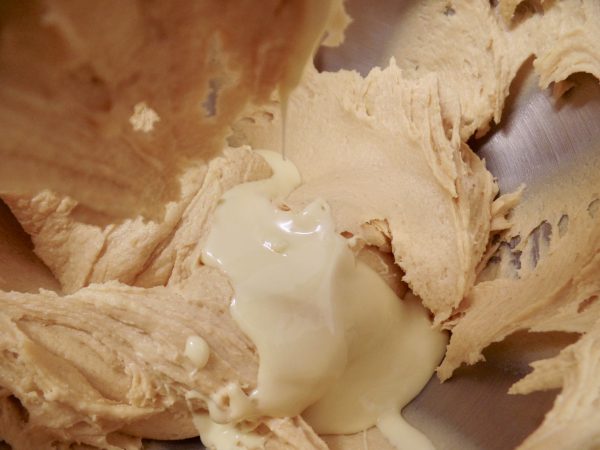
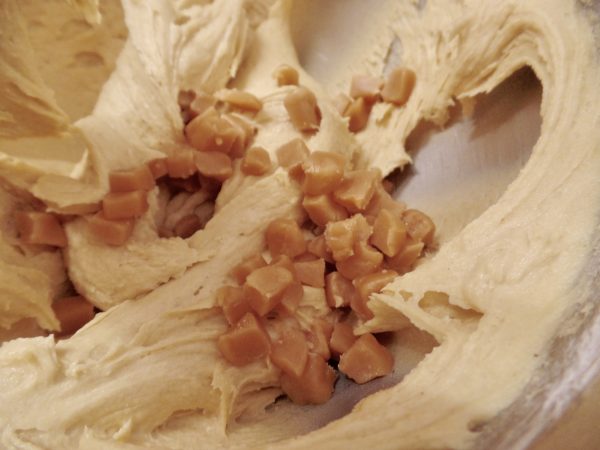
  • Pour in the melted white chocolate and add the fudge pieces.
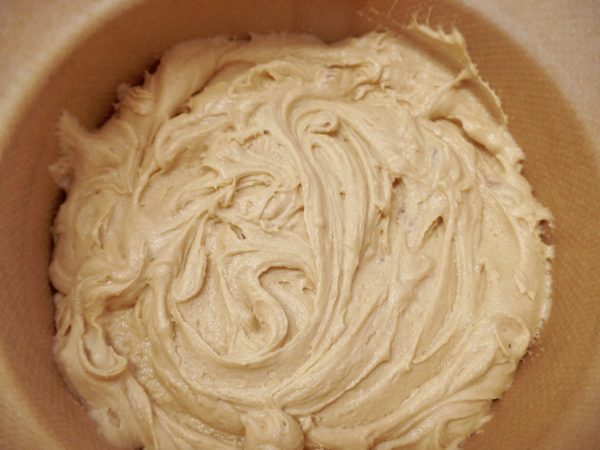
  • Spoon this mixture into a 8” round tin lined with Bacofoil® The Non-Stick Baking Paper.
  • Tap on the side to get out any air bubbles.
  • Bake at 140C for 1 hour 45 minutes or until it is fully baked and a skewer/cake tester comes out clean.

Once the cake is baked, I like to turn it out from the tin soon after removing it from the oven. One of the main reasons I do this is to ensure a nice flat top. If you take the cake out of the tin and leave it to cool upside down on the side (not on a wire rack), then any bumps on the top flatten, leaving you with a lovely flat, even cake to decorate later!

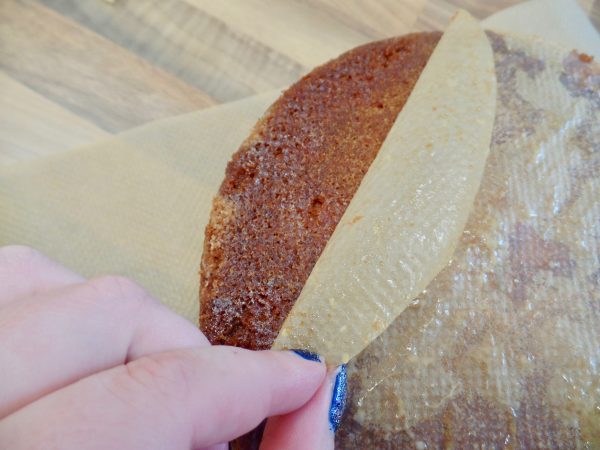
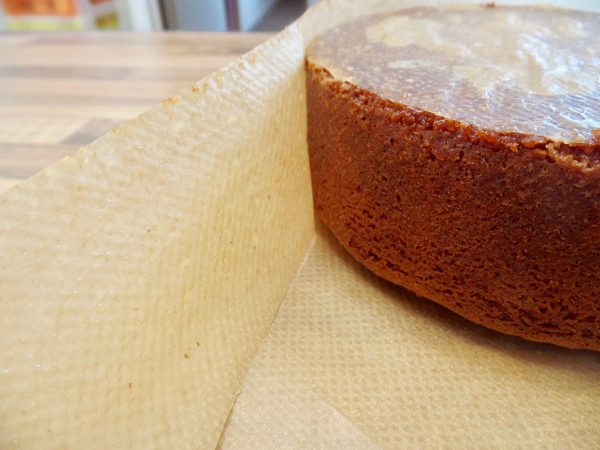
Using oven gloves, as the tin will still be hot, turn out the cake onto a strip of Bacofoil® The Non-Stick Baking Paper on the side. The great thing about Bacofoil® The Non-Stick Baking Paper is that as the paper comes away from the cake so easily, bakes look perfect and nothing sticks to the paper!

Leave to cool completely. I also like to leave my cakes until the next day before cutting into and filling so once the cake has cooled, wrap it well in two layers of cling film and leave overnight.

Decorating the cake:

I’m going to be filling this cake with a salted caramel buttercream but feel free to get as adventurous as you like! A chocolate ganache would work just as well, as would a white chocolate buttercream or something else entirely!

Salted caramel buttercream –

  • 250g unsalted butter
  • 500g icing sugar
  • 2 tablespoons salted caramel

To make the buttercream:

  • Cream the butter on its own for 5 minutes.
  • Add in the icing sugar.
  • Add in the salted caramel and mix well.

Don’t add in any liquid to the buttercream like water or milk. The salted caramel sauce is all it needs.

To split and fill the cake, I recommend to use a cake leveller. They are readily available in cake shops and online. Because I’m using a leveller as opposed to a knife, I feel more comfortable cutting the cake. For this cake, I’m going to split it twice, creating three lovely layers.

Split the cake once about a third of the way up and then again halfway between the first cut and the top of the cake. You can measure if you like but I normally do this by eye! Once cut, carefully take the top two layers off and spread your filling. Then reassemble an take off the top layer, adding more buttercream. Then reassemble and chill in the fridge for 10 minutes. This firms up the buttercream and makes it easier to handle.

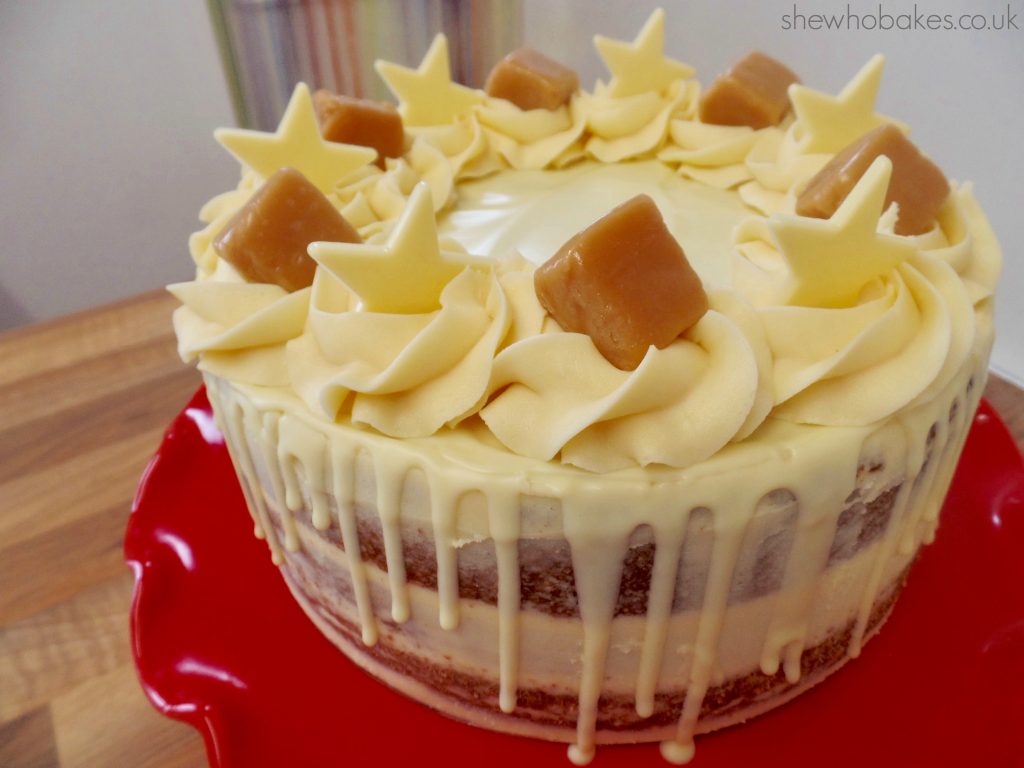
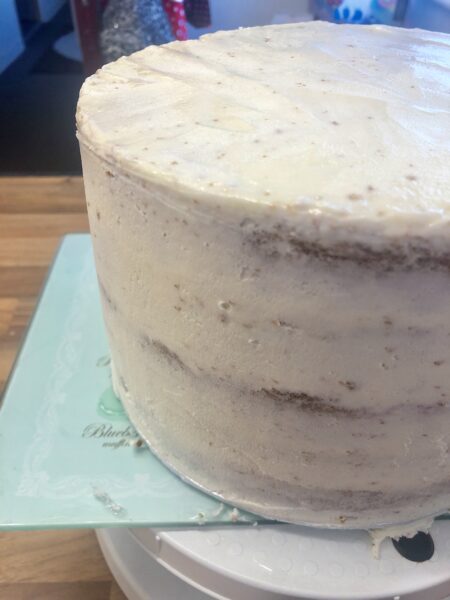
Once chilled, spread a layer of buttercream on the top of the cake and a thin layer around the sides, creating the ‘semi-naked’ look.

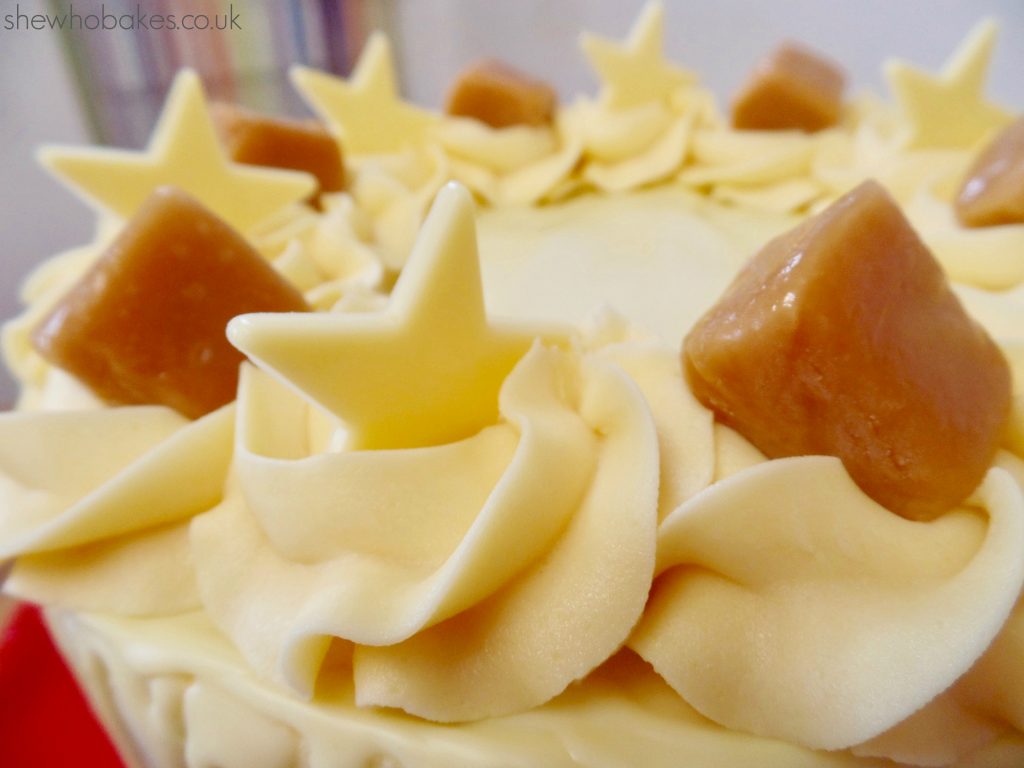
To finish the cake, melt a little white chocolate and pour onto the top, using a palette knife to push the chocolate to the edge of the cake, allowing it to drip down. Top with rosettes of buttercream (I used a 2D nozzle), white chocolate stars and more fudge pieces.


Leave to set and enjoy!

This cake, once baked will last 3-4 days if wrapped well.

I loved working with Bacofoil® The Non-Stick Baking Paper. It made making this cake really easy and it’s a great product I will certainly use again! It’s ideal for all kinds of baking jobs – lining, making and baking and for all types of food – savoury or sweet! The next thing I think I’ll use it for is some chocolate chip cookies!!

For more information about Bacofoil® and all of their products, check out their website www.bacofoil.co.uk

Happy baking!

Britt xo

This is a sponsored post in partnership with Bacofoil®  All views and opinions are my own.

Bumblebee Honeycomb Cake

01/21

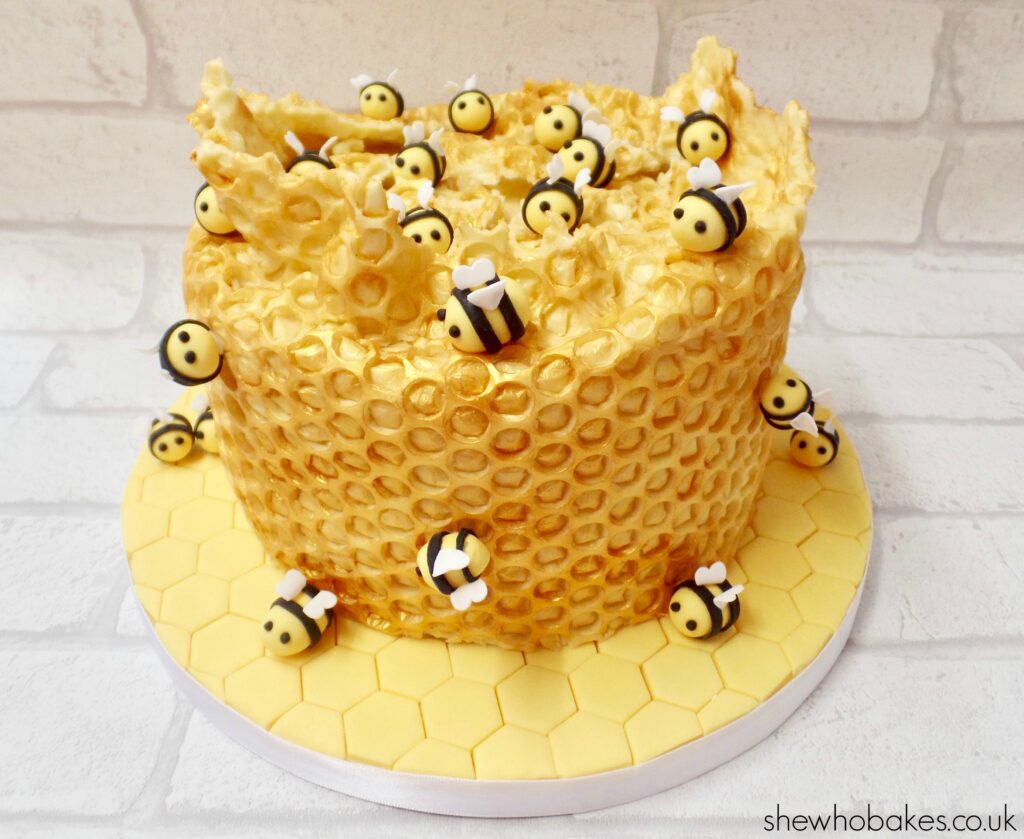
Sometimes, you’ll be thinking of a cake design for ages, just waiting for the right time to do it. This was one of those times. Inspired by a good friend of mine who keeps bees and knows more bee facts than anyone I know (Hi Amy!!), I’ve been wanting to make a bumble bee honeycomb cake for a few months now. Finally, this week, I got a window of time to do it.

I took some photos so I could talk you through how I made this cake.

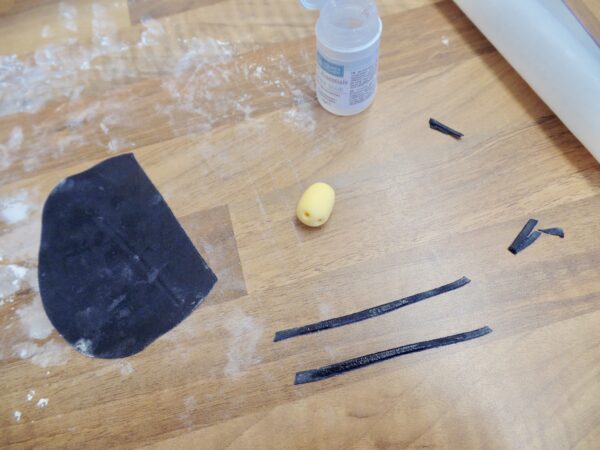
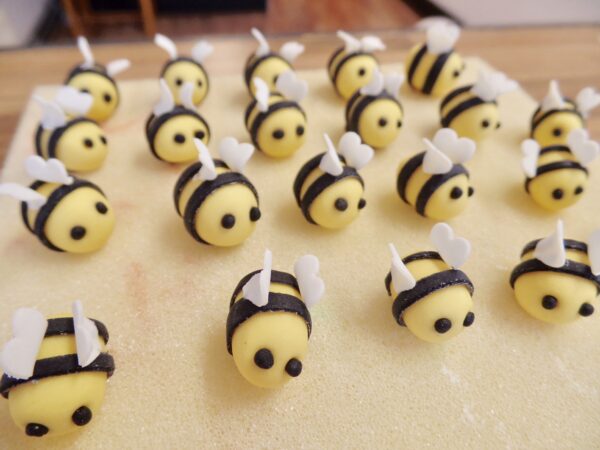
Firstly, I made the bumble bees. I did this by colouring modelling paste yellow (this is the modelling paste I use) and rolling oval shapes. I made small indentations using a mini ball tool where the eyes would be. I then left these shapes to dry on foam overnight. The following day I rolled out black flower paste very thinly and cut strips. I stuck these strips around the bees using a paintbrush and a little edible glue. I then rolled small balls for the eyes and glued them into the little sockets I’d made.

For the wings, I rolled out white flower paste and cut out small heart shapes using a mini plunger. I glued these individually to the top of the bee and bent them slightly to create movement.

Next, I decorated the board. I coloured 500g sugarpaste yellow using Sugarflair Egg Yellow. I then rolled out the sugarpaste on a surface dusted with cornflour. I painted a 10″ cake drum with piping gel and then gently lifted the rolled sugarpaste onto the board. I cut around the board with a knife. I then kneaded the excess sugarpaste into a ball.

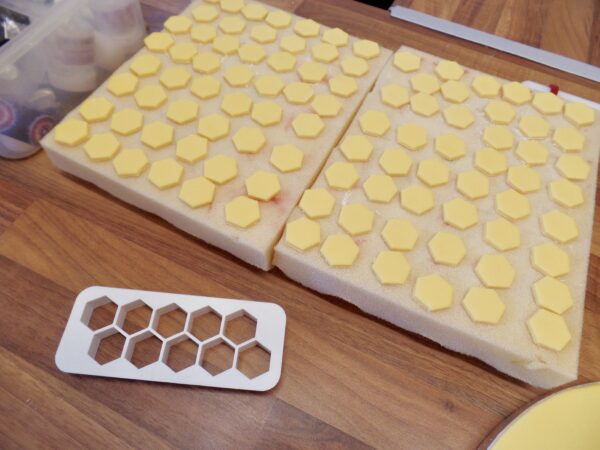
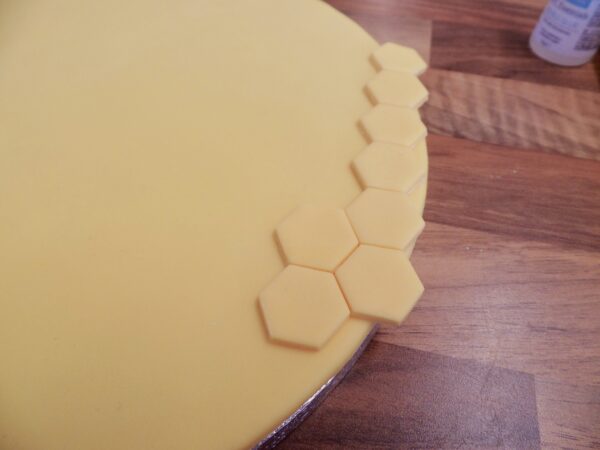
This ball, I then rolled out again on a surface dusted with cornflour. I then used a hexagonal cutter to cut out many, many hexagon shapes. I lost count in the end but it was a lot! I then painted the backs with a little edible glue and stuck them down to the board, one by one. I let them hang over the edge of the board slightly and used a scalpel to trim them to be flush with the edge.

Once my decorations were made, I started work on the cake. I used my trusty madeira cake recipe which you can find here. Once it was baked and cooled, I double wrapped it in cling film and left it to firm up overnight. I then made a batch of vanilla buttercream, the recipe can also be found here.

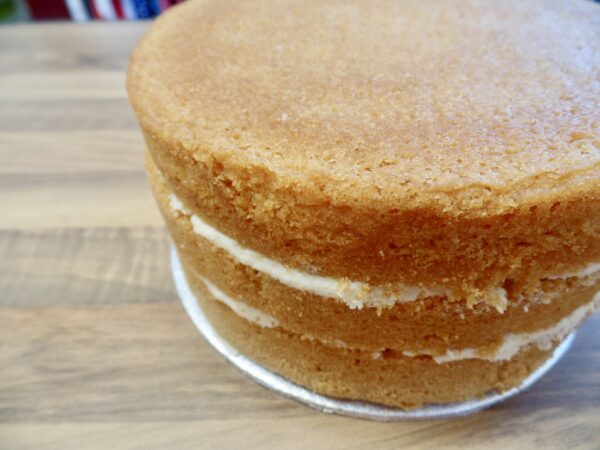
Using a cake leveller, I split the cake twice, creating three layers of sponge, and I filled with lovely buttercream. I let this chill in the fridge for 10 minutes and then I did a crumb coat layer of buttercream.

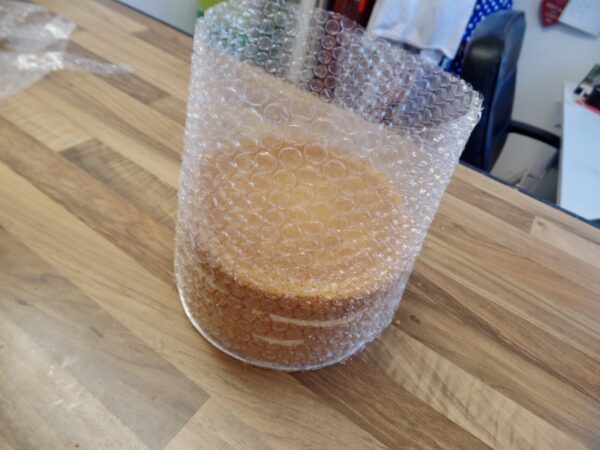
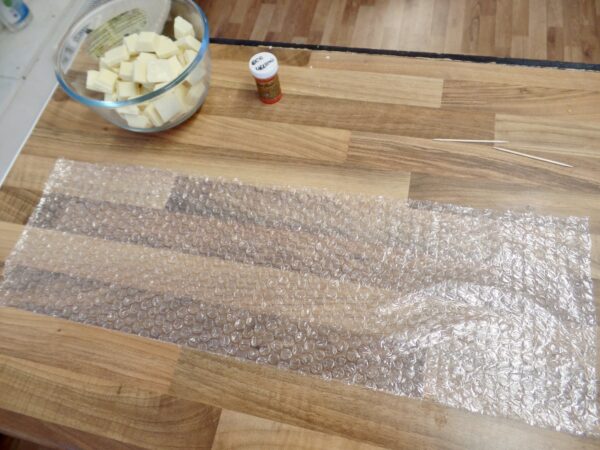
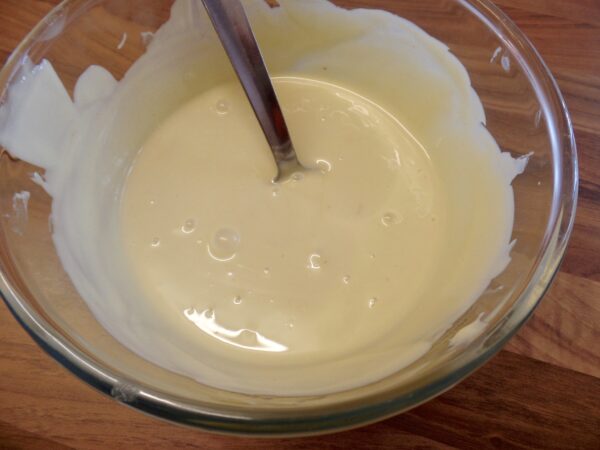
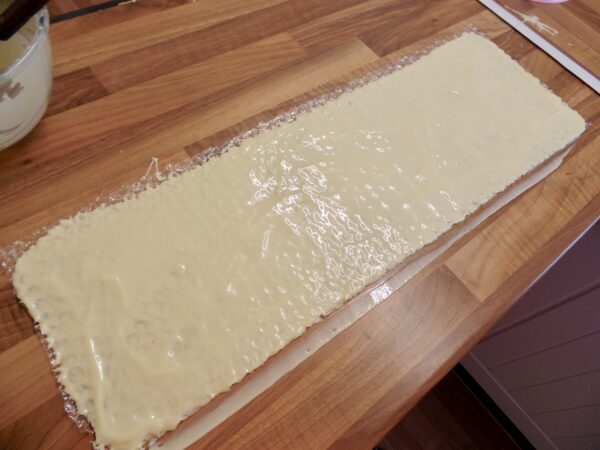
To create the honeycomb effect, I rolled out some bubblewrap and placed it around the cake and cut it to size. Then, I laid it down on the kitchen side, bubbles face up. I melted 200g white chocolate and poured it onto the bubble wrap, using a palette knife to spread the melted chocolate all the way to the edges.

I then left it to partially set. You want it to not be completely liquid, but you need it to still be flexible. It was a very hot day when I did this so it took longer than I had anticipated. The bubble wrap strip was also too long to fit into my fridge so I had to do it at room temperature. In hindsight, I think I would have used candy melts as these set a lot faster.

Once the wrap of chocolate was starting to set nicely, I quickly put a little more buttercream around the edge of my cake and lifted up the bubblewrap collar. I pressed this against the edge of my cake and wrapped it all the way around. I then chilled this in the fridge until completely set.

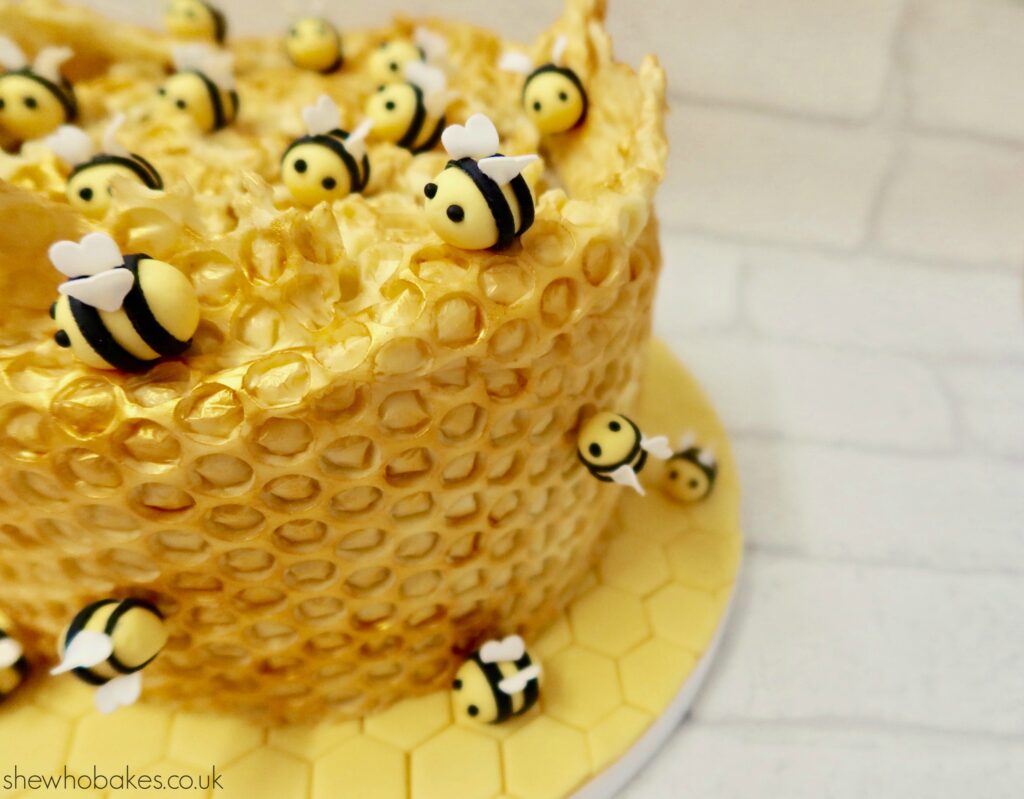
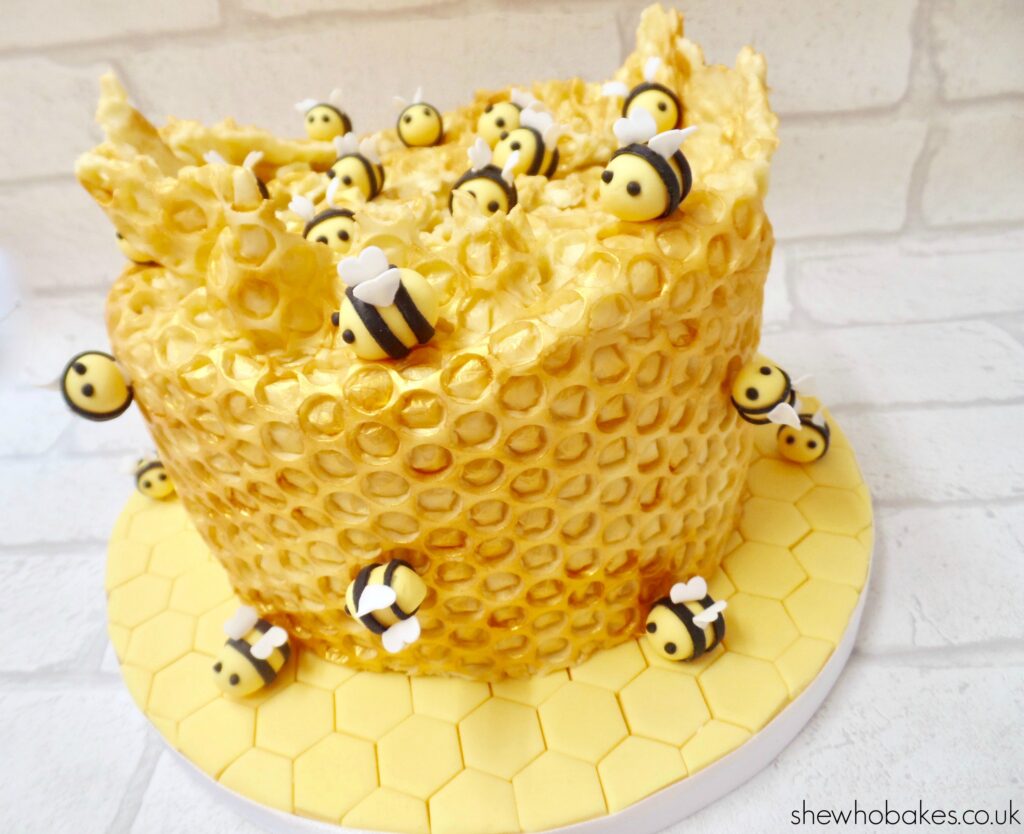
When the chocolate had set, I peeled off the bubble wrap, revealing the amazing chocolate design!

I broke some pieces off the top to give it more of an organic feel (and because some pieces broke off on their own anyway!)

To give it a little texture, I dusted the honeycomb with gold lustre dust using a large dry paintbrush.

I carefully lifted the cake and secured it to the decorated board with a little royal icing. Then I filled a small piping bag with more royal icing and used this to secure the bees on and around the cake.

I finished the design with a 15mm white ribbon around the edge of the board, secured with 3mm double sided sticky tape.


And there you have a bumblebee honeycomb cake! I really enjoyed making this one. I think it’s such a fun design. You could easily make matching cupcakes by doing the same chocolate on bubble wrap technique but once set, breaking into shards and using these to top buttercream covered cupcakes. Add a small bee and you’ve got a perfect match!

If you give this design a go and let me know how you get on, either on Facebook or Twitter or Instagram.

For more information on how to decorate your cake and go from home bake to showstopper, check out my list of latest online cake decorating courses here.

If you want to turn your baking hobby into a career, check out my book Cakes, Bakes & Business for everything you need to know about running a successful baking business, including pricing, marketing, insurance and much more!

Happy baking!

Britt xo

This post contains affiliate links. 

Parsnip & Pecan Loaf

12/20

{AD} Last year, I partnered with Microplane to create a warming, autumnal carrot, cinnamon and citrus loaf recipe. I absolutely loved working with the products so when they got back in touch asking if I wanted to try something new, I jumped at the chance!

This time, I would be working with the new Microplane Limited Edition Neon Yellow Premium Classic Zester and the new Microplane Adjustable V-Blade Slicer with Julienne Feature. As soon as I saw them I knew I wanted to do something with root vegetables and freshly grated nutmeg and so the idea came to me for a Parsnip & Pecan Loaf. Beautifully warming, packed with parsnip and chopped pecans, nutmeg and maple syrup. This recipe is a sure winner this winter.

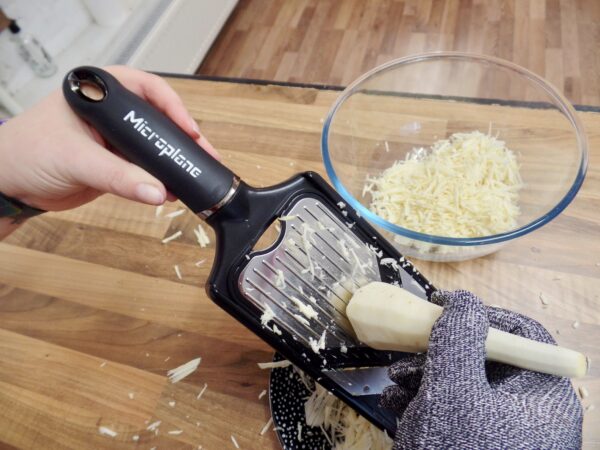
I’ve always been a little weary of Julienne slicers, mainly because I’m sometimes a little clumsy, but I was so pleased to also receive a Microplane Cut-Resistant Glove to keep me safe. It felt like chain mail! I will also say, the V-Blade Slicer felt incredibly safe. The blade is tucked away nicely and the cutting plate on top (that can be easily switched around to give you normal slices and Julienne slices) was very sturdy and I felt very safe using it. The sharp blades made easy work of the tough parsnips, slicing them swiftly and elegantly into thin pieces, perfect for this loaf recipe.

The Zester as well, has a quality weight to it, with a bright eye catching neon yellow handle and long, sleek features, it made grating fresh nutmeg effortless. I much prefer to grate nutmeg myself as I find it has a deeper flavour and the smell is just incredible and this Zester was perfect for the job.

Check out the bottom of the page for details on how you can win your own Microplane Limited Edition Neon Yellow Premium Classic Zester and Microplane Adjustable V-Blade Slicer with Julienne Feature!

So! Let’s get baking!

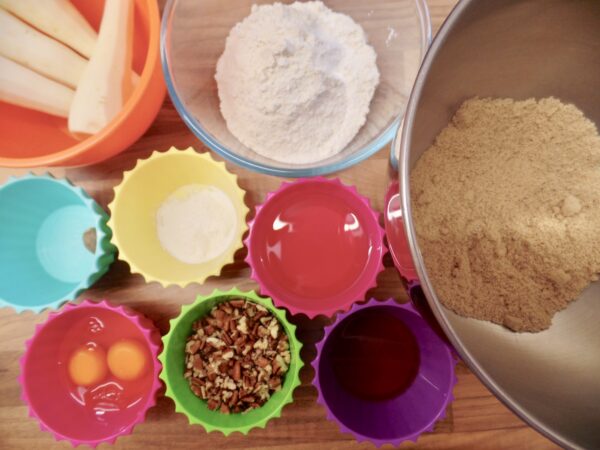
Ingredients;

  • 200g plain flour
  • 2 tsp baking powder
  • 200g parsnips
  • 75g pecans (with a little extra for the topping)
  • Fresh nutmeg
  • 50ml maple syrup
  • 2 medium free range eggs
  • 150ml sunflower oil
  • 150g light brown sugar

Method;

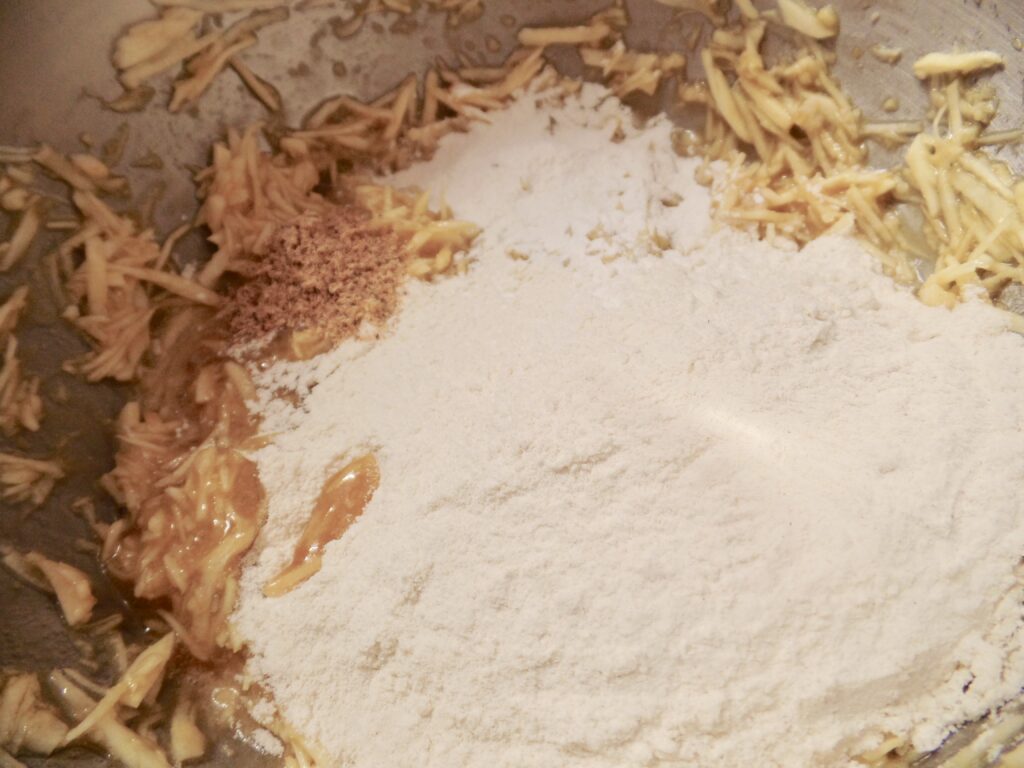
  • Firstly, using a zester or fine grater, grate the fresh nutmeg until you have about ½ a teaspoon of it. Put this to one side.
  • Next, top and tail the parsnips, peel them and then using the Julienne blade, slice into rough small pieces.
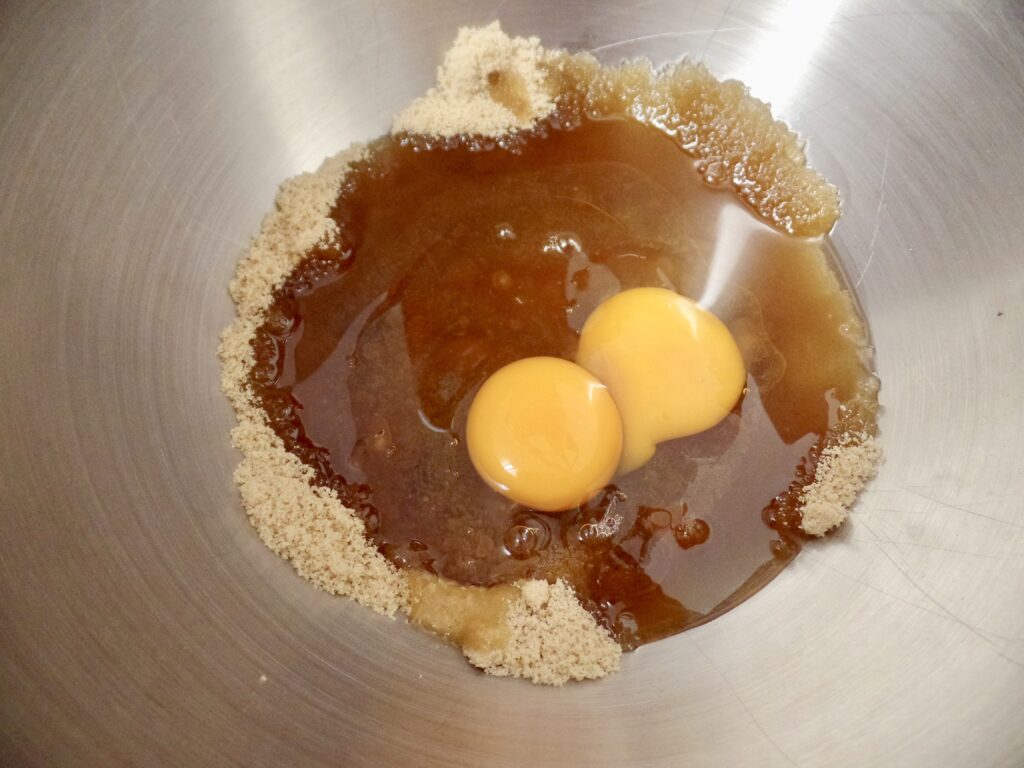
  • Mix together the light brown sugar, sunflower oil and eggs.
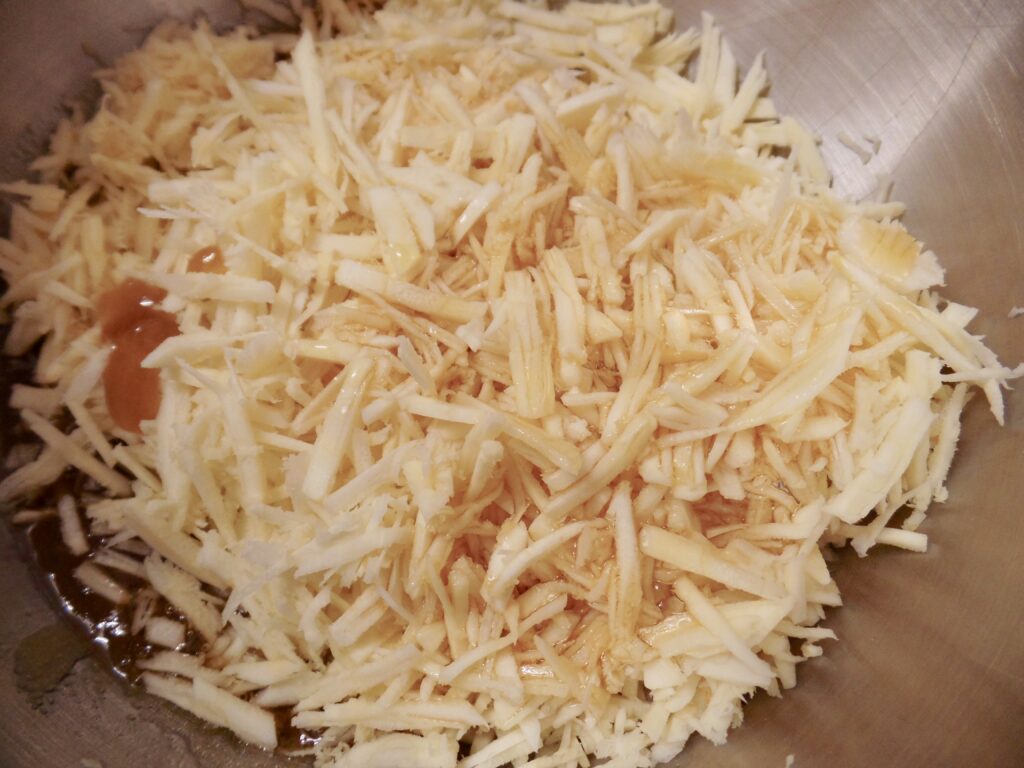
  • Add in the grated parsnips and maple syrup and mix.
  • Add in the plain flour, baking powder and fresh grated nutmeg and mix again.
  • Finally mix in the chopped pecans.
  • Pour this into a bottom-lined and greased 1lb loaf tin and bake at 140C (fan assisted) for 1 hour and 20 minutes.
  • Leave to cool completely before decorating.

I’ve made a maple buttercream to top my loaf but feel free to use any topping you like. A cream cheese frosting would also go well and you can find my recipe for that here.

Maple Syrup Buttercream

Ingredients;

  • 100g unsalted butter
  • 200g icing sugar
  • 2 tablespoons maple syrup

Method;

  • Cream the butter on it’s own for a few minutes.
  • Add in the icing sugar and mix well.
  • Add in the maple syrup and mix on a high speed until soft and creamy.

To decorate;

Once the loaf has cooled, spread on a layer of maple syrup buttercream. Top with chopped pecans and a little more freshly grated nutmeg.

Once your cake is made, store in an airtight container. This bake will last 3-4 days. 

I’ve loved partnering with Microplane again. The V-Blade Slicer and Neon Zester are so brilliant to bake with. Super sharp while also being very safe. They feel well made, great quality and would make a wonderful addition to any kitchen.

For more about Microplane, check out their website here – http://microplaneintl.com

Happy baking!

Britt xo

Competition Details

For your chance to win your very own Microplane Limited Edition Neon Yellow Premium Classic Zester and Microplane Adjustable V-Blade Slicer with Julienne Feature simply follow the instructions below.

The Instagram winner will be chosen at random from someone who follows my Instagram page instagram.com/brittmariebox and Microplane’s Instagram page www.instagram.com/microplaneintl and tags a friend on my Instagram post. 

You may only enter once on Instagram.

Best of luck!

Britt xo

And now for the terms & conditions:

– The competition starts at 6:30pm on Monday 7th December 2020

– The competition closes at 9pm on Wednesday 9th December 2020

– The competition is only open to UK mainland entrants.

– The winners can not transfer the prizes and there is no cash alternative.

– The competition is in no way sponsored, endorsed or administered by, or associated with Facebook or Instagram.

– The winners will be chosen at random and the decision is final.

– The winners will be notified within the week after the competition ends.

– The prizes must be claimed within a month after the winners’ announcement. After that time the prizes will be reallocated if unclaimed.

– The prizes will be posted out directly from Microplane International in January of 2021.


Cupcake Wreath Tutorial

11/20

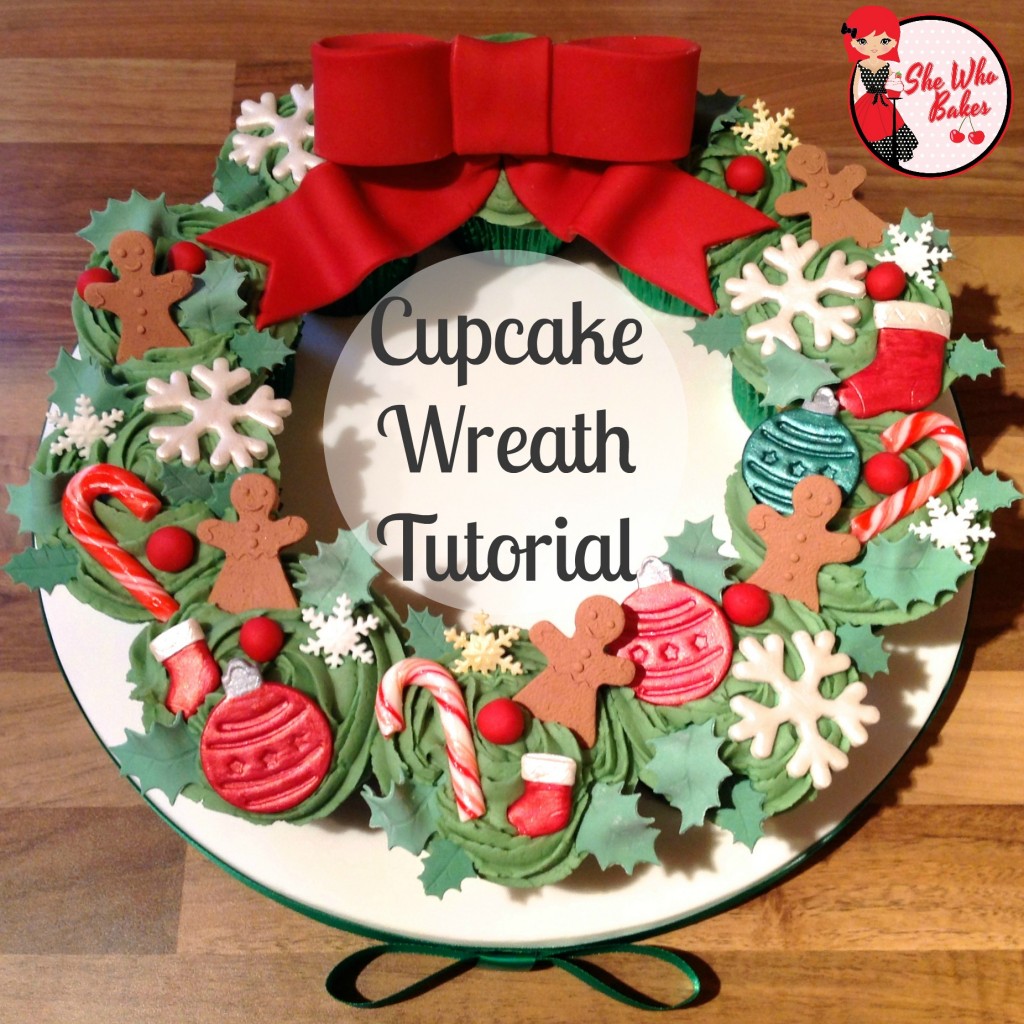
Merry Christmas to you all! If you fancy baking something a little different to a Christmas cake this year, why not try a cupcake wreath. A simple but impressive display made up of cupcakes. I demonstrated how to make this at the Cake & Bake Show in London last year and it’s one of my favourites.

You will need;

  • 10 cupcakes in green cases
  • 12″ cake drum
  • 300g sugarpaste to cover drum
  • green 15mm ribbon
  • 3mm double sided sticky tape
  • 100g red modelling paste for the bow
  • paintbrush
  • edible glue
  • drying foam
  • green buttercream
  • large piping bag
  • 1J nozzle
  • royal icing
  • Christmas decorations made and dried overnight

This tutorial shows you how to make a cupcake wreath using 10 cupcakes and a 12” cake drum, but you can make them as big or as small as you like. Even doing a second layer inside the first for a really big party.

I’ve broken it down into separate tutorials as there’s a lot I want to show you.

You will need to make your wreath decorations, including the modelling paste bow, in advance. I’ve used a mixture of moulds which I’ve painted, cutters and mini candy canes, but this is where you can really personalise your wreath using whatever toppers and colours you like.

Firstly, cover a 12” cake drum in sugarpaste (roll out icing). To do this, roll out your icing to 5mm thick on a corn floured surface, turning the sugarpaste as you roll to get an even shape and to stop it sticking. Spray your drum lightly with water and then using your rolling pin to lift your sugarpaste, lay it gently on the board, securing it with your hand and cutting off the excess with a sharp knife. Leave this to set overnight. To see a video of me covering a board in sugarpaste, check out my post here.

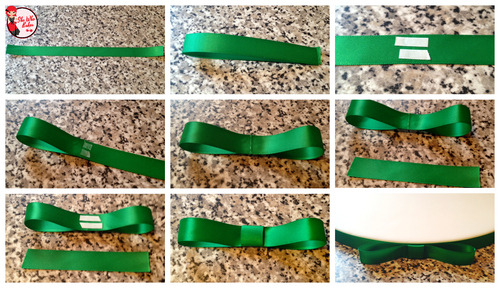
Then, to apply a board ribbon, use 5mm double sided sticky tape and a 15mm width ribbon. The hardest part here is peeling off the backing of the tape!

Next, create a cute flat bow to attach to the front of the board. Use a length of your 15mm ribbon (approx 12cm) and fold in half to make a crease. On this creased line, stick two bits of double sided sticky tape, as pictured. Then fold the halves in on themselves to look like the middle picture. stick a shorter piece of ribbon around the middle of your bow. Attach to your board with more double sided sticky tape.

To create a bow out of modelling paste for the top of our wreath, cut four identical strips out of red modelling paste to your desired thickness. On two of the strips, cut a triangle to create the ends of the ribbon. Then cut a smaller strip for the middle of the bow.

With a small amount of edible glue, fold over the plain strips in on themselves to create the bow loops. Then glue the small strip in the centre as the third picture.

The strips that you have cut the ribbon ends, dry on foam with a ripple in the icing to create a more fabric look. Do this by pinching the top and bottom together, you can also use a cel stick if it helps.

Leave the bow to dry upright to create prominent bow loops.

Now for the wreath. Bake your desired flavour cupcakes in green cases, I’m using my vanilla cupcake recipe here (I’ve used metallic ones for a more Christmassy feel.) Make up some green buttercream (you can find my recipe here) and fill a large piping bag with a 1J nozzle.

Once the cupcakes have cooled, pipe onto them by starting in the middle of the cupcake and working your way slowly outwards. (I found I went round the cupcake 2 ½ times.) A gentle and even pressure is needed here.

Leave the buttercream to set slightly so they are easier to move about. Then position your cupcakes on your dried iced board. Once you are happy with the shape of your wreath, stick your cupcakes down with a little royal icing. You don’t need to use a lot. It’s just to secure them enough to transport the wreath. We still want people to take them off to eat them!

Once your cupcakes are secured to your board, decorate to your hearts content! Adding the bow to the top first, then using your toppers.

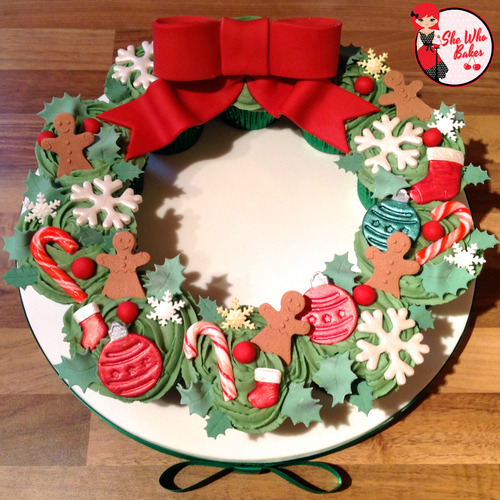
And there you have it! A cupcake wreath for the festive season!

Equipment can be purchased from Iced Jems.

For more information on how to decorate your cake and go from home bake to showstopper, check out my list of latest online cake decorating courses here.

Give it a go and let me know how you get on, either on Facebook or Twitter or Instagram.

If you want to turn your baking hobby into a career, check out my book Cakes, Bakes & Business for everything you need to know about running a successful baking business, including pricing, marketing, insurance and much more!

Happy baking and Merry Christmas!

Britt xo

All of my online cake decorating courses are currently HALF PRICE! Grab a bargain here


Funfetti Drip Cake

08/20

This week I reached a crazy milestone of 20,000 followers on Instagram! To celebrate, I made this pink and white funfetti drip cake and I wanted to tell you all about it!

I’ve been on Instagram for a really long time. My first post was in November 2010 so nearly ten years of my life in filtered squares. The account was originally a personal one, which became all about cakes when I ran my business, then I started incorporating back in my life and now, it’s a mix of everything. It’s had several names and where I spend a lot of my time online.

Since the invention of Instagram Stories, I’ve lived most days on there, sharing them with whoever is interested and now, that number sits at 20,000. It blows my mind. That’s enough people to sell out the O2 Arena in London!

I wanted to mark the occasion and what better way, than with cake!

Here’s how it was made;

The Cake

I wanted to bake something fun, and whats more fun than a funfetti cake!

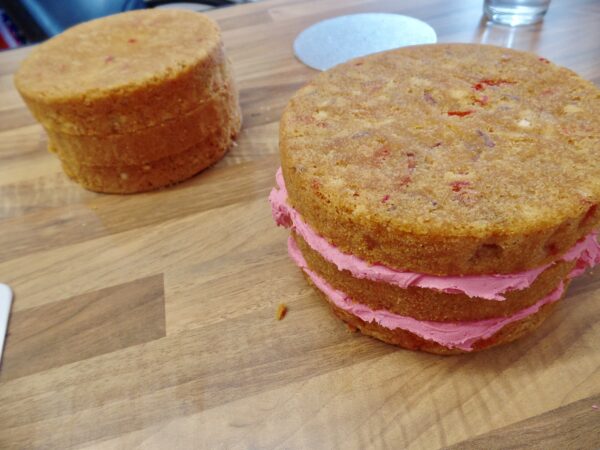
I baked two 6″ round cakes as I wanted double the height. For this, I used my madeira cake recipe. I left the 7″ round recipe as it was and didn’t alter it, because I find if I want a little more depth to my cakes, I’ll go up a tin size.

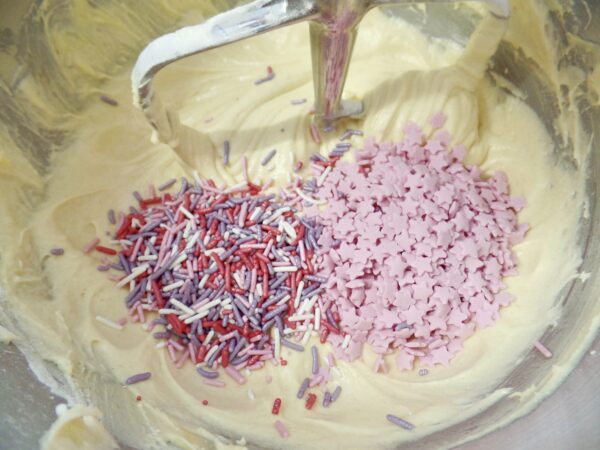
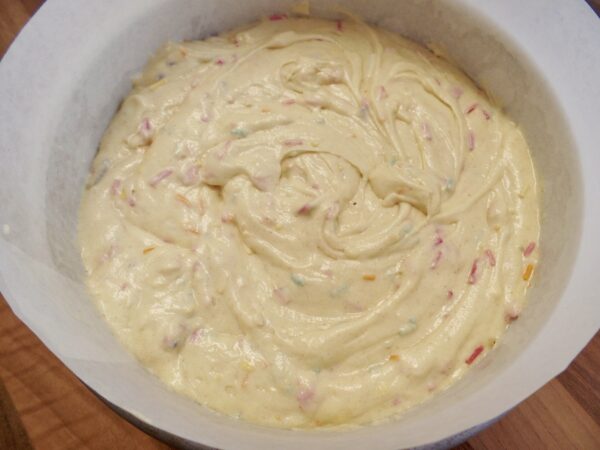
I made up the recipe as usual and then at the end before pouring the mixture into the tin, I added in a load of sprinkles. For any funfetti cake, the key to getting it right will be in the sprinkles. I find that cheaper, supermarket ones tend to lose their colour once baked and will melt into the sponge. You need bake stable sprinkles.

I’m using Scrumptious Sprinkles for this. I’ve used them for so many different projects and they’ve never let me down.

Once the cakes were baked, I turned them out onto greaseproof paper and left them to cool completely. I then double wrapped them in cling film and left them to firm up overnight.

The following day I made up the buttercream, which I wanted to be a bright pink colour.

I used my usual half butter to icing sugar ratio and mixed 500g unsalted butter with 1kg of icing sugar (I needed a lot of buttercream for this cake, if you’re making a normal height cake you’ll only need half this amount). I coloured it with Sugarflair Pink. I find concentrated colours like Sugarflair really are the best to use. They give a great colour without having to add lots of product in and they last a lot longer than their water based cheaper counterparts. Especially with something like buttercream where, the more liquid you add the sloppier it gets, a gel colour works best.

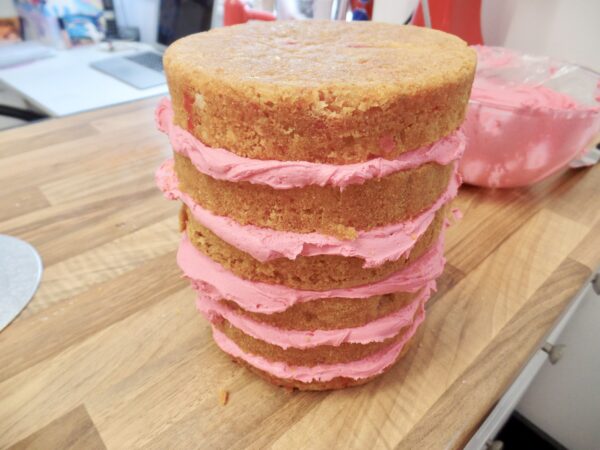
I split both cakes twice giving me six layers of cake. I then filled these with my bright pink buttercream. I then let the cake firm up in the fridge for 10 minutes or so.

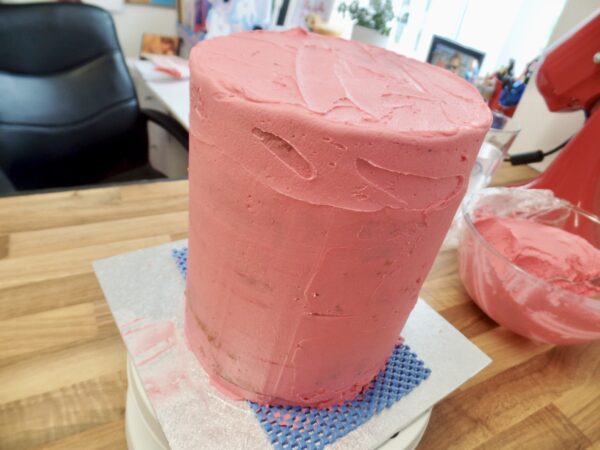
Next, I gave the whole cake a thin layer of buttercream on the outside (a crumb coat), I used an extra large scraper for the edges. I then chilled this again.

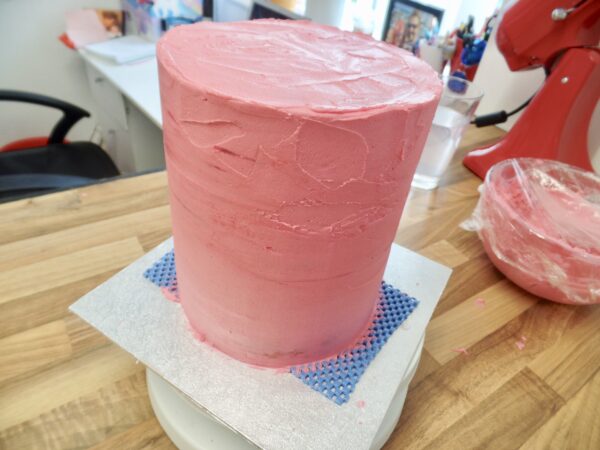
I then repeated the whole process, but this time giving the cake a slightly thicker later of buttercream. I smoothed it all down and took off excess with a palette knife and large scraper. I left this to chill for a final time.

The Drip

When the cake was having it’s final chill, I melted down some white candy buttons in the microwave on 10 second intervals.

After this had all melted and was smooth, I added in a tablespoon of oil to give it a runnier consistency and to help with the drip. I then poured half of this into a piping bag.

I took the cake out of the fridge and

I poured a little onto the top and smoothed this to the edge using a palette knife, scraping it all the way to the edge and letting it fall over slightly. Then, working quickly and holding the piping bag on the top edge of the cake, I piped on my drips. How long you want your drips is up to you but I wanted quite long ones so I pushed gently on the piping bag until it had started to fall down the top third of the cake, then stopped. I then let the drip set completely.

The Decoration

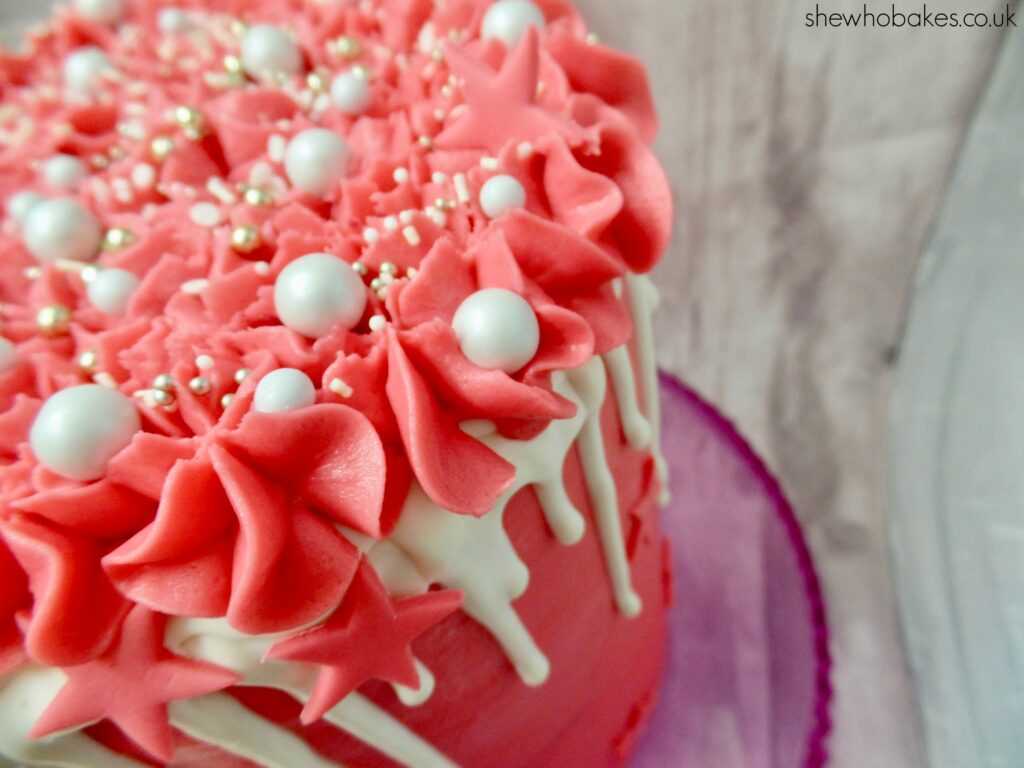
To decorate, I filled a piping bag with my pink buttercream and fitted it with a 2D rose nozzle. I then piped stars to the top of the cake, topping each some stars with a little pink modelling paste star and some sprinkles.

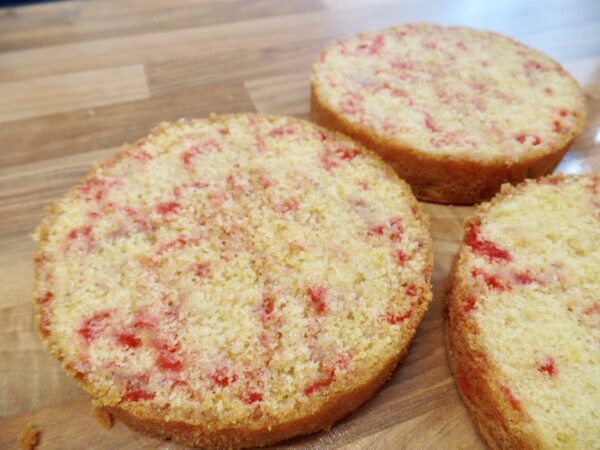
I love how the slices look when they are cut into!

Once baked, this cake will last for two weeks if wrapped well and will freeze for three months. Once you’ve cut into it however, you’ve got about 4-5 days if it is wrapped up tightly.

If you bake any of my recipes or use any of my tutorials, come let me know how you get on, either on Facebook or Twitter or of course – Instagram.

For more information on how to decorate your cake and go from home bake to showstopper, check out my list of latest online cake decorating courses here.

If you want to turn your baking hobby into a career, check out my book Cakes, Bakes & Business for everything you need to know about running a successful baking business, including pricing, marketing, insurance and much more!

Happy baking!

Britt xo


Triple Chocolate Cake

07/20

This delicious cake is a must bake for all chocolate lovers!

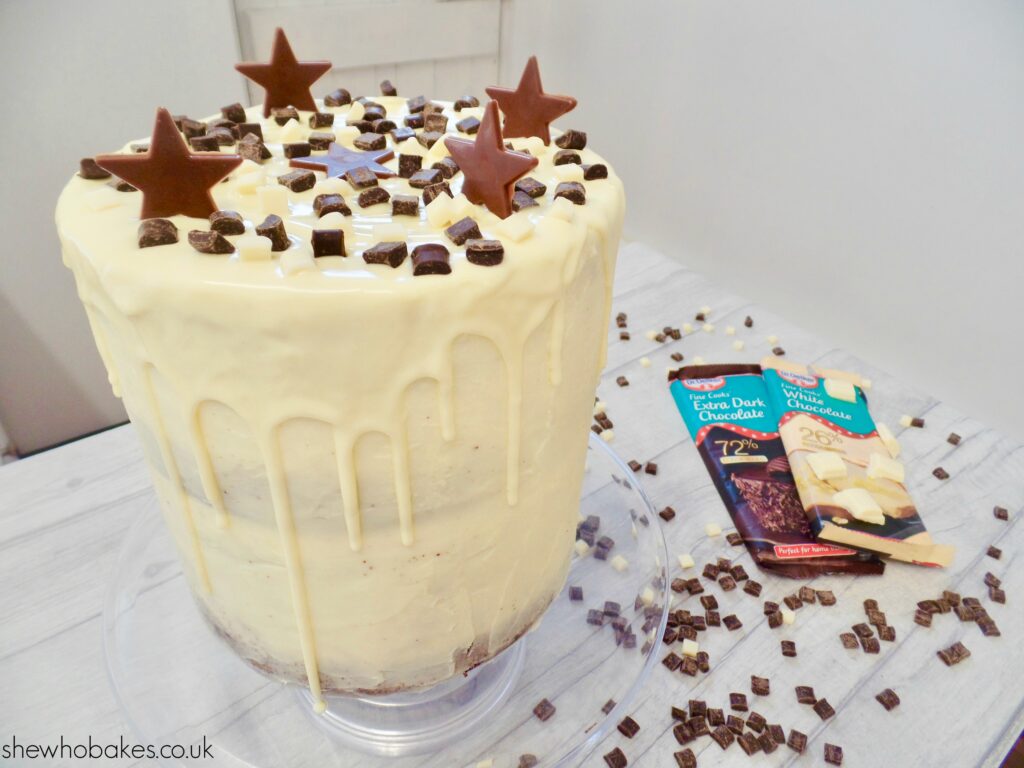
A rich chocolate sponge packed with melted dark chocolate and white chocolate chunks, filled with white chocolate buttercream, topped with a white chocolate drip and milk chocolate decorations, this decadent delight is sure to be a winner every time.

I’m a white chocolate fiend so I’ve put that in both the buttercream and used it as the drip, but if you’re not as keen you can easily swap it out for milk or dark chocolate instead.

To get the perfect layers, I’ve used a cake leveller from Iced Jems. They are a game changer and I highly recommend them.

This cake will hold up to being covered in sugarpaste/icing and used as a middle tier.

Once baked, it will last 5-6 days. This recipe is for a single height 7″ round cake.

NOTE – As I wanted an extra deep cake, I baked two 7″ rounds using the above recipe and stacked them one on top of another. If you bake one you will get a cake half this height.

Cake Ingredients

  • 200g Self Raising Flour
  • 150g Unsalted Butter
  • 50g Golden Syrup
  • 300g Dark Brown Sugar
  • 50g Cocoa Powder
  • 5 medium eggs
  • 100g Dark Chocolate
  • 100g White Chocolate Chunks
  • 1 ½ Teaspoon Baking Powder
  • 1 Tablespoon Instant Coffee in 100ml Hot Water

Method

  1. Melt the dark chocolate in the microwave or in a bowl over a pan of hot water.
  2. Make up the instant coffee.
  3. Cream together the butter, sugar and golden syrup.
  4. Add in the eggs.
  5. Mix in the flour, cocoa powder and baking powder.
  6. Add in the melted dark chocolate and coffee.
  7. Finally stir in the white chocolate chunks.
  8. Pour into a lined 7″ round tin and bake at 140ºC for 1 hour and 45 minutes.
  9. Check after an hour and only take out when a skewer comes out clean.
  10. Leave to cool completely upside down on a sheet of greaseproof paper.

For the Buttercream

  • 250g Butter
  • 500g Icing Sugar
  • 100g White Chocolate (melted)
  1. Mix together the (room temperature) butter and icing sugar until soft.
  2. Add in the melted white chocolate.
  3. Mix until you have a smooth consistency.
  4. Split the cake into three sections using a cake leveller and fill with the delicious buttercream.

For Decoration

  • 100g White Chocolate
  • Chocolate Stars
  • Chocolate Chunks in White and Dark
  1. Cover the cake in a layer of white chocolate buttercream and leave to set.
  2. Melt 100g white chocolate and pour onto the top of the cake.
  3. Use the back of a spoon or a palette knife to edge the melted chocolate to the sides of the cake and let it drip down.
  4. Top with chocolate chunks and chocolate stars.


If you want to turn your baking hobby into a career, check out my book Cakes, Bakes & Business for everything you need to know about running a successful baking business, including pricing, marketing, insurance and much more!

Give it a try and let me know how you get on either on Facebook or Twitter or Instagram.

Happy baking!

Britt xo

#AD – Originally made in 2017 in partnership with Dr Oetker and webake.co.uk

Tiered Sprinkles Cake – My Lockdown Birthday 2020

06/20

Well, my 32nd birthday was very different to what I thought it would be! We has originally booked a trip to Disneyland Paris and I had imagined walking down Main Street, with my Minnie Ears on, holding a Mickey balloon and eating a magical snack.

Sadly, thanks to the global pandemic it wasn’t to be. We sadly had to cancel the trip and organise a different kind of birthday.

My amazing husband Tim gave me the best lockdown birthday I could have hoped for! I was surprised in the morning with my own little corner of Disneyland Paris in the spare room, complete with fairy lights, castle backdrop, Mickey & Minnie balloons, Main Street music being played and the smells of the Disney bakery on the wax burner. It was truly magical! I opened my presents and the surprises just kept coming! He had also created such a thoughtful and emotional video for me of messages from so many of my friends. If you fancy seeing what made me cry on my birthday, you can watch this video on YouTube here.

Tim had sneakily organised my friends in a timetable so I got to see lots of people in a socially distant way and I’m so grateful for it. I had a few visitors pop over with pressies in the afternoon and then in the evening we had an outdoor picnic in a friend’s garden. I had the most amazing time.

Because I wasn’t having a bit party, I only wanted to make a little cake and didn’t want to spend too much time on it. This i actually the tenth birthday cake I’ve made for myself since I started baking in 2010! I’ve done all manner of things now;  Unicorns, Mermaids, Slytherin themed, and last year was my massive Captain Marvel cake!
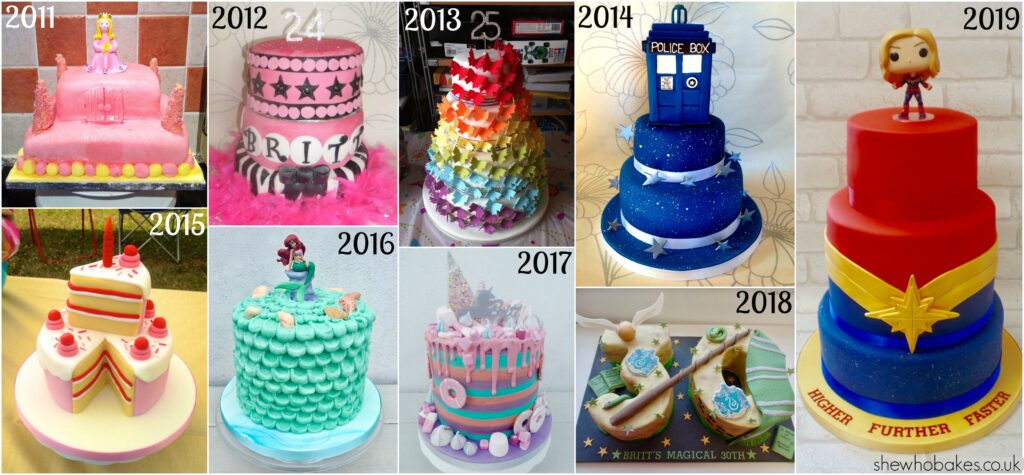
They have all been so different and it’s been so lovely to see my growth each year. They are all special to me in their own way.

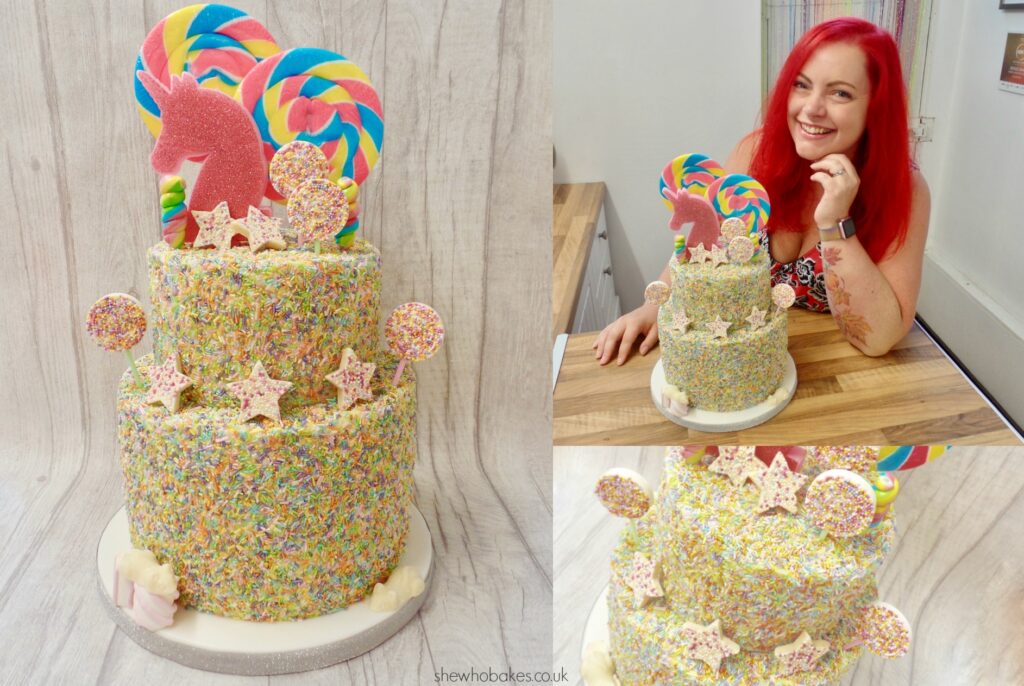
I had originally planned to do a Disney theme this year to tie in with the trip but I’m going to save that design for another year. Instead, I decided on a sweet shop themed, little two tier covered in rainbow sprinkles and decorated with some of my favourite sweets.

Baking The Cake

I wanted a deeper bottom tier and so I baked 1 and ½ 8″ cakes and a 6″ top tier.

For the 8″ and the ½ 8″, I used an adapted version of my Salted Caramel, Fudge and White Chocolate Cake. I omitted the melted white chocolate and fudge pieces, making it a simply salted caramel cake, and I also used all golden caster sugar rather than a mix of that and light brown. So the final recipe looked like this –

  • 300g self raising flour
  • 300g golden caster sugar
  • 285g Stork
  • 75g plain flour
  • 5 eggs
  • 4 tablespoons salted caramel sauce

It was made in exactly the same way though by creaming the Stork and golden caster sugar, then adding in the eggs and mixing well, then adding in the plain and self raising flour, and finally adding in the salted caramel sauce and mixing for a few minutes before pouring into a lined tin and baking at 140C (fan assisted) for 1 hour 50 minutes. Once baked, I turned them out straight away onto a sheet of greaseproof paper and left to cool upside down.

For the ½ depth 8″ cake, I used the same ingredients but changed the amounts. This half depth 8″ cake recipe can also be used to make a full 7″ cake and this took 1 hour 30 minutes in the oven at 140C (fan assisted) –

  • 200g self raising flour
  • 200g golden caster sugar
  • 185g Stork
  • 50g plain flour
  • 4 eggs
  • 2 tablespoons salted caramel sauce

For the salted caramel sauce, I used this one I found on Amazon by Joe & Sephs. It’s delicious!

I wanted a lighter and fluffy cake so I used Stork instead of butter, which I tend to reserve for richer bakes, I used Tesco’s own golden caste sugar and obviously Homepride Flour.

For the 6″ cake, I went with a lemon flavour. I also wanted it a little deeper than average so I used a mix I would normally use in a 7″ tin for the extra height. I find if you want a deeper cake you can go up a recipe size with a madeira cake mix really easily and it still bakes through nicely.

I used the exact lemon madeira recipe listed halfway down the page here.

I wanted a buttercream flavour that would compliment both cakes as I only wanted to make one batch (fun fact, I hate making buttercream!) and so I’d decided on a white chocolate buttercream. Originally I was going to add in melted white chocolate as I’ve done previously here but when I was in Tesco, I came across this white chocolate spread. Similar in consistency to Nutella but white chocolate and I was intrigued. I got it home and tried it and oh my goodness, it was delicious!

I’d decided to use the spread in the buttercream instead and went with a recipe that I’ve used for Nutella buttercream before and it worked really well. NOTE – this recipe is for filling both my 1 ½ height 8″ round cake and my deep 6″ cake as well as crumb coating them both twice, plus a third layer to stick on the spinkles. If you’re making a normal size cake you won’t need this much buttercream and can halve the recipe easily –

  • 200g white chocolate spread
  • 500g unsalted butter
  • 1500g icing sugar

Cream the butter on it’s own for a few minutes, add in the icing sugar and mix until creamy and then add in the spread and mix well.

I baked all three of the cakes and made the buttercream on the Tuesday. Once the cakes were cooled I double wrapped them in cling film and left them in a cool, dry place. I also transferred the buttercream to a plastic box, laid a sheet of cling film over the top of the buttercream to prevent crusting, added the lid and left in the fridge overnight.

Cakes can last a long time once baked if stored correctly. You can read more about my process in this article. Buttercream, if tired this way, will last in the fridge until the expiry date on the pack of butter that you’re using. I also always recommend to use proper butter for buttercream if you can.

Decorating The Cake

Wednesday came and with it came the day to decorate the cakes. Using a cake leveller, I levelled the top of the cakes (which were pretty flat anyway thanks to the low and slow baking and leaving to cool upside down on greaseproof paper) I split the full 8″ cake and the 6″ cake twice, then split the half size 8″ once.

I rejuvenated the chilled buttercream by first zapping it in the microwave for 15 seconds and then putting back in my mixer to beat it until it was spreadable.

Using a cranked palette knife, I filled each layer with buttercream. I stacked all five layers of the now monstrous 8″ bottom tier and then did the three layers of the 6″ top tier. I then left these to chill in the fridge for the butter to firm up (this is why I use butter). Once firmed, I spread a thin layer of buttercream on the top and sides of both cakes, crumb coating them. I took off the excess with a side scraper. I then chilled them in the fridge to allow this outer layer to firm up.

I repeated this process a second time. I always like to crumb coat a few times, especially if i’m not covering in sugarpaste icing. This gives it a really nice finish and stops any air getting in, allowing the cake to stay fresh. I then chilled again.

Finally once the buttercream was firm, I did a third, much thinner layer of buttercream simply to act as a glue for the sprinkles.

Sprinkles

To decorate this cake, I’m using a rainbow of Scrumptious Sprinkles which I made myself using seven of their colours from their Glimmer Strands and Rods range; Mother Of Pearl, Light Pink, Yellow, Violet, Orange, Turquoise and Lime.

Adding the sprinkles is messy business. I’ve tried to do it many different ways and I’ve found, for me, the best way is the messiest way!

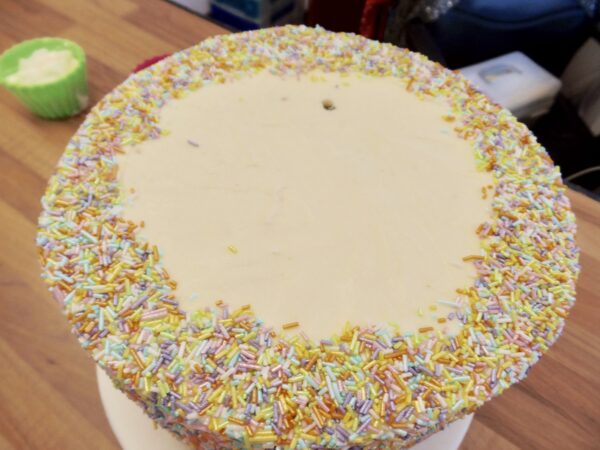
I lined a baking tray with foil, then in the middle I put a cake tin smaller than my bottom tier at 7″. I started with the bottom tier and placed the cake on top of the tin. As I didn’t want to coat the top where I wanted to stick down the top tier, I traced round a 6″ greaseproof paper circle with a scribe to make a sprinkle free circle.

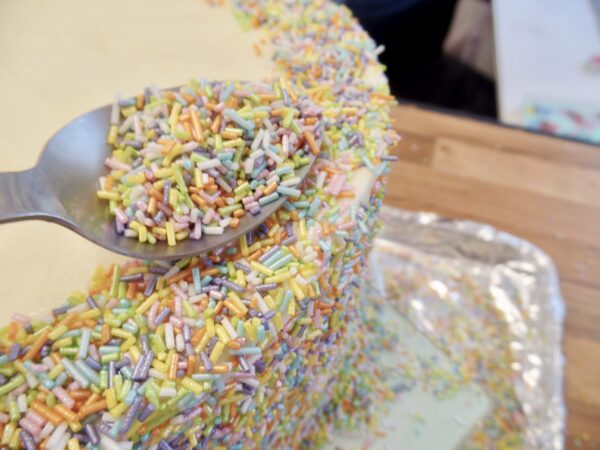
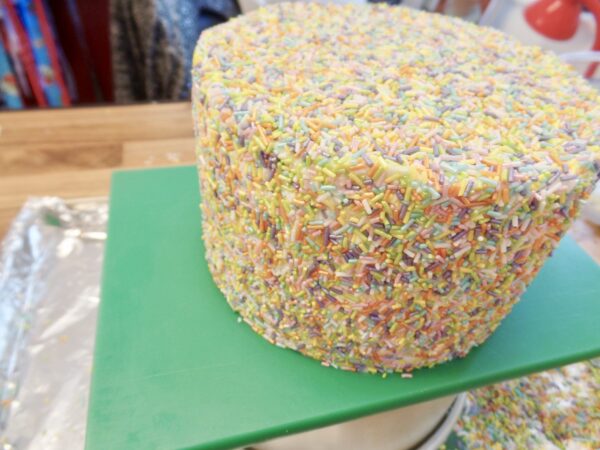
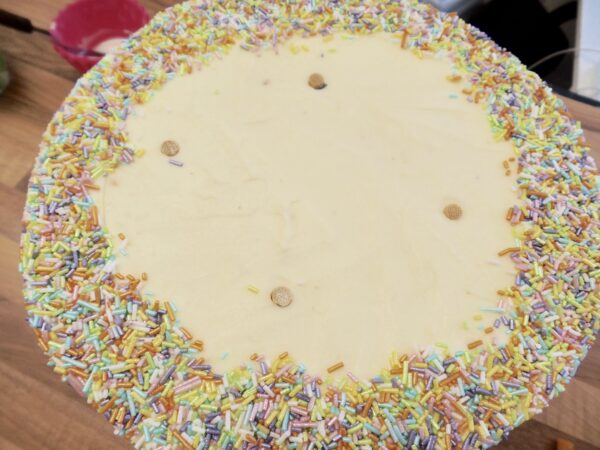
I  then took handfuls of sprinkles and pushed them firmly on to the sides of the cake, rotating to get it completely covered. Then, for the top, avoiding the circle I had traced on, I spooned on sprinkles and press them down gently. I went around the cake a few times to completely cover it.

Once the cake was fully covered with sprinkles, I chilled the cake for a further 15 minutes to set. I used this time to roll up the foil and pour the unused sprinkles back in the pot.

I repeated this for the top tier and again, left it to chill.

Assembling The Cake

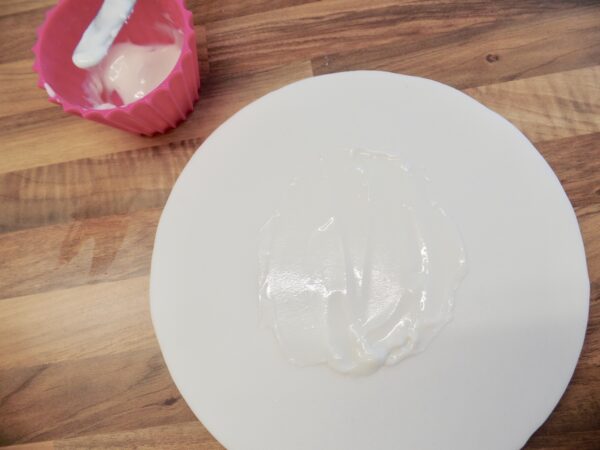
Once the sprinkled covered tiers has set completely, I stacked them. I’m using a 10″ round board I’ve already iced earlier in the week using a bit of spare white sugarpaste, sticking it down with piping gel. I’ve applied silver glitter washi tape around the edge of the board from Iced Jems.

I spread a little royal icing, made up from royal icing powder, into the centre of the iced board, then gently lifted up the 8″ tier and carefully set it down onto the iced board. I then stuck bamboo dowels into the cake to support the top tier (this is super important if you’re making a tiered cake) and cut them to size.

Next, I painted a little more royal icing into the non-sprinkled middle, covering the top of the dowels and carefully set down the 6″  cake on top. I then left it in a cool room to set.

Once set, I topped it with two giant round pastel lollies I got from eBay, jazzie lollies I also myself (see below) and two small twist lollies. I also used white mice and jazzie stars, from eBay.

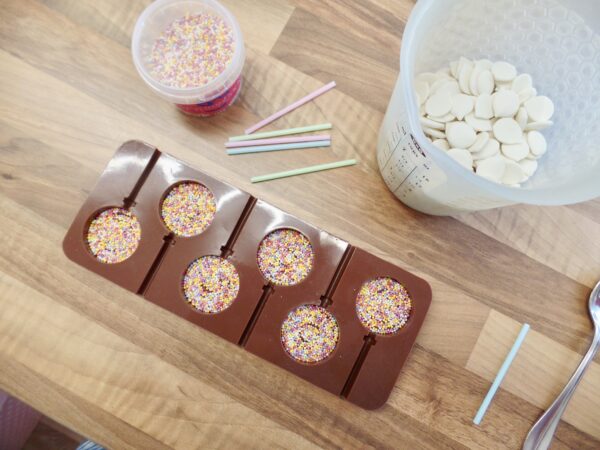
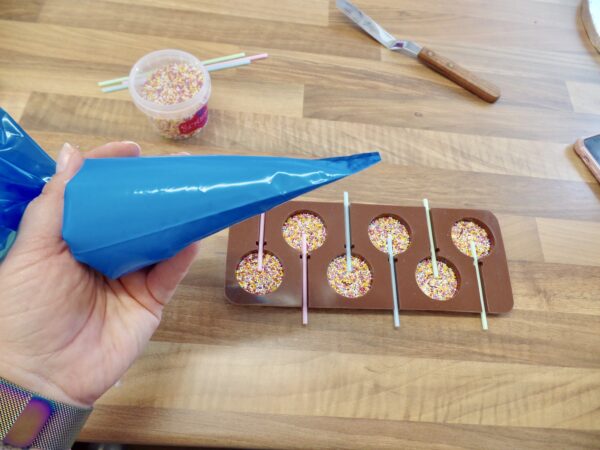
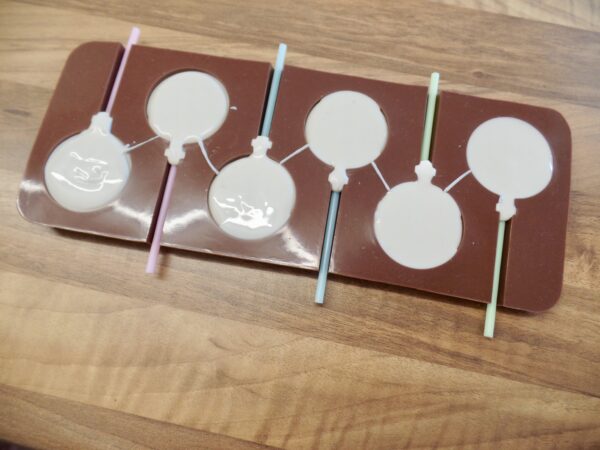
I made the jazzie lollies by using this mould from Iced Jems, as well as some lolly sticks, candy melts and hundreds and thousands. I poured the sprinkles into the mould, then melted the candy melts, poured it in and pushed half a stick into the melted candy. I then left them to set in the fridge.

I then left the whole cake to set completely.
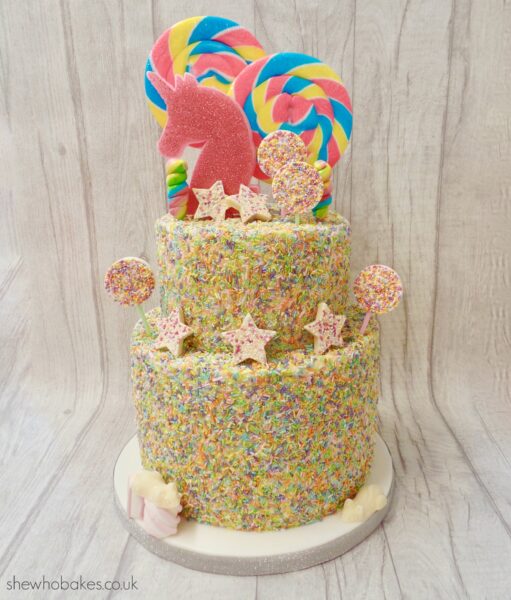
I had a bit of a nightmare the day I assembled the cake. It was really really hot and two of the decorations I’d made that were supposed to go onto to the cake fell apart! So a quick nip to Tesco to pick up an emergency sparkly unicorn was in order! I think it sets off the cake nicely!

It’s a shame my friends won’t be able to see the finished cake in person this year, but I’ll be packaging up some pre-cut slices for them instead.
I hope you’ve enjoyed all of these tips and tricks. I always love writing about the cakes I make in the hope that it may help someone else making something similar!

If you’re baking any of my recipes or using any of my blogs, let me know how you get on, either on Facebook or Twitter or Instagram.

Happy baking!

Britt xo

For more information on how to decorate your cake and go from home bake to showstopper, check out my list of latest online cake decorating courses here.

If you want to turn your baking hobby into a career, check out my book Cakes, Bakes & Business for everything you need to know about running a successful baking business, including pricing, marketing, insurance and much more!

Easy Fantasy Castle Sugar Cookies

06/20

One of my favourite places to be is Disneyland Paris. Walking down Main Street with my Minnie Ears on, snacking on a tasty treat and looking ahead to the beautiful pink castle that overlooks the whole park. *Sigh*

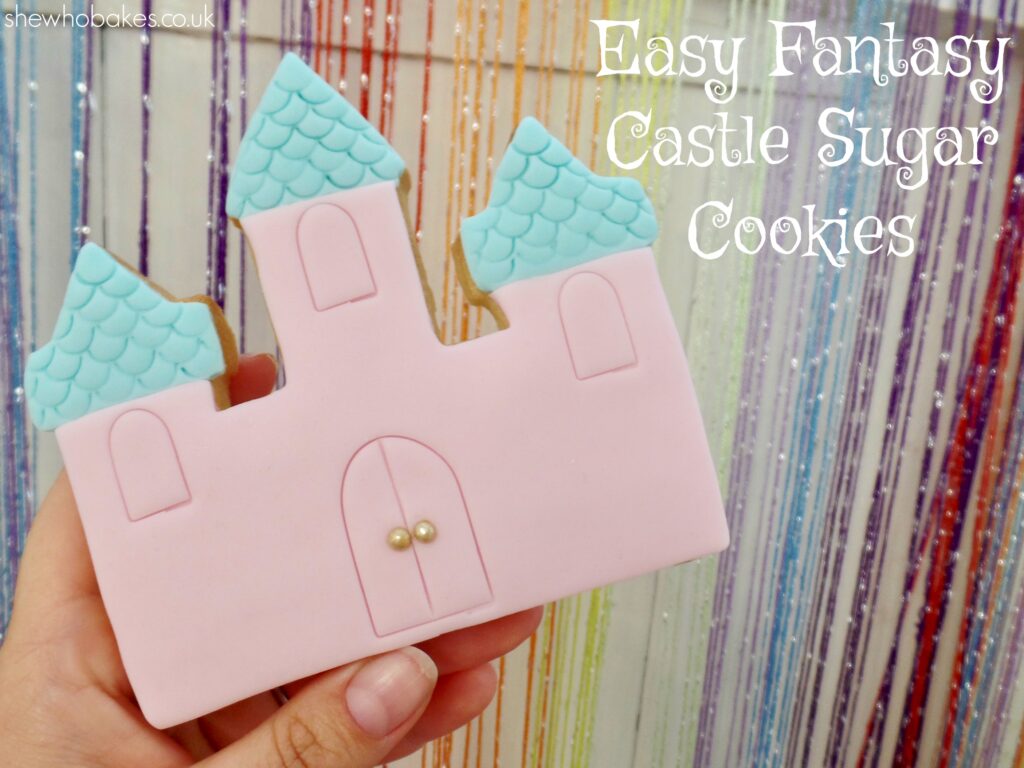
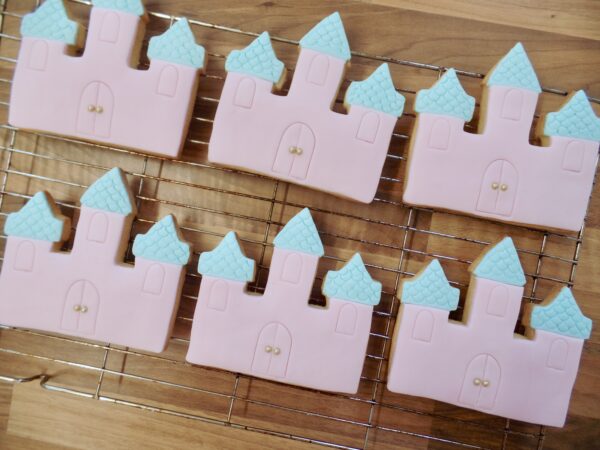
While these cookies might not be as detailed as the castle itself, they are sure to add a little Disney magic to your kitchen.

To make these, I’ve used my super reliable no-spread sugar cookie recipe which you can find here. As the cutter is quite big (which is great as I love cookies), I got six of cookies out of this recipe.

I cut out the castle shape with this cutter and after baking them for the full 15 minutes, I left them to cool completely.

To decorate, I used a 500g pack of ready to roll sugarpaste/icing. I coloured ¾ of it pink using Sugarflair Pastel Baby Pink and ¼ of it blue with Sugarflair Pastel Aqua. I highly recommend using professional colours like Sugarflair which are concentrated and you apply with a cocktail stick as opposed to cheaper colours that are mostly water and will melt your sugarpaste.

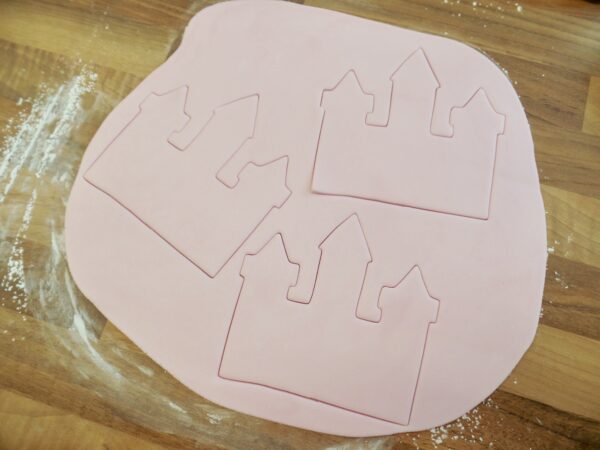
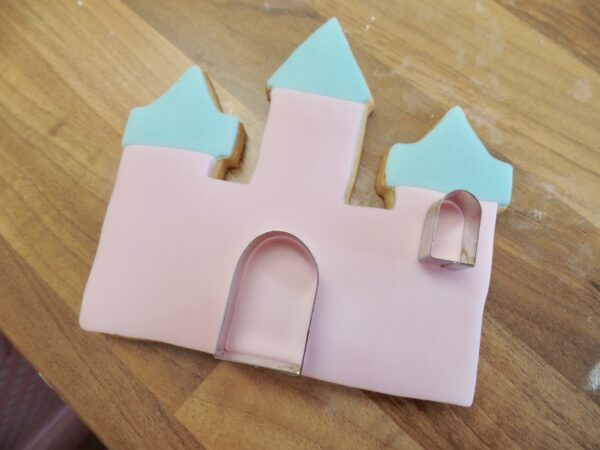
Once colures, I rolled out the pink on a surface dusted with cornflour using a large rolling pin and icing spacers. I then cut out the castle shape using the cookie cutter.

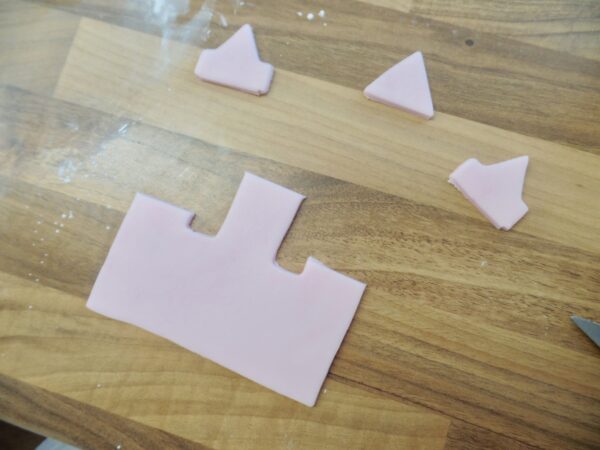
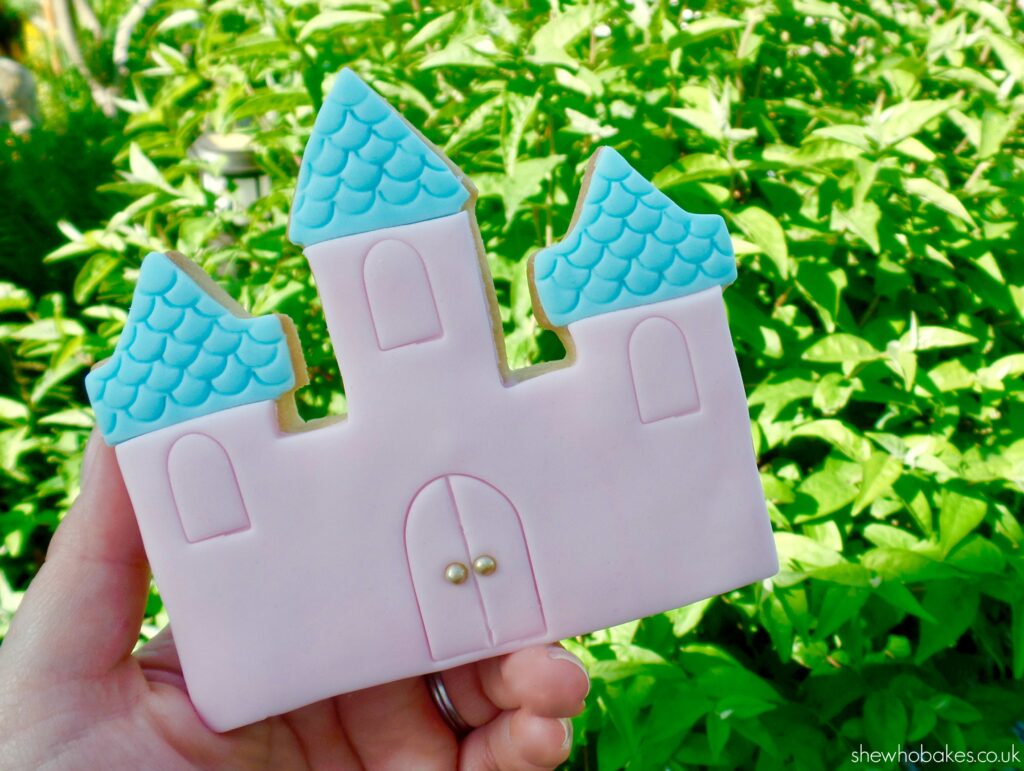
To copy the design of the Disneyland Paris castle, I then cut the turrets off (as I will be cutting them out in blue later), but feel free to have the castle all one colour if you like!
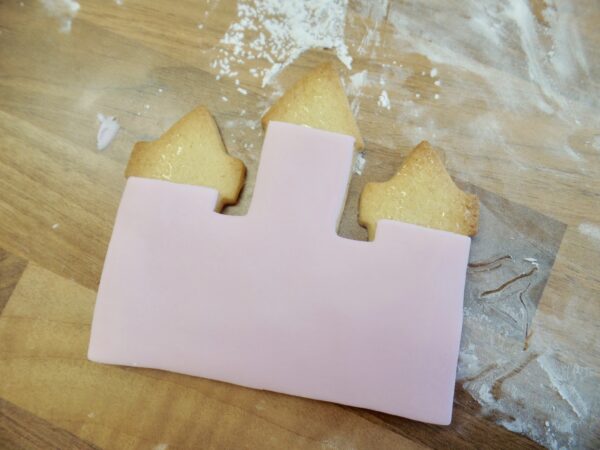
Once the turrets were cut off, I painted the cooled cookies with a little piping gel using a silicone brush. Edible glue works well too. I then gently lifted the sugarpaste shape from the surface and smoothed onto the top of the cookie, lining up the turret shapes.

Be careful at this point because the icing is super soft, gently push it down making sure to not leave any finger marks.

Once you’ve done this for all six of your cookies, roll out the blue sugarpaste in the same way.

This time, using the cutter, only cut out the top turrets and trim them to size. Stick them down to the top of the sugar cookie, again using a little piping gel or edible glue.

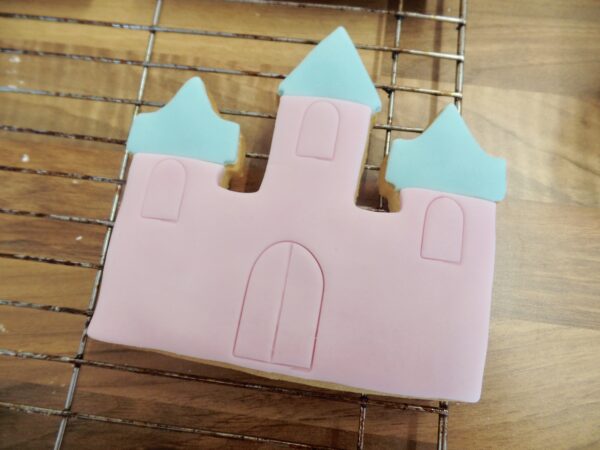
For the door and the windows, I’ve used an old cutter I have which is actually for gravestones! I can’t remember where I got them from but I did manage to find some similar ones on eBay here. You could always use any cutter you have thats similar or do it by hand.

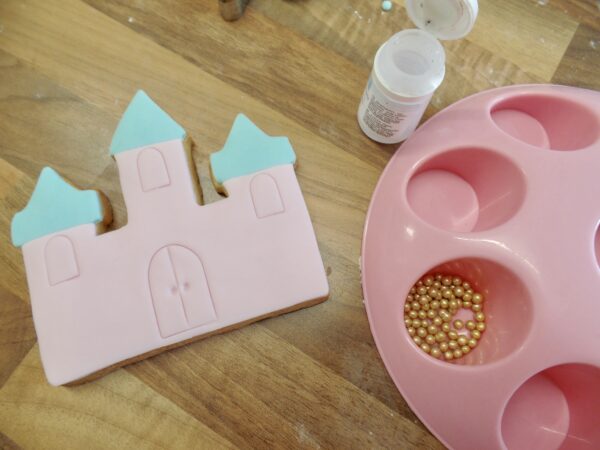
I gently pressed in the cutters to indent the shape. Then using a sharp knife, I made the line down the middle of the doorway.

For the doorknobs, I used a ball tool to indent into the cookie and then painted a little bit of edible glue into the hole. I then gently pressed in an edible gold pearl.

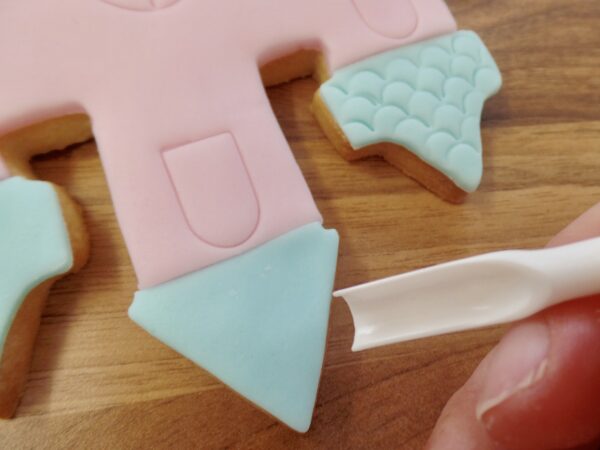
Finally, for the turret design, I used a ‘smile’ tool and gently pressed it in from the top, in rows to create a rooftop tile pattern.

Leave the cookies to set, preferably overnight, and then enjoy!

Kept in an airtight container they will last up to two weeks.

You can buy all of the equipment I have mentioned from Iced Jems.

You can find my other Disney themed bakes, including Mickey & Minnie CookiesMickey Rice Krispie Treats and Chocolate Chip Mickey Cookies here.

f you’re baking any of my recipes or using any of my blogs, let me know how you get on, either on Facebook or Twitter or Instagram.

Happy baking!

Britt xo


Sign Up to my Newsletter

Subscribe here to my newsletter!

Designed by Clockwork Moggy