Owl Tutorial

08/14

1. You will need;

Your desired colour of modelling paste and yellow flower paste.

A selection of small circle cutters.

A heart, leaf and small blossom cutter.

A smile tool.

Edible glue and a paintbrush.

2. Roll a small ball of modelling paste and pinch the top to make the ears.

3. Shape the bottom to sit flat.

4. Cut out three leaves and glue them on top of one another, like so. These will be the wings.

5. Fix the wings onto the side of the owl’s body with a little edible glue.

6. Cut out a small heart shape for the owl’s tummy.

7. Using a smile tool, indent ‘feathers’ onto the heart.

8. Cut out two white circles for the outside of the eye.

9. Cut out a smaller circle in a desired colour for the inside of the eye. Also cut out a small diamond in yellow for the beak.

10. Cut out two yellow blossoms for the feet. Glue these to the bottom of your owl.

11. Roll two small balls of black and even smaller balls of white to finish the eyes and give your own character!

Hope it helps and make sure to let me know on Facebook or Twitter how you get on!

Happy baking,

Britt xo

Feast Festival of Food & Drink – Maidstone

08/14

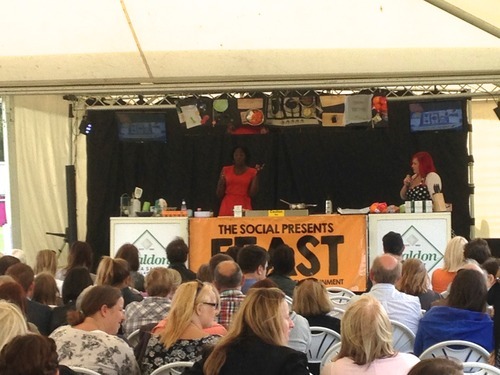
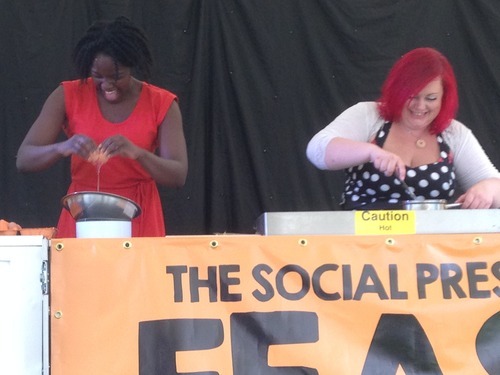
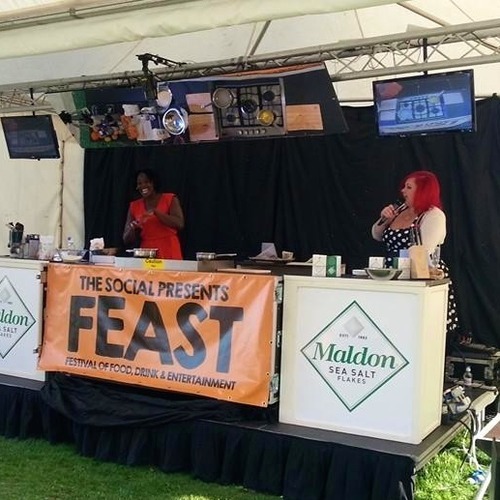
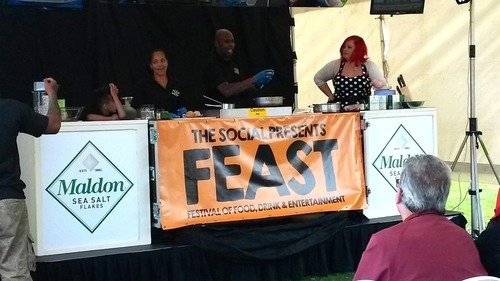
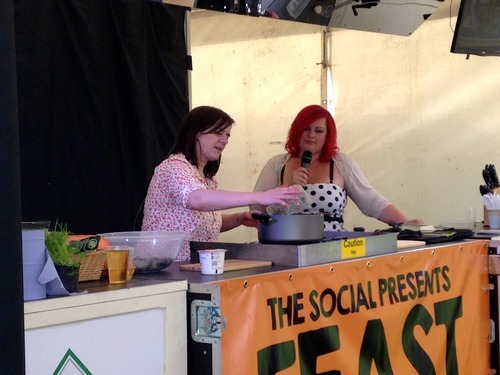
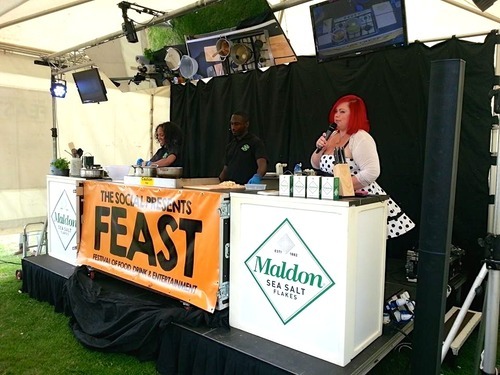
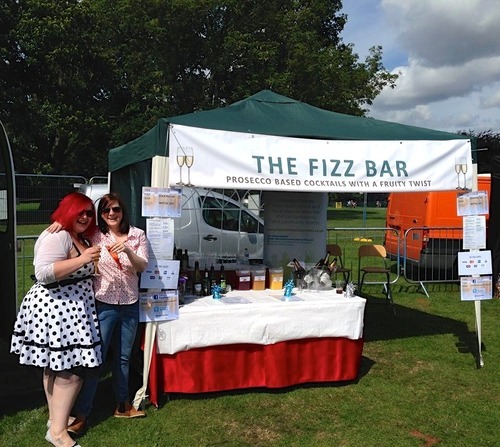
This weekend, I was very proud to compere the live cooking stage at the Feast Festival of Food & Drink in Mote Park, Maidstone. On Saturday 23rd I was joined by Great British Bake Off finalist 2013 Kimberley Wilson and on the Sunday 24th I was joined by Masterchef 2013 winner Natalie Coleman.

Both ladies were absolutely brilliant. Kimberley baked a Lebanese-style Carrot Polenta cake which tasted amazing! The recipe for that bake can be found here. Natalie made two dishes, mussels with bacon, leek and cider and also a blueberry clafoutis. Both recipes can be found in Natalie’s upcoming book, details can be found here.

I also had another Natalie joining me on stage, from Easy Nuh. Natalie showed us how to make a caribbean classic of ackee and saltfish with sweet dumplings. Details of this recipe can be found in Natalie’s recipe book and you can find out more about it here.

As well as the chefs stage, there were pop up restaurants, street food vendors and stalls to satisfy a sweet tooth. There were also a few bars serving local beer and ale, champagne cocktails and alcoholic smoothies.

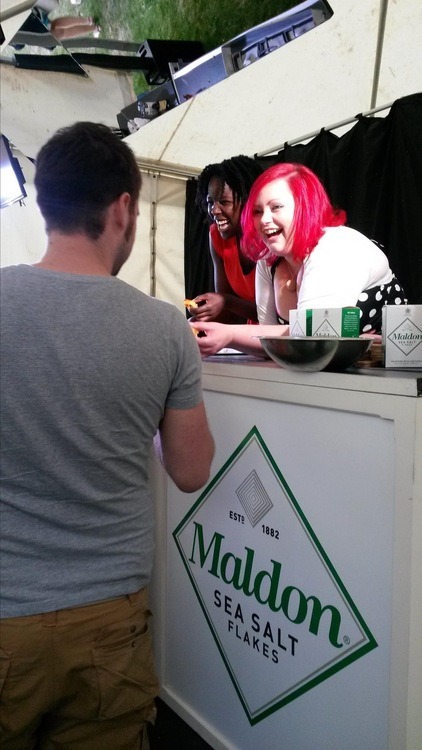
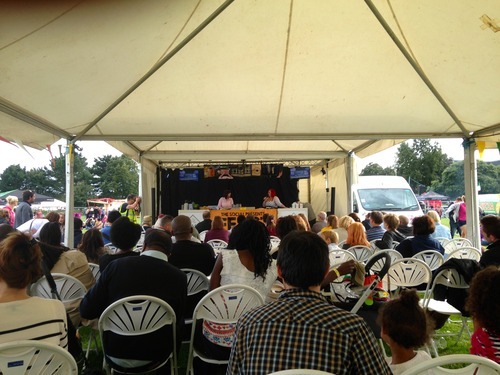
It was a fabulous foodie festival in my home town of Maidstone  that I am very pleased to say I was part of. Here are a few of my favourite pictures from the weekend.

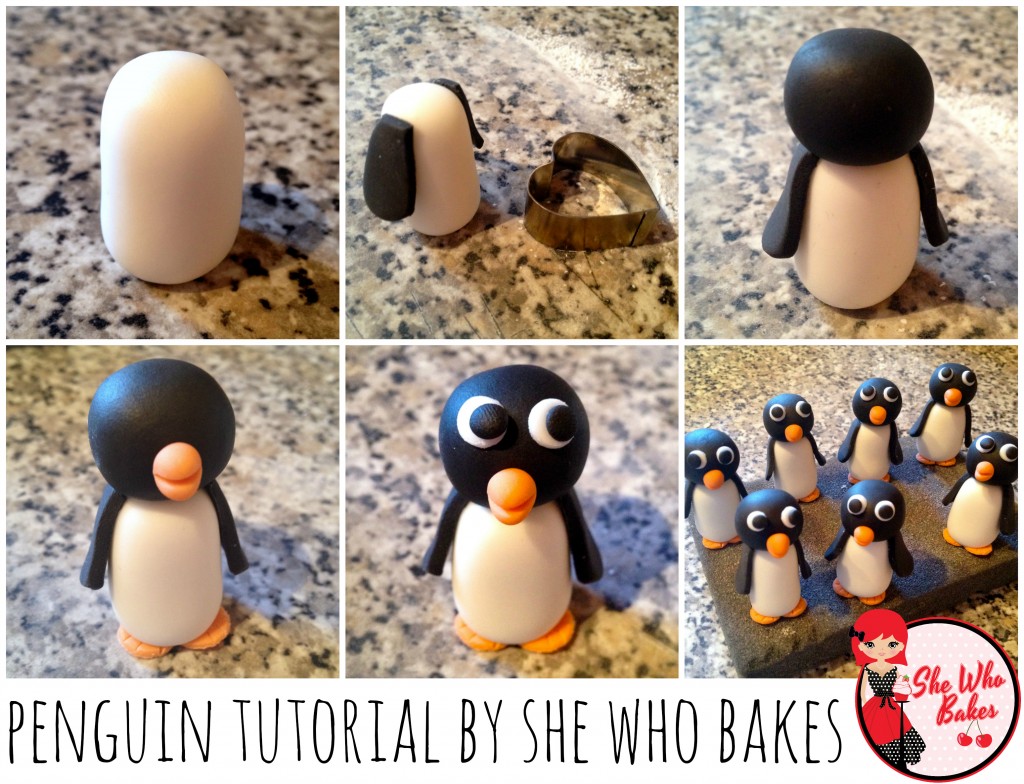
Penguin Tutorial

08/14

You will need;

White, black and orange modelling paste.

Edible glue and paintbrush.

Heart and small circle cutter.

  1. For the body, roll a small ball of white modelling paste and shape into a sausage with flat ends. .
  2. Roll out some black modelling paste and cut out a small heart shape. Cut this in half and also cut the pointed end off. Glue these on to the body to create wings.
  3. Roll a small ball of black modelling paste for the head and fix onto the top of the body with edible glue.
  4. Roll a small ball of orange modelling paste and shape into a cone for the beak. Use a scalpel to cut ¾ of the way into the cone to open up the beak. Fix on with edible glue. Roll out your orange modelling paste and cut out a small circle, cut the circle in half using your scalpel, these will be the feet. Mark out three lines on each for toes. Glue these to the bottom of your penguin.
  5. For the eyes, roll out white modelling paste and cut out small circles, do the same with the black modelling paste but use smaller circles. Glue these on to the head of your penguin.

Give it a go and make sure to let me know on Facebook or Twitter how you get on!

Happy baking,

Britt xo

Thank you Bee

08/14

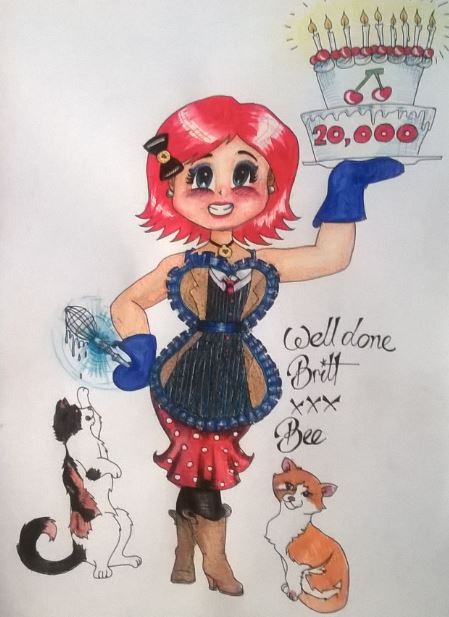
Oh my goodness!! I have just received the sweetest gift. Belinda Bassett drew me this fabulous picture to congratulate me on hitting 20K likes on Facebook. Thank you so so much! I LOVE IT!!!
(For those who don’t know just how obsessed I am with Doctor Who, which explains the 10th Doctor themed apron and SONIC WHISK!)

Britt xo

Q&A with Claire Goodwin from GBBO

08/14

image

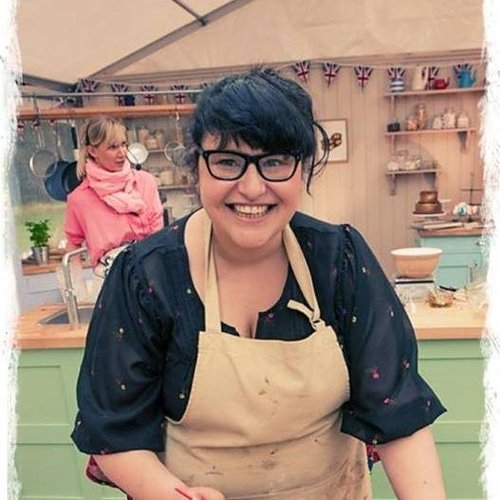
Joining me for todays Q&A is the lovely Claire Goodwin! Claire lives in Cheshire, where she works as a speech and language therapist. She has been baking since she was 11 years old. Both her mother and grandmother were wedding cake decorators and her father a chef.

Claire sadly left the tent in week one but left a fab impression with her sweet disposition and bright personality! 
image

How has life been since leaving the tent?

As I left on the first weekend, I had the summer to myself really. Previous to the tent you do lots of recipe development once you know you are in the final 12. Prior to that it is all auditions and interviews. A really hectic time really. Between leaving the tent and the press releases a week before the first transmission it was quite a lull really with the exception of filming the final at Welford Hall and the filming of my Extra Slice. During the summer I was able to plan and design my website with a lovely web company and gear myself up for what the production staff kept saying would be the ‘madness’. It was only when the press releases came out a week before that everything started to get really hectic and the realisation of how big all of this was hit me. Even though I went in the first week, I was so proud to have been part of it. 

What one memory from being on the Bake Off will stay with you?

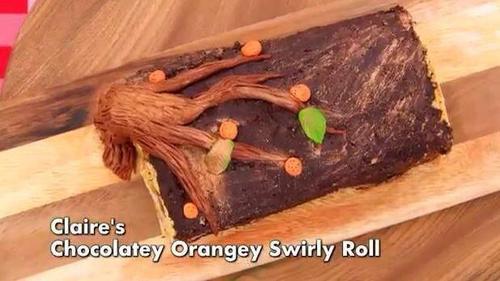
I have so many, but one that stands out involves Sue Perkins. When I had finished my Swiss Roll (which did not look like that at home) I stood back and looked at it. I wasn’t happy. I had battled with my ganache splitting and going bitty (I made that ganache five times in the tent, desperately hoping the cocoa content of the chocolate would miraculously deplete each time) I split the bloody thing rolling it up roll and then I had manically started tried to decorate with fondant what I hoped would be a beautiful rustic orange tree and a few leaves and oranges, dusted with lustre dust. Anyway, Sue came over and said ‘Why is there a Claw on your Swiss Roll’, accompanied by Freddie Kruger type movements and a few horror movie noises. I started laughing and joined in with the claw movements. Then, every time I looked down at my horrifying Swiss Roll, I knew I was going home. I’ll send you a pic of it!
image

If you had stayed on GBBO, what week would you have rocked?

A few of them. I had a cracker of a recipe for bread week, which involved stuffing a full English breakfast into a loaf and calling it The Great British Breakfast Loaf. It’s bread week this week so I’m making it. I’ll put it up on my website when I have taken some pics. I really thought my pies were great too. I did a recipe for self saucing puddings that I was particularly proud of which was sticky toffee pudding with a melting penuche centre. I’ll pop the recipe up on my site on pudding week. I felt so disappointed that I didn’t get to show the judges what I really could do! 

Do you still keep in touch with the other contestants?

We talk every day. We have our own little virtual chatroom. We also meet up when we can and are going to meet up in September. Also I will be seeing them for the final Extra Slice filming too. It’s been an awesome experience. I have met so many lovely people and all of the bakers I admire individually for differing reasons. I suppose without Bake Off we would be a bit of a Motley Crew but we are a little bit like a family now. 
image

Claire’s chocolate and cherry cakes.

What was the best thing that happened during your experience?

I think being able to have the opportunity to write has been awesome for me. The Bake Off has given me a little audience that likes to read my ramblings on my blog posts. There are only a few at the moment, but I am planning to expand my website as much as I can over the coming weeks. 

Take 5!

1. What is your favourite thing to bake?

A lovely fluffy white loaf

2. Define your baking style in three words.

Creative, inventive, therapeutic

3. What is the best advice you have been given?

Keep talking, no matter how small your problems may feel like they are to others, keep talking. 

4. Sweet or savoury?

A little from column A and a little from column B. Don’t restrict me!

5. Finish the sentence: “Baking, to me…”

Baking, to me, relaxes my brain and feeds my soul.”

Thank you so much for joining me Claire! You were awesome and I look forward to seeing what you get up to next!

You can keep up with Claire’s latest goings on at www.baketherapy.co.uk and on Twitter – @bake_therapist

Tonight is bread week on Great British Bake Off! I will be, as always, live tweeting throughout the show so join in the conversation with me here or on Facebook!

Britt xo

Top 10 tools for cake decorating

08/14

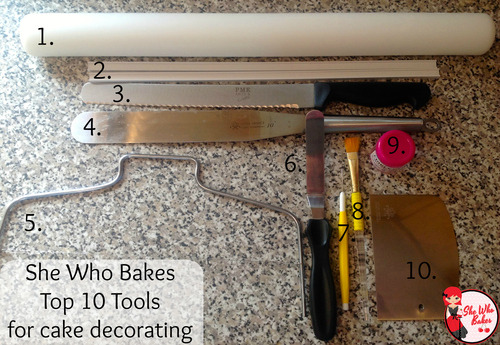
Recently in an interview, I was asked what were the best tools to get when you are starting out as a cake decorator so I thought it would be best to list my top 10! Now, I’m not saying I could live without any of my other tools, however, these are the 10 most used tools in my kitchen when I am specifically icing and decorating a cake. 

image

Price guide – 

£ – £10 or under. ££ – £10-£20.

Number 1.

What is it? A 16 inch non stick rolling pin.

Who makes it? PME.

Why do I need it? It doesn’t leave any marks on your icing like wooden rolling pins and is much easier to keep clean.

Price Guide – ££

Number 2.

What is it? Marzipan and icing spacers.

Who makes it? PME.

Why do I need it? It makes sure your icing and marzipan is evenly rolled and to a good thickness.

Price Guide – £

Number 3.

What is it? A 10” serrated cake knife.

Who makes it? PME.

Why do I need it? Super sharp and well made, this cuts through cakes like butter making it easy to level the tops of your cakes.

Price Guide – ££

Number 4.

What is it? A 10” stainless steel pallet knife.

Who makes it? Little Venice Cake Company.

Why do I need it? Great for spreading onto large surfaces andIt makes lifting up and moving your iced cakes very easy indeed.

Price Guide – £

Number 5.

What is it? A 10” cake leveller.

Who makes it? PME.

Why do I need it? I can’t cut through a cake in a straight line to save my life, so this is perfect for splitting your sponge cakes evenly.

Price Guide – £

Number 6.

What is it? A 4.5” cranked pallet knife.

Who makes it? PME.

Why do I need it? With the cranked knife, it makes spreading buttercream in and on your cakes so much easier and gives a nice, smooth finish.

Price Guide – £

Number 7.

What is it? A scriber.

Who makes it? PME.

Why do I need it? This little tool is great for marking out spaces on your cake and perfect for bursting any unwanted air bubbles in your icing.

Price Guide – £

Number 8.

What is it? A wide paintbrush.

Who makes it? PME.

Why do I need it? Fab for affixing decorations onto your cake with edible glue and use it dry to brush off any excess cornflour from your decorations.

Price Guide – £

Number 9.

What is it? Edible glue.

Who makes it? Sugar City (DPM)

Why do I need it? To fix decorations onto your cake. Also good for sticking icing to your boards. (Because naked boards should be outlawed.)

Price Guide – £

Number 10.

What is it? Side scraper.

Who makes it? Little Venice Cake Company.

Why do I need it? Perfect for achieving a smooth finish when crumb coating your cakes.

Price Guide – £

So, there we have it. My top 10 tools for cake decorating. Of course… a special mention goes to a turntable and a set of smoothers. 

You can find all PME products on their website here, all LVCC products from docrafts, here and Sugar City products here.

Hope that helps and if you have an questions, please don’t hesitate to get in touch either on Facebook or Twitter.

Happy baking!

Britt xo

How to make edible drapes

08/14

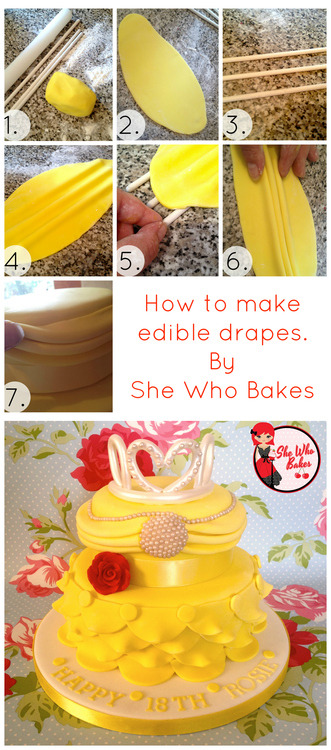
Hello muffins, I’ve had a fabulous response to my Belle from Beauty and the Beast inspired cake. Thank you very much. I have had enquiries as to how I made the drapes around the top tier. So, from me to you, here is a picture tutorial to show you how!

image

  1. You will need modelling paste, three dowels, a rolling pin and a cornflour dusted surface.
  2. Roll out a strip of your modelling paste to the thickness of about 3mm.
  3. Space your dowels evenly on your surface.
  4. Lay your modelling paste over the top and gently press down onto the dowels, making sure you can clearly see them through the paste.
  5. Pull your dowels out carefully.
  6. Pinch together the modelling paste to create pleats. 
  7. Cut off both ends and affix to your cake with edible glue.

Hope it helps and make sure to let me know on Facebook or Twitter how you get on!

Britt xo

Sign Up to my Newsletter

Subscribe here to my newsletter!

Designed by Clockwork Moggy