Cake Stands

06/15

It has come to my attention lately that department stores have really stepped up their baking game. There’s tools, equipment, even cake boards in shops that previously all you could find was a mixing bowl! Baking accessible to the masses is what I’m all about, so this makes me very happy.

With that in mind I give you 10 of the best department store cake stands that I am loving right now!

HOF 1 HOF 2

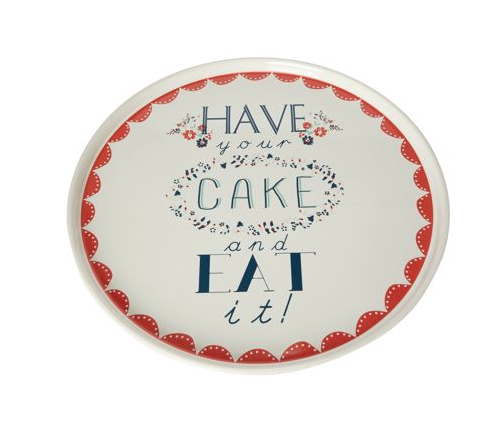
Linea – Born to Bake Cake Stand
Where can I get it? House of Fraser
How much is it? Now £31.50 (Was £45.00)

HOF Ted Baker

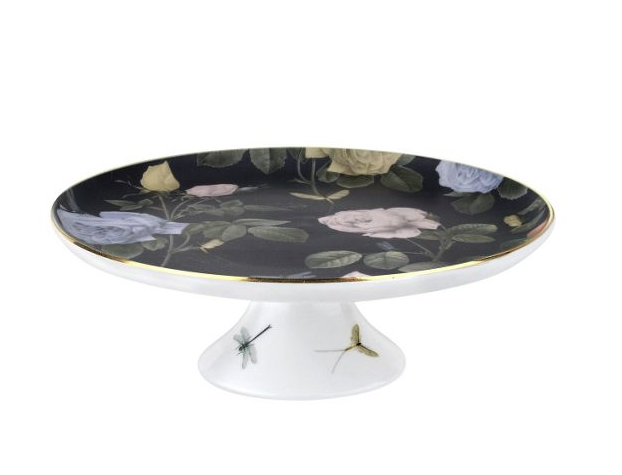
Portmeirion Ted Baker Footed Cake Stand Black
Where can I get it? House of Fraser
How much is it? £70

John Lewis 1 John Lewis 2

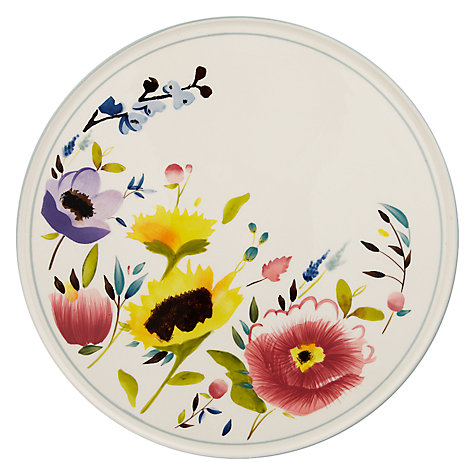
Bluebellgray Cake Stand
Where can I get it? John Lewis
How much is it? £48

John Lewis Cath

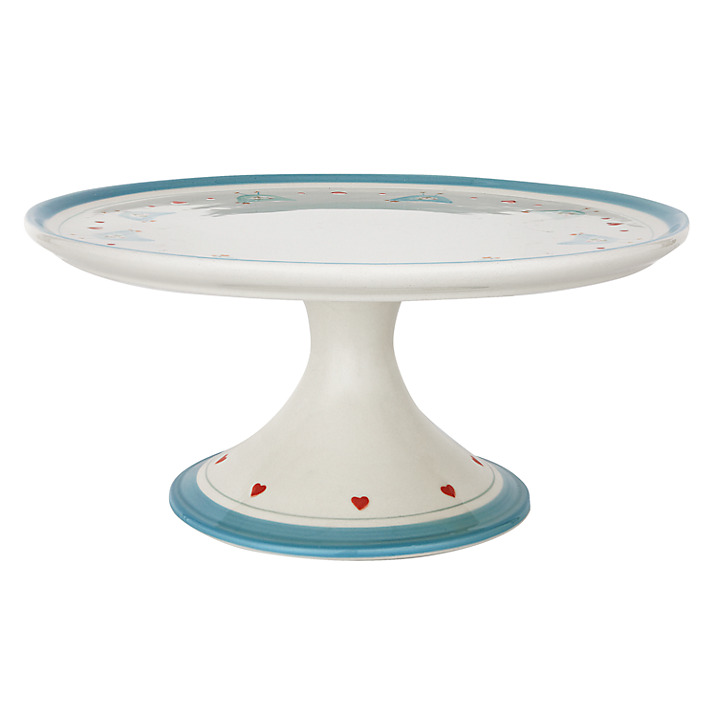
Cath Kidston Cranham Cake Stand
Where can I get it? John Lewis
How much is it? £20

 John Lewis Polly 2John Lewis Polly 1

Polly’s Pantry Cake Stand
Where can I get it? John Lewis
How much is it? £24

M&S dome

Pretty Embossed Cake Stand with Dome
Where can I get it? Marks & Spencer
How much is it? £17.50

M&S glass stand

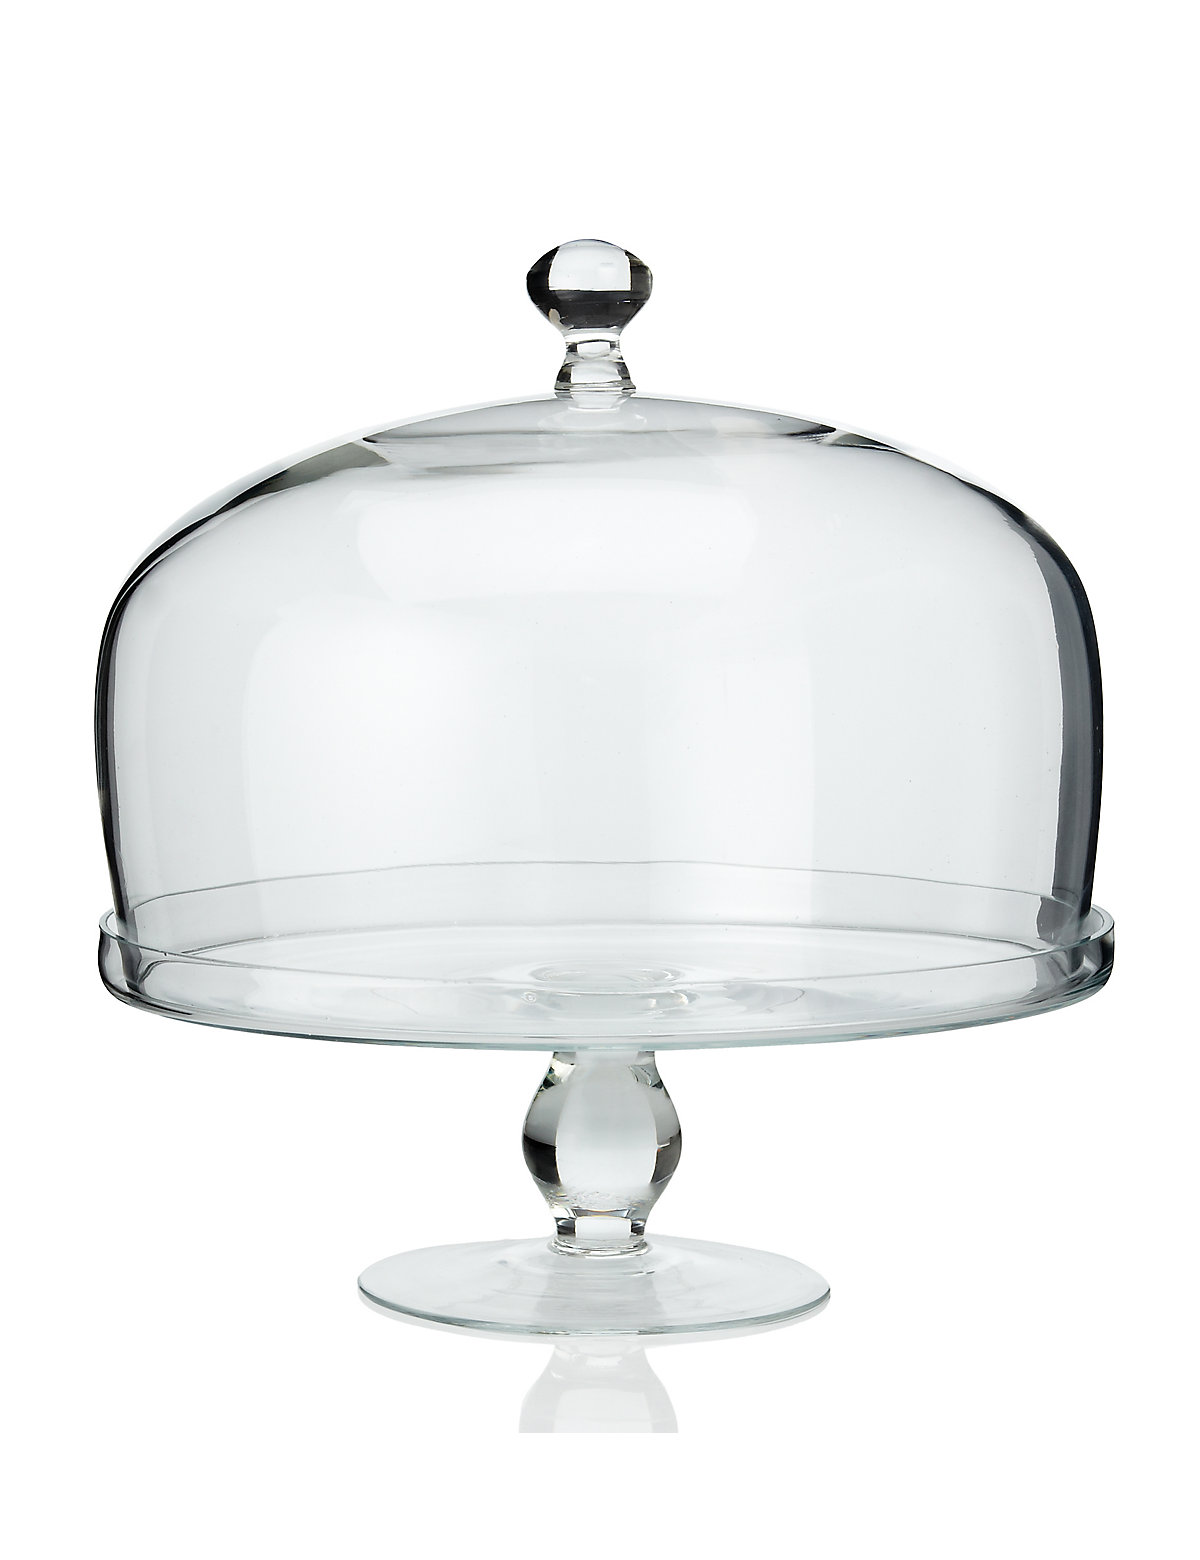
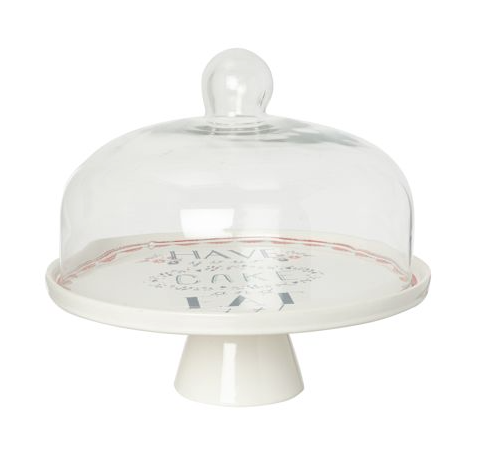
Glass Cake Stand with Dome
Where can I get it? Marks & Spencer
How much is it? £39.50

Debenhams Daisy

Portmeirion Multicoloured ‘Crazy Daisy’ Cake Stand
Where can I get it? Debenhams
How much is it? £40

Debenhams Monsoon

Denby Fine china ‘Monsoon Antalya’ pedestal Cake Stand
Where can I get it? Debenhams
How much is it? Now £24 (Was £30.00)

Selfridges Royal Albert

Royal Albert Cheeky Pink Small Cake Stand
Where can I get it? Selfridges
How much is it? £40


Happy Birthday to Me!

06/15

This week, it was my birthday!
I’ve made my own birthday cake since I first started baking and I wanted to share with you these pictures to show you how far I’ve come. I can remember being SO PROUD of my princess castle cake back in 2011, the same pride I’ve just felt finishing my cake this year. I’m learning every day and I’m loving it.

I had such a great time yesterday celebrating my birthday. Thank you all very much for all the lovely messages and posts! The weather was beautiful and the drinks were flowing. And as promised, here was this year’s cake!


IMG_4130
Britt xoxo

Kent Digital Awards

06/15

Hey you, yes you, guess what? You are now reading an AWARD WINNING BLOG. Haha!

I am one very happy girl! Last night at the Kent Digital Awards I won the Bronze Award for Best Website : Lifestyle & Culture and the GOLD Award for Best Blog!!
I started my little blog as a diary, then introduced baking and continued to write as a means of dealing with my depression after my mum had died. Baking and blogging turned my life around and to be honest, saved me. I am honoured to be recognised not only in my industry, but also the digital world.
Thank you to everyone who has believed in me. It means more than you will ever know. I know I’m making my mum proud.
Massive thank you to Clockwork Moggy who turned my vision into a reality with my beautiful website, and to my wonderful partner, Tim Box. Thank you for supporting and believing in me. xoxo

IMG_4033 CHz4FRSWUAArG2F.jpg-large

Double Boarding a Cake Tutorial

06/15

Double boarding a cake is a lovely little technique to use if you want to add a little height to your cake, or play around with the design. In my example, I’ve used a double board to create a wave in the sea beneath this English seaside wedding cake.

Double Board Logo

You will need;

  • Two 12mm cake boards. (Here I’ve used a 13″ and 15″)
  • Double sided tape
  • Scissors
  • Clear Piping Gel
  • Silicone brush
  • Sugarpaste to cover your boards
  1. Turn over the top board and cover the back lines of double sided tape.
  2. Peel off the backing, which is always harder than it looks.
  3. Stick the top board down in the middle of the bottom board.
  4. Cover both boards, including the edge of the top board in a thin layer of Piping Gel.
  5. Roll out your sugarpaste and using your rolling pin, gently life onto your boards. Use your hands or a pair of smoothers to smooth down.
  6. Leave to set overnight before decorating.

If you wanted your boards two different colours for different effects, ice both and eave to set overnight, then stick them together using a little royal icing. If using this method, don’t forget to cover the edge of what will be the top board with sugarpaste or a ribbon.

For more about cake boards and their uses, check out my End the Nakedness blog.

Happy baking!

Britt xoxo


Sign Up to my Newsletter

Subscribe here to my newsletter!

Designed by Clockwork Moggy