Hello muffins!
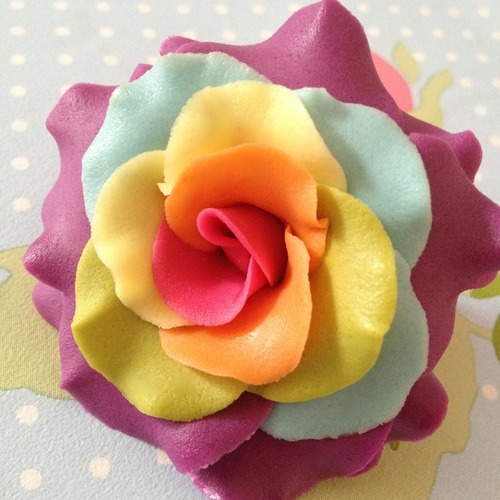
Right, it’s been grey and drizzly outside today in Kent so I thought, what better way of brightening up the day than making a rainbow rose! And, because you lot always brighten my day, I thought I’d share the tutorial with you all.
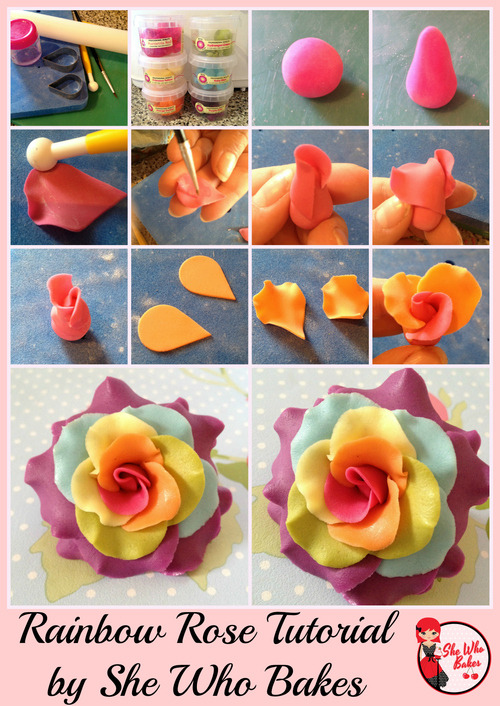
- You will need; a small and large rose petal cutter, ball tool, paintbrush, edible glue, foam pad, rolling pin, working board. (Or dusted surface)
- You will also need flowerpaste. I’ve gone with the colours of the rainbow by Beau Products Ltd. (N.B The pink I’ve used it in the wrong pot, it’s clearly not poinsettia red. I was recycling!)
- You first need your rose cone. Roll a small ball of whatever colour you will be using in the middle of your rose.
- Shape this into a cone shape like so and leave to dry.
- Cut out two small petals and transfer to your foam pad. Use your ball tool to frill the edges of your petal by pressing it down half on the petal, half on the pad and running it around the edge. This can take some practise, so don’t worry if you don’t get it on the first go.
- Paint the back of the petal thinly with glue.
- Wrap it around your ready made cone.
- Repeat the frilling for the second petal and glue this slightly inside the wrap of the first petal.
- Repeat with your next colour, so cut out and frill.
- Glue these petals slightly inside the wrap of the previous petal.
- Repeat for your third colour and when you get to the fourth colour, switch to the bigger petal cutter.
- Keep going until you are happy with the size and shape of your rose.
- Leave to dry then use as desired!
And there you have it, a rainbow rose! Perfect to brighten up any cake. Obviously, this tutorial works with single coloured roses too. 😉
Give it a go and let me know how you get on as always either on Facebook or Twitter!
Happy baking (and decorating!)
Britt xo