
Last week was my 31st birthday and I had the most amazing time! A personalised escape room built by Tim to find all my presents, a spa break at Rowhill Grange Hotel followed by a day out in London completing the Sherlock Holmes Escape Room (with the Sherlock Holmies – thats our escape room group name!), cinema trips, beach days, lots of tasty food and drink, it’s honestly been wonderful. Tim has just been amazing the whole time and my friends have helped make it magical as usual.
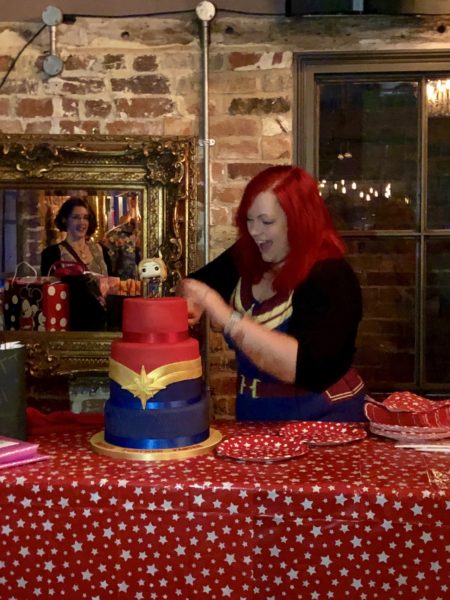
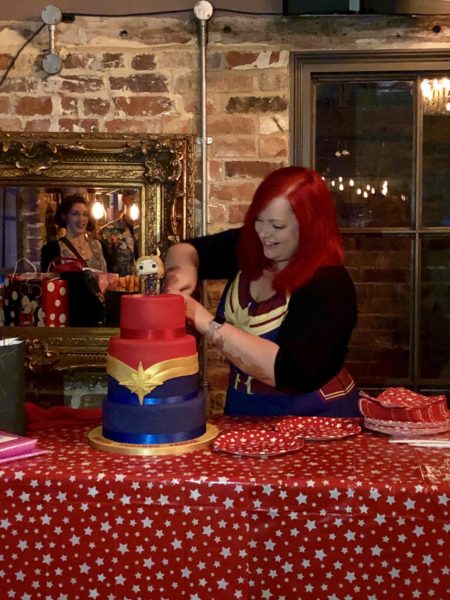
In the middle of it all on Friday night, I had a party at a private bar and, as always, I made my own birthday cake for it. It’s something I’ve been doing since I started baking back in 2010 and even though I always complain about it, I always enjoy it really!
Previous years themes have included Unicorns, Mermaids, Rainbows and last year was a Harry Potter/Slytherin special. But this year, I knew what the theme was going to be from very early on. Ever since I walked out of the cinema at the end of Captain Marvel back in March, I wanted my cake to be a celebration of my favourite superhero in red, gold and blue.

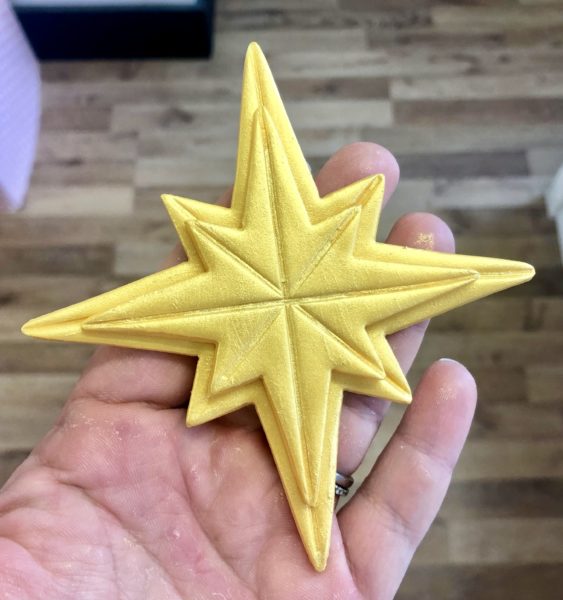
I knew I wanted the cake to look like Captain Marvel’s final red, gold and blue outfit but at first I wasn’t sure how I was going to do the star. I’m not very good at cutting anything out freehand and I struggled to find the right shape and size cutter. That was, until I found this set of three 3D printed cutters on Ebay. They came all the way from Australia and were perfect!
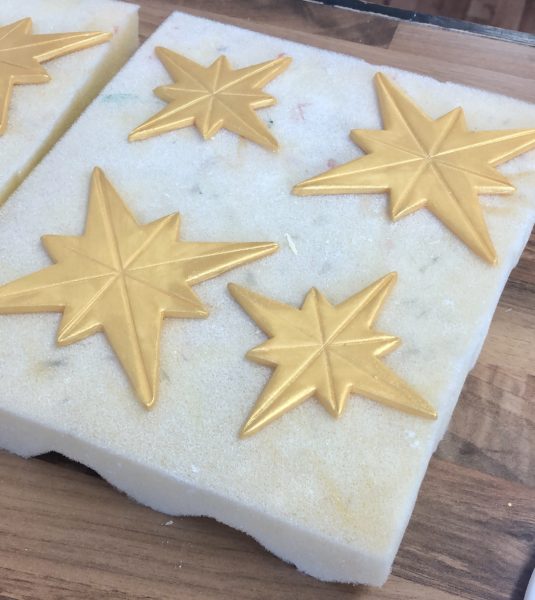
I cut the stars out with modelling paste that I coloured yellow with Sugarflair Egg Yellow. I indented them with a stainless steel ruler to create a nice effect and then I painted them gold using Rainbow Dust Metallic Golden Sands mixed with a little rejuvenator spirit. I left them to dry on foam and once they were completely dry I stuck a smaller one on top of a bigger one using a little royal icing.
There are so many made in the second picture because if I’m only having one delicate decoration I like to make a few incase one (or two) breaks.

For the actual cakes themselves, I knew I wanted three tiers as I thought this would create a nicer effect for the suit and colours. However, with only about 50 people coming to the party, three tiers of cake would have been a waste. So the bottom tier was a 10″ round polystyrene dummy which I iced blue well in advance. This meant no cake would go to waste. I regularly use polystyrene dummies for bottom tiers of cake when I know it simply won’t get eaten. The bottom two tiers of our wedding cake were polystyrene for this exact reason. It also means you can decorate them months in advance to get ahead of schedule.
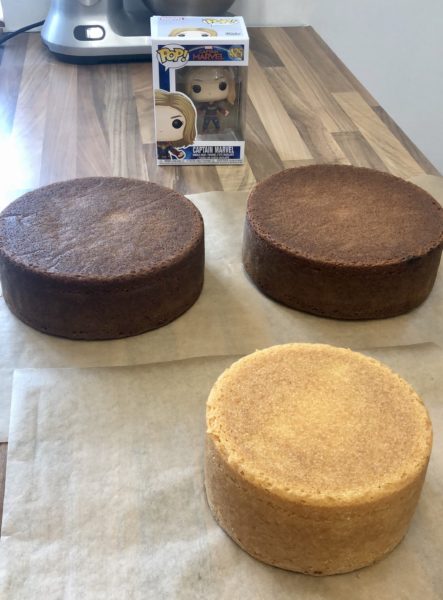
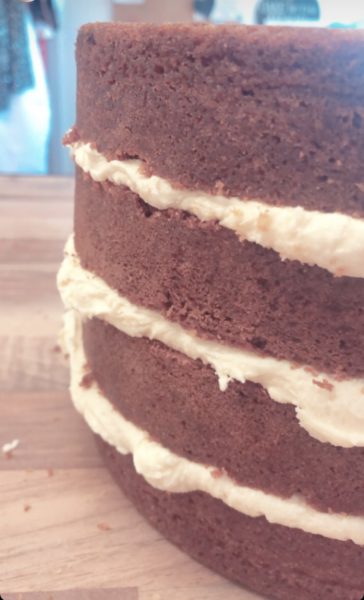
The middle tier was an 8″ round salted caramel, fudge and white chocolate with salted caramel buttercream and the top tier was a 6″ round lemon madeira with lemon buttercream. Two of my favourite flavours! Because I wanted the middle tier to be much deeper than the other two, I baked two 8″ round cakes which I planned on stacking.
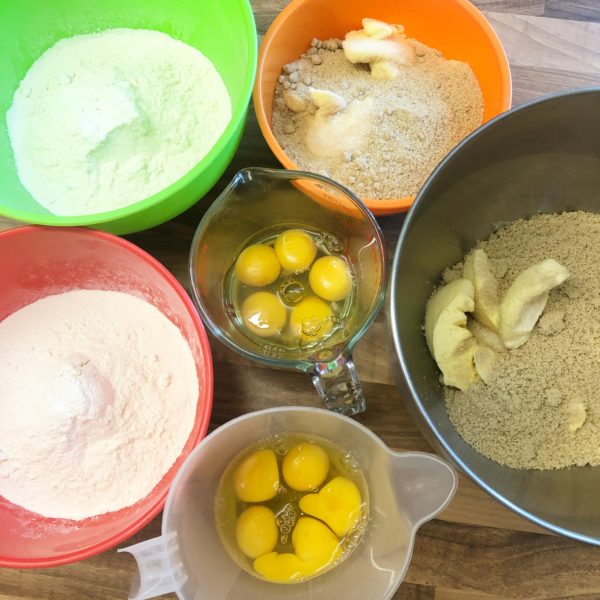
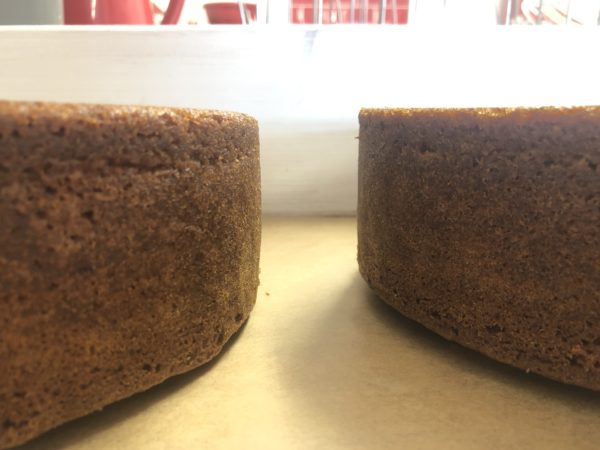
Firstly, I split the two 8″ round cakes in two. Then I turned one cake upside down so the very bottom would be super flat, then I filled the both the cakes with salted caramel buttercream and stacked them together using more buttercream. The 6″ round lemon, I split as I usually do, twice, making three layers of cake and two of lemon buttercream.
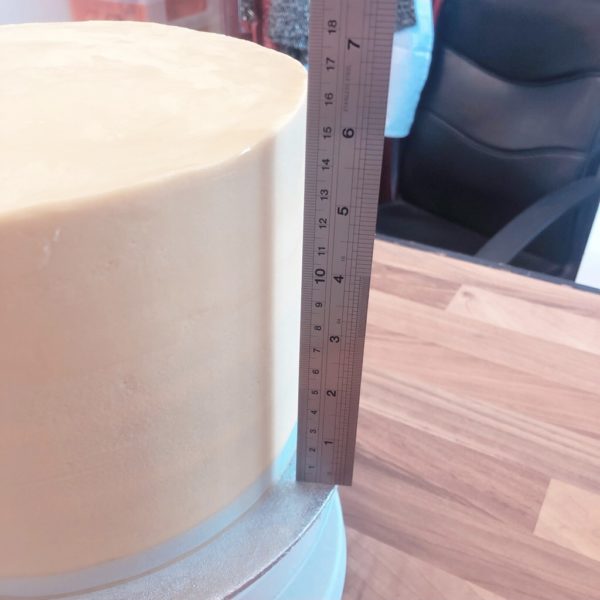
I secured both of these cakes on cake boards of the same size using a little buttercream and chilled for 10 minutes. Once this was set, I crumb coated (spread a thin layer of buttercream around the outside of the cakes) both of them in their buttercream flavours and chilled again. Finally I did a second layer of crumb coat, left to set and then they were ready to be iced! Once the middle tier was crumb coated it was already at nearly 7″ high!!


The bottom tier was iced using Renshaw Sapphire Blue Sugarpaste and the top tier was iced using Renshaw Poppy Red Sugarpaste. I will usually buy white Renshaw Extra paste and colour it myself using Sugarflair Concentrated colours but I made exceptions for black, red, dark blue and dark green. For these, I find it’s much easier to buy it pre-coloured.
As the middle tier was going to be iced in two different colours, I first iced it in a very thin layer of white sugarpaste. This meant it was so much easier to decorate as I didn’t have to worry about buttercream squidging out between the two different colour layers.
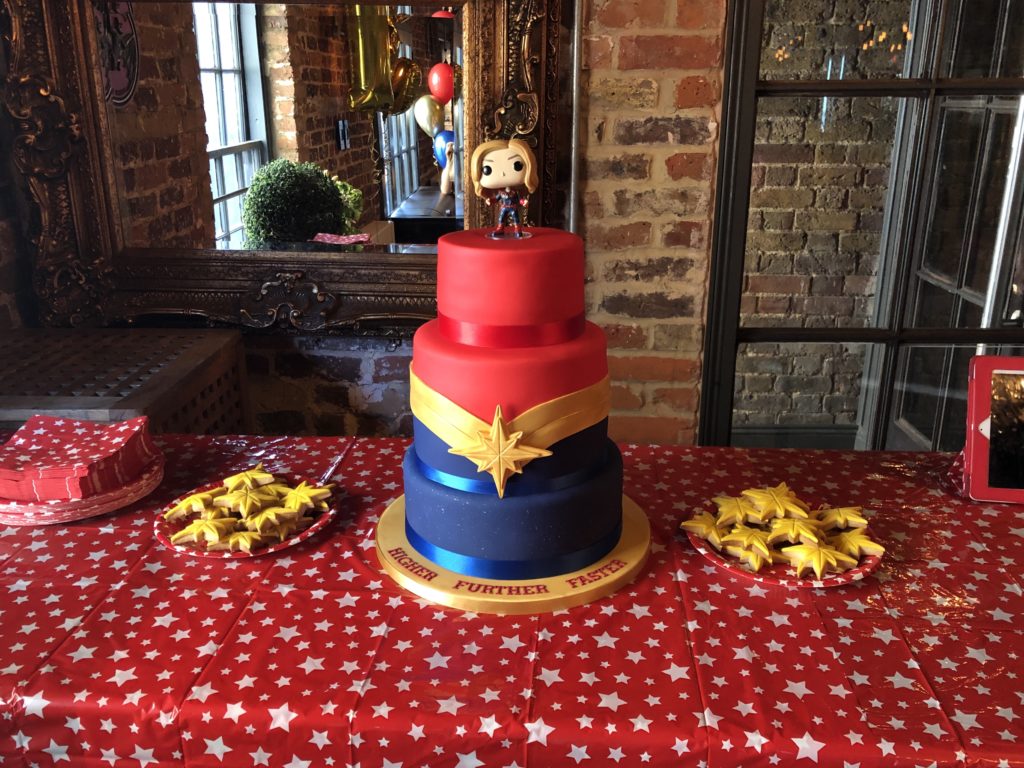
I also iced the 13″ round board in white sugarpaste I coloured using Sugarflair Egg Yellow and when dry, sprayed gold using lustre spray. I also cut out the wording I wanted ‘Higher, Further, Faster’ which is a line from the movie, using Mexican paste I coloured with Sugarflair Red Extra and tappit cutters. I left everything to set overnight before decorating. It all looked like this –

When it came time to decorate, I firstly wanted to give the bottom tier a bit of a ‘starry speckle’. I did this by mixing Pearl Rainbow Dust with a little rejuvenator spirit. I used a large brush and essentially flicked paint onto the cake, creating a night sky effect. I left this to dry for 30 minutes before sticking the bottom tier to the iced board using royal icing. I also stuck the letters to the board using a thin paintbrush and a little edible glue.
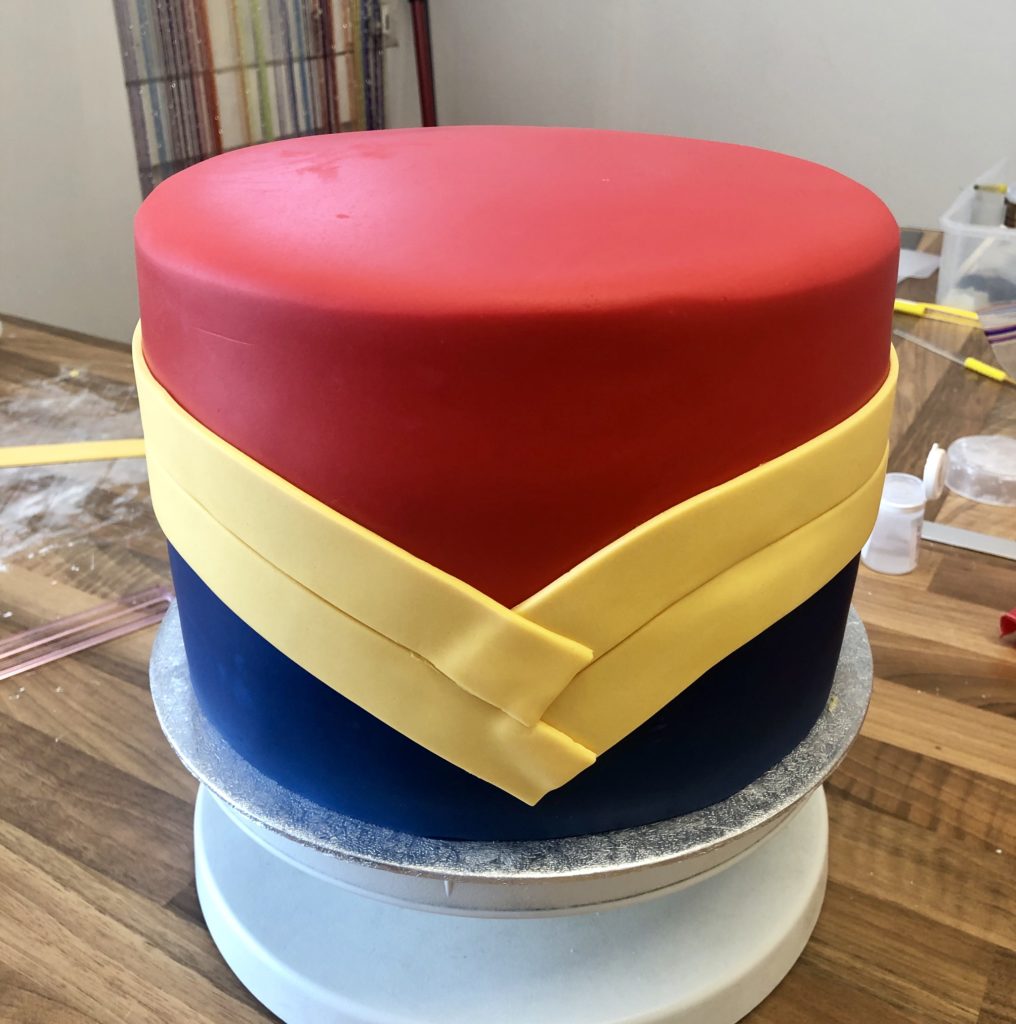
For the middle tier, this one was tricky and a little ‘trial and error’ (as all baking is I feel). I rolled out a long strip of the Renshaw Sapphire Blue sugarpaste and gently rolled it up. I unrolled it around the cake, checking it would fit and making marks where I wanted to cut it to size as I had the blue shallower at the front of the cake than the other sides. I then gently took the sugarpaste off the cake and cut as necessary using a pizza cutting wheel. Once I was happy with the size, I painted on edible glue to the white iced cake. I then unrolled and stuck down the blue sugarpaste where I wanted it.
Once I had done this, I rolled out the Poppy Red sugarpaste to size. Then I gently lifted it up using a rolling pin and plated it onto the cake. Using a scribe, I tried onto the icing around the cake where the blue was so I knew where to cut the red to meet it. I also made sure the front of the red was hanging lower than the rest to create the V-shape in icing. Once I was happy I carefully removed the icing from the cake, cut to size and stuck down with edible glue.
I’ll be completely honest, in 32C heat which it was last week, this bit was not fun. In hindsight, I would have used modelling paste and matched the colour to make my life easier but I was still happy with the results. I then cut out strips of modelling paste coloured with Sugarflair Egg Yellow using a strip cutter and stick these down over the red/blue joins using a little edible glue. Once the strips were dry, I painted them gold in the same way I did the big star.
Don’t be fooled by this picture. The red/blue join wasn’t neat in the slightest. But cake decorating is a bit smoke and mirrors isn’t it. Haha.
Once everything was set, it was time to stack the cakes. I inserted 5 bamboo dowelling rods into the 8″ cake and cut them to size. I then carefully lifted this monster of a cake and stuck it down to the polystyrene 10″ round using a little royal icing. Finally I stuck down the 6″ round cake on top, again with royal icing.
With the cake stacked, it was just left to do the finishing touches. I used 15mm golden ribbon to decorate the outside of the cake board, using 3mm double sided sticky tape. I also used 25mm royal blue and red ribbons to go around the bottom and top tiers, stuck together at the back with the same double sided sticky tape. The middle tier was meant to have the 25mm blue ribbon but I by the time I had decorated there wasn’t enough room. Luckily, I had some 15mm ribbon of the exact same colour in my drawers (it really helps to keep EVERYTHING) and so I used this instead.
For the topper, I was very tempted to make a Captain Marvel out of modelling paste but time constraints, schedule, the heat and to be perfectly honest my tiredness levels meant it was an impossibility so I went with a plastic Captain Marvel Funko Pop. I actually collect these, I’ve got quite a few now, so I thought it would make a great topper!
To finish the front of the cake, I stuck down the star right in the middle using royal icing.
I loved how this cake turned out. Don’t get me wrong, I cried a few times when I was making it. The kitchen was so very hot, the icing wasn’t playing ball and I was tempted to sack it off and go buy a Colin Caterpillar. But I’m really glad I persevered with it. Even though I’ve done this for years and have made thousands of cakes, it’s always the ones I make for myself that stress me out. I think it’s the pressure to be honest.
Getting the cake down to the venue was also stressful. It was the hottest day of the year and the venue was a 25 minute drive away on the motorway. I sat in the back with it on a folded down car seat so I could keep an eye on it! I had with me a piping bag full of royal icing, spare stars and tools as a ‘recovery kit’. Thankfully it wasn’t needed!
The cake looked great at the venue all set up on the table. I even made some Captain Marvel cookies to go with it, using one of the smaller cutters of the three and this recipe.
I guess the saddest part of this story, is that I didn’t get any of it! I cut it all up for my friends to enjoy and at the time I had a few drinks so was more focused on dancing (standard) and there was none left for me! I never seem to actually EAT any of my birthday cakes haha! I’ll just have to make myself one to enjoy this week!!
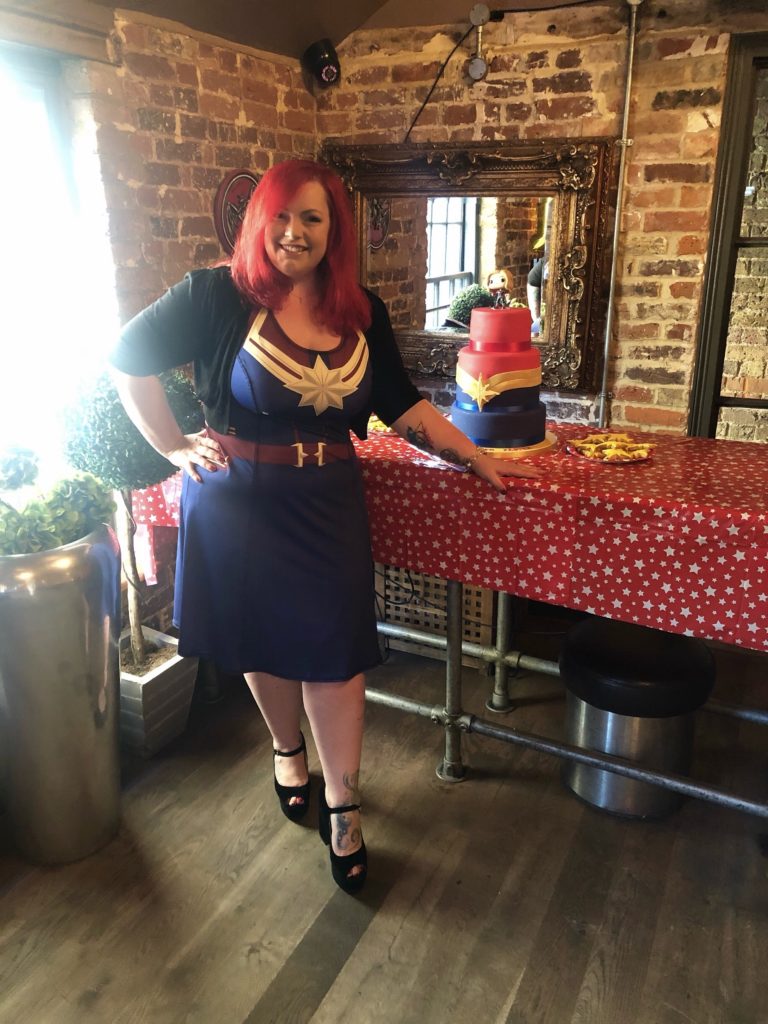
I loved how it looked and I also loved that it matched my dress perfectly. I had this dress shipped over from Torrid in America (Thank you Colin!)

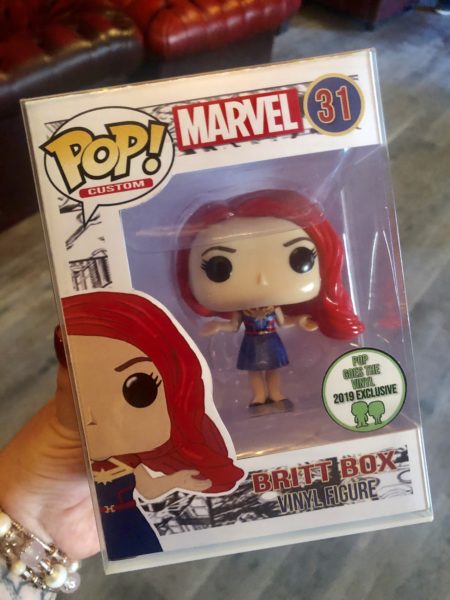
I also want to give a big shout out and thank you to Pop Goes The Vinyl! Tim got in touch with them to order and they made me two custom Funko Pops for my birthday and I think they are fabulous. A She Who Bakes one and a Britt Box one (wearing my birthday dress!) to show both sides of my personality!
If you or anyone you know also collects Funko Pops (or even if you don’t!) they make wonderful gifts!!

I hope you’ve enjoyed all of these tips and tricks. I always love writing about the cakes I make in the hope that it may help someone else making something similar!
If you’re baking any of my recipes or using any of my blogs, let me know how you get on, either on Facebook or Twitter or Instagram.
For more information on how to decorate your cake and go from home bake to showstopper, check out my list of latest online cake decorating courses here.
If you want to turn your baking hobby into a career, check out my book Cakes, Bakes & Business for everything you need to know about running a successful baking business, including pricing, marketing, insurance and much more!
Happy baking!
Britt xo
