Our Wedding Cake

09/19

From the day Tim and I got engaged in June 2017, I had people ask if I was going to make my own wedding cake. It was something I thought about and looked at the pros and cons on both sides. On the one hand, it’s what I do and love so why wouldn’t that extend to my own wedding? On the other hand, did I need the stress? I had come to the decision that yes, yes I did. I thought it would be something really lovely and personal to do, considering we wanted to DIY a lot of the decorations together.

Originally, we had thought about getting married in this country and having the classic British wedding we all know and love. But as we got into the planning, we became aware that our love of the beach and being by the sea meant we couldn’t find a venue that was truly ‘us’. So, we took the plunge and contacted my good friend Lesley who arranges all of our holidays and specialises in Destination Weddings. We booked Sandals Royal Barbados for ten days, just the two of us and started to plan our wedding. We still wanted to celebrate with friends and loved ones and so we booked a Kent venue, Westenhanger Castle for the week after our return to have our UK wedding reception.

The cake I had planned was always for the UK wedding reception. I had no intention of travelling 8 hours to the Caribbean on a plane with a cake I’d made in England. Plus with the wedding package we booked with Sandals, we got a two tier cake to cut and enjoy together on our wedding day! When we were out there we chose vanilla with piña colada frosting for one tier and red velvet with Irish cream frosting for the second tier.

I started to design the cake in the summer. I knew I wanted it to be big and I wanted it to incorporate our love of the beach and include references to our beach wedding. I wanted it to have pearl seashells to match our engagement cupcakes and I wanted it to be relatively simple. With all we had to do and plan on the week of the reception, I knew I simply didn’t have time for anything too complicated. I had bought the custom made topper from a lady I found on Facebook with her business A Moment For Life. ‘You, me & the sea’ is something Tim and I say regularly and we have it written on artwork around our home so it felt the obvious choice. It was blue and glittery and just perfect. It came through really quickly and was so reasonably priced. I highly recommend her!!
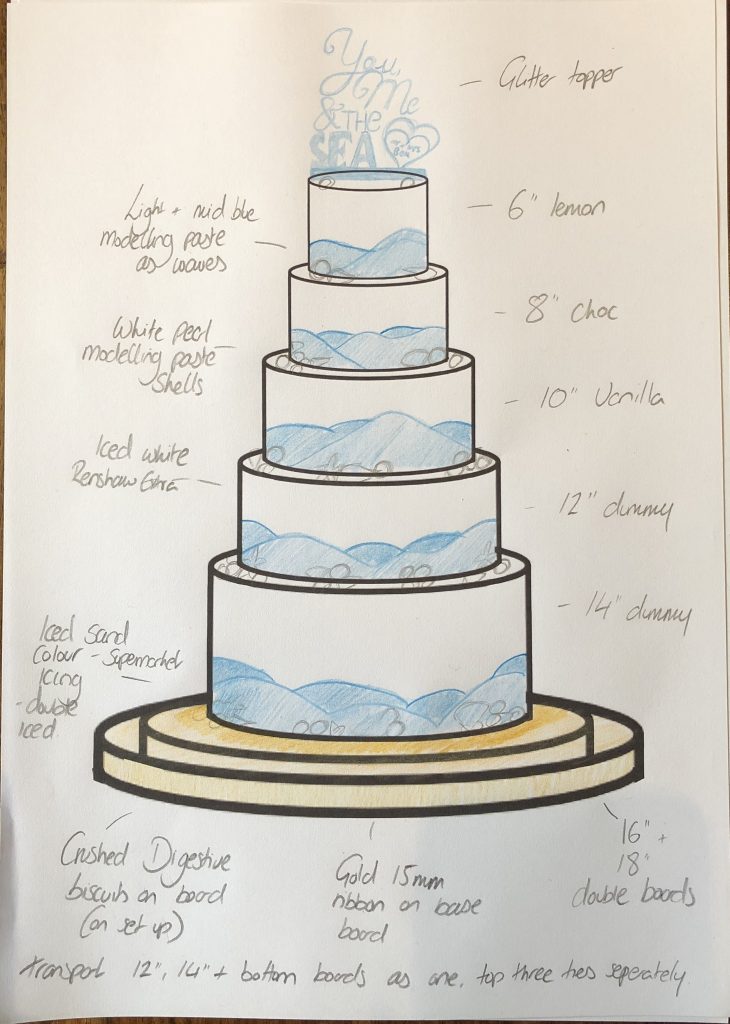
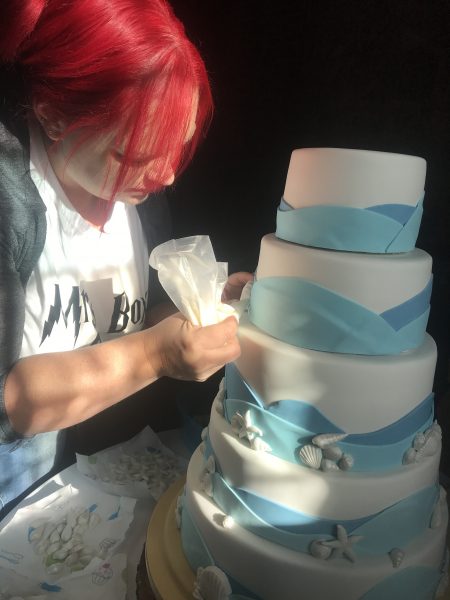
So, down to the details! As you can see, I can’t draw shells. The cake itself turned out to be a five tier, white iced cake with sea accents, shells and a sand base. (I was also inspired by a smaller, slightly different design I saw on Pinterest and despite weeks of searching I cannot find the original baker or company to credit. All links go from one Pinterest board to another!).

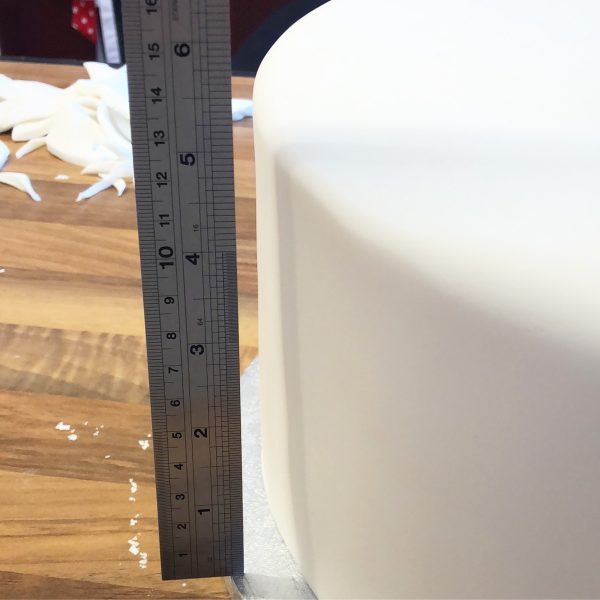
As we only had 90 people at our party, five tiers of cake was simply too much cake and there would have been so much leftover. To solve this, the bottom two tiers were polystyrene. This worked in my favour as I could ice and (mostly) decorate these two tiers and the board before we even stepped on a plane. So that all there was left when we returned was to bake and decorate the top three tiers. Once the polystyrene tiers were iced, I stuck them together with royal icing and then glued them both down to the decorated board, again with royal icing.

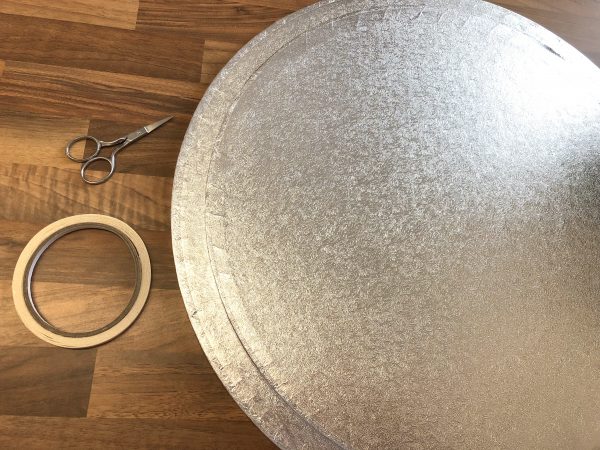
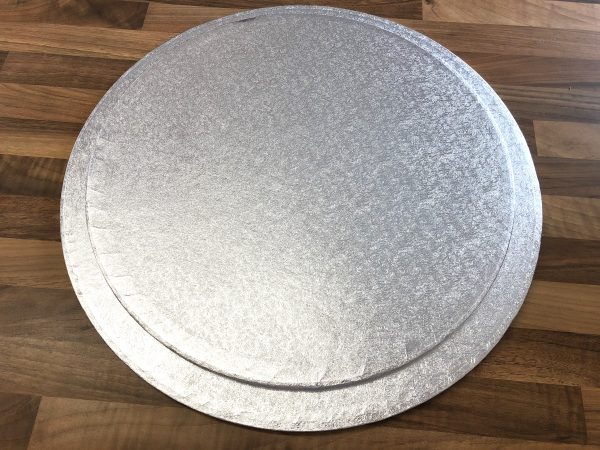
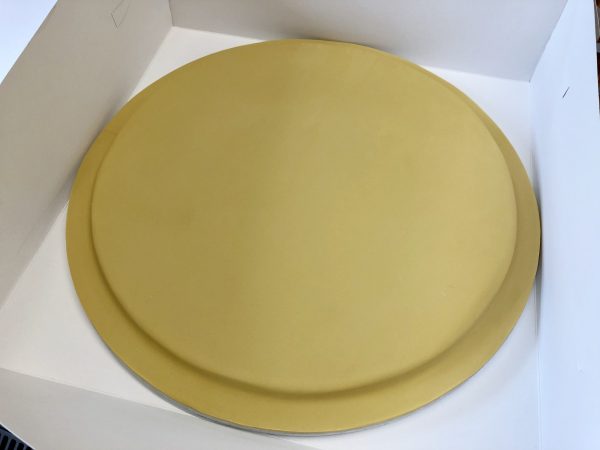
To decorate the board, I stuck together a 18″ drum and 16″ drum with double sided sticky tape. I then painted the boards with piping gel and iced these as one unit with Renshaw white covering paste I had coloured a sandy colour using Sugarflair Ivory.

I made the shells about a month in advance. I used white modelling paste (I use Karen Davies marshmallow paste) and a selection of seashell moulds from Iced Jems. I left them to dry on foam and the following day sprayed then with Pearl Spray to give them a nice sparkle.

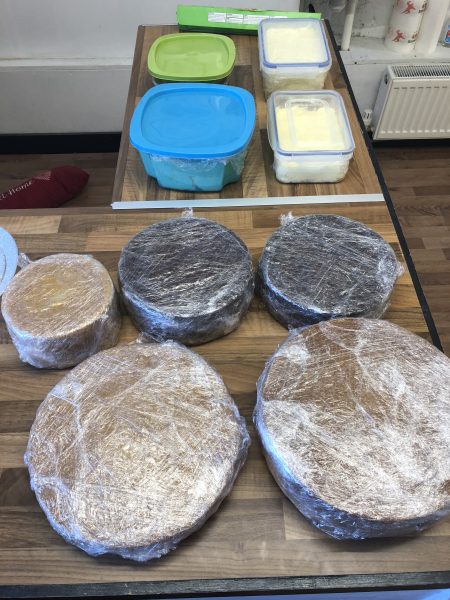
A few days after we got back from Barbados, I baked a 10″ vanilla madeira, a 8″ chocolate madeira and a 6″ lemon madeira (the original recipe, before scaling up, can be found here). For the 10″ cake and the 8″ cake I baked a second ‘half’ cake to go on top to make it deeper. By this, I mean I halved the recipe and baked it in the same tin. So these cakes were 1 and a half their original size. The 6″ cake was a 7″ recipe baked in a smaller tin, also to get a deeper height. I was really pleased with how the actual cakes turned out after baking. I always bake cakes well in advance of when I need them so I have maximum time to decorate. If you use a sturdy recipe like a madeira, they last ages. More on that here.

For the fillings, I made a piña colada frosting to go into the 10″ vanilla cake. This wasn’t in the original plan but I wanted to bring the taste of our wedding cake in Barbados home. To do this, I made a vanilla buttercream (recipe here) and added in piña colada flavouring I found online here. I also made a chocolate buttercream for the 8″ cake and a lemon buttercream for the 6″ cake (recipes here). I didn’t include jams or curds as I prefer a simple buttercream filling. Like the cakes, buttercream can be made ages in advance too. Once made it will last in the fridge for as long as the date on the pack of butter you’ve used, which is usually a few weeks. I keep mine stored in an airtight tupperware box with a layer of cling film over the top to prevent it crusting over or drying out.

The day after baking, I split, filled and crumb-coated all three cakes with their respective buttercream filling. I then iced them all (including the bottom polystyrene cakes but I used piping gel to stick down the sugarpaste) in Renshaw White Extra. It’s fast becoming my favourite sugarpaste to use. Really forgiving and good to work with. I then let the cakes set overnight. The following day, I created the ‘sea’ by colouring modelling paste (I use Karen Davies marshmallow paste) two different shades of blue in Sugarflair Ice Blue and Sugarflair Baby Blue. I then rolled this out thinly and cut out wave shapes by hand with a pizza cutter. I then stuck these to the sides of the cake with edible glue. I left these overnight once more.

Once these were done I was limited with what I could continue to do at home. I was aware I didn’t want to transport the cake fully stacked as it was, at this point, REALLY HEAVY. So I had made the decision to stick down the 10″ cake to the already stacked, fully decorated and boarded 12″ and 14″ polystyrene dummies. This meant I could finish decorating, to a certain extent, the bottom half of the cake. I stuck on the shells with Royal Icing.

The 8″ and 6″ cakes were going to be transported separately and I would finish decorating the cake on the day of the party. Ideally I would have done this the night before but I ran out of time. I always have thin cake boards the same size as my cake underneath any cakes I make. This is for stability (especially if stacking), hygiene, so that nothing can get into the cake from the bottom and for ease of movement.

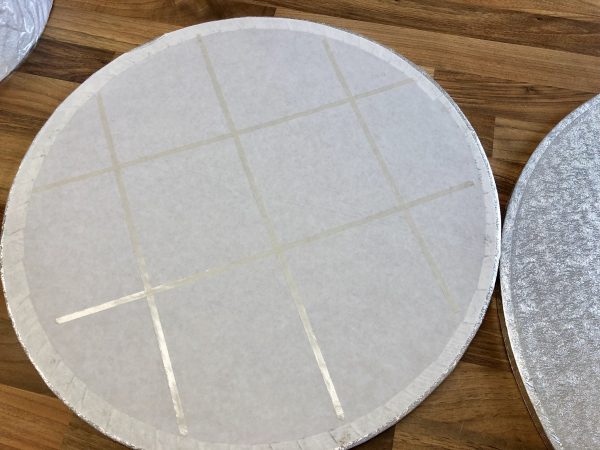
I made some ‘travel boards’ for the individual cakes by using a thin cake board one inch bigger than the cake and cutting out non-slip matting to fit. I stuck the non-slip matting down with double sided tape and boxed the cakes up in one inch bigger cake boxes.

On the day of the party, I dowelled the 10″ cake and the 8″ cake and put a layer of cling film on top so air didn’t get into the dowel holes. We then travelled SLOWLY to the venue. I had the biggest part of the cake in the back of the car with me on the folded down seat with the 8″ and 6″ cakes in the footwell. It was a tense journey! I had brought with me all of the shells, royal icing in a tub as well as a piping bag, palette knives, and any other equipment I thought I would need.

When we got to the venue I walked in the bottom half of the cake onto the cake stand which was a rustic wood slice borrowed from the good people at The Three Tuns pub. I then built the cake by sticking down the top two tiers with royal icing and sticking on all of the other shells. I then finished this with the cake topper and poured crushed digestive biscuits around the base to make the sand.

I stepped back and looked at my creation. A mixture of pride, relief and excitement overcame me. I was so proud of how it looked in the end. Whenever you go through a creative process there’s inevitably a lot of mixed feelings but to see it finally down, in the backdrop of the castle, was enough to bring a tear to my eye. Everyone had such lovely comments to say about how it looked and tasted too which made it all worth it!

If you are a baker, or just enjoy baking, and think you want to make your own wedding cake, let me tell you that it can absolutely be done. With the right amount of practice, planning, preparation and lists – you can do it.

Happy baking!

Mrs Box xo
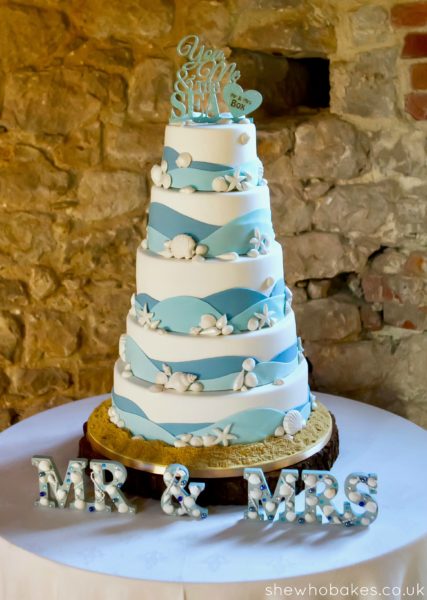
Pictures from our Wedding Day in Barbados and our UK Wedding Reception –

Cheese & Tomato Muffins

09/19

Earlier this year I attended a the 100th birthday celebrations of the iconic KitchenAid stand mixer. It was such a fun event and I met some lovely people. I’m super excited to be working with KitchenAid on a project that I like to call, A Tale Of Two Muffins.

With my brand new (gifted) Queen Of Hearts KitchenAid stand mixer made to commemorate the 100th anniversary, I have created two muffin recipes. One savoury; Cheese & Tomato and one sweet; Chocolate Orange

I have never used a KitchenAid mixer before. I have always wanted one and a few years ago, it topped my poll on ‘most loved stand mixer’ based on voted from my readers on social media.

After spending a good 10-15 minutes just LOOKING at the mixer on my kitchen side (imagine the heart eye emoji and you’ve got an idea of what I looked like), I finally built up the courage to use it. With the passion red colour and brand new bowl, it’s so shiny and beautiful and I just didn’t want to get it messy! Then I realised, that’s exactly what it’s built for, and let me tell you, it works like a dream. The mixing is smooth, the controls are easy to use, the weight just screams quality and I’m genuinely so excited to be using this mixer for my bakes from now on.

Also, after putting a call out onto my social media for name suggestions, I’ve decided to call her – Ruby.

Cheese & Tomato Muffins

I could eat every one of these soft and fluffy savoury muffins. Made using mature cheddar and sun-dried tomato, they are great hot or cold, served with a big chunk of salted butter.

Check out the video below for a filmed step-by-step.

Ingredients

  • 100g unsalted butter
  • 120ml whole milk
  • 2 eggs (lightly beaten)
  • 100g grated cheddar cheese
  • 100g chopped sun-dried tomatoes
  • 250g plain flour
  • 1 1/2 teaspoons baking powder
  • 1 teaspoon mustard powder

Method

  1. Mix together the unsalted butter and beaten eggs..
  2. Pour in the milk.
  3. Add in the plain flour, baking powder and mustard powder.
  4. Mix in the grated cheddar cheese.
  5. Mix in the chopped sun-dried tomatoes.
  6. Spoon into 10 large muffin cases.
  7. Bake at 180C (fan assisted) for 25 minutes.
  8. Leave to cool and enjoy!

Once baked and cooled, these muffins will last 4-5 days in an airtight container.

(This recipe has been made in paid partnership with KitchenAid but all opinions expressed are my own)

Chocolate Orange Muffins

09/19

Earlier this year I attended a the 100th birthday celebrations of the iconic KitchenAid stand mixer. It was such a fun event and I met some lovely people. I’m super excited to be working with KitchenAid on a project that I like to call, A Tale Of Two Muffins.

With my brand new (gifted) Queen Of Hearts KitchenAid stand mixer made to commemorate the 100th anniversary, I have created two muffin recipes. One sweet; Chocolate Orange and one savoury; Cheese & Tomato

I have never used a KitchenAid mixer before. I have always wanted one and a few years ago, it topped my poll on ‘most loved stand mixer’ based on voted from my readers on social media.

After spending a good 10-15 minutes just LOOKING at the mixer on my kitchen side (imagine the heart eye emoji and you’ve got an idea of what I looked like), I finally built up the courage to use it. With the passion red colour and brand new bowl, it’s so shiny and beautiful and I just didn’t want to get it messy! Then I realised, that’s exactly what it’s built for, and let me tell you, it works like a dream. The mixing is smooth, the controls are easy to use, the weight just screams quality and I’m genuinely so excited to be using this mixer for my bakes from now on.

Also, after putting a call out onto my social media for name suggestions, I’ve decided to call her – Ruby.
 

Chocolate Orange Muffins

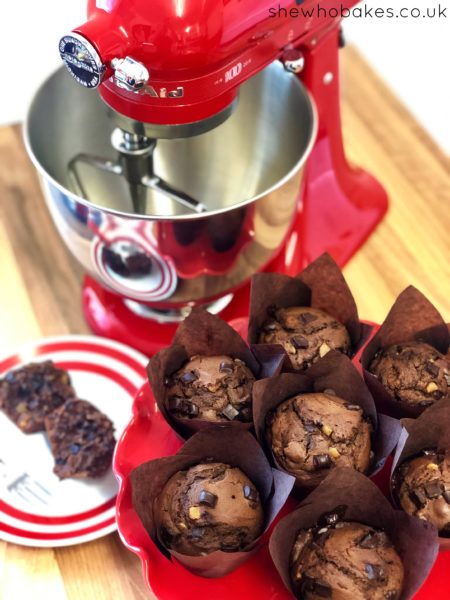
These deliciously rich muffins are so very chocolatey and have a great zesty touch. I’ve used marmalade, orange flavouring and mixed peel to get that citrusy flavour I wanted and big dark chocolate chunks to provide a difference in texture.

They are soft and fluffy inside and a great addition to any dessert table.

Check out the video below for a filmed step-by-step.

Ingredients

  • 100g unsalted butter
  • 100g brown sugar
  • 120ml whole milk
  • 2 eggs
  • 1 teaspoon orange extract
  • 1 tablespoon marmalade
  • 50g mixed peel
  • 250g plain flour
  • 50g cocoa powder
  • 1 1/2 teaspoons baking powder
  • 150g dark chocolate chunks

Method

  1. Cream together the unsalted butter, brown sugar, marmalade and orange extract.
  2. Add in the eggs.
  3. Pour in the milk.
  4. Add in the plain flour, cocoa powder and baking powder.
  5. Mix in the chocolate chunks and mixed peel.
  6. Spoon into 10 large muffin cases.
  7. Bake at 180C (fan assisted) for 25 minutes.
  8. Leave to cool and enjoy!

Once baked and cooled, these muffins will last 4-5 days in an airtight container.

(This recipe has been made in paid partnership with KitchenAid but all opinions expressed are my own)

The Cake & Bake Show – London 2019

09/19

I am so pleased to announce I will be back at the Cake & Bake Show this year in London!

I will be on the Baking Super Theatre on Friday 4th October demonstrating how to make delicious Pumpkin Spice Latte Cupcakes! Check back to my blog for the recipe soon! You can catch me on stage making these at 10am.

I’ll also be doing a book signing straight afterwards at 11:20 where I’ll be singing copies of my Amazon number one best selling book; Cakes, Bakes & Business.

You can book your tickets over on the Cake & Bake Show website here. Plus check my social media as I’ll be doing a ticket giveaway next week.

I’m really looking forward to being back at the show. The Cake & Bake show actually holds a special place on my heart. You can read all about why here.

I hope to see you there!

Happy baking!

Britt xo

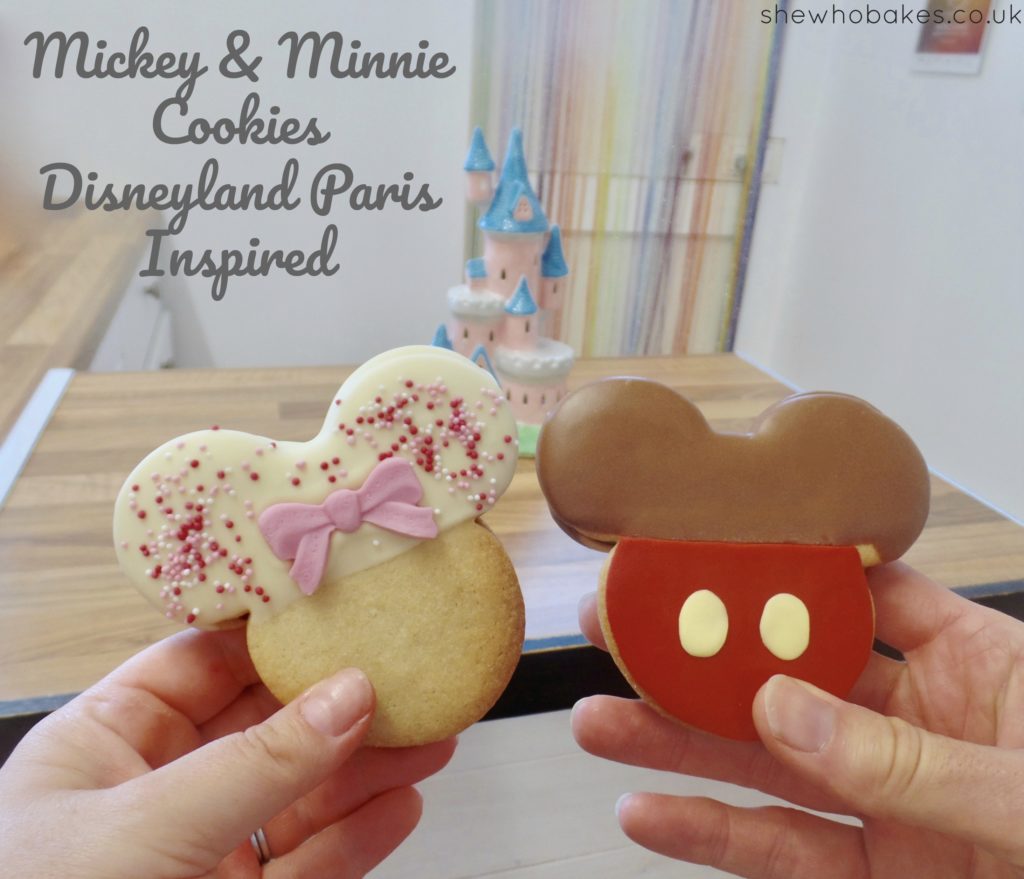
Mickey & Minnie Cookies

08/19

Inspired by my recent trip to Disneyland Paris, I wanted to recreate my favourite snack we had there!

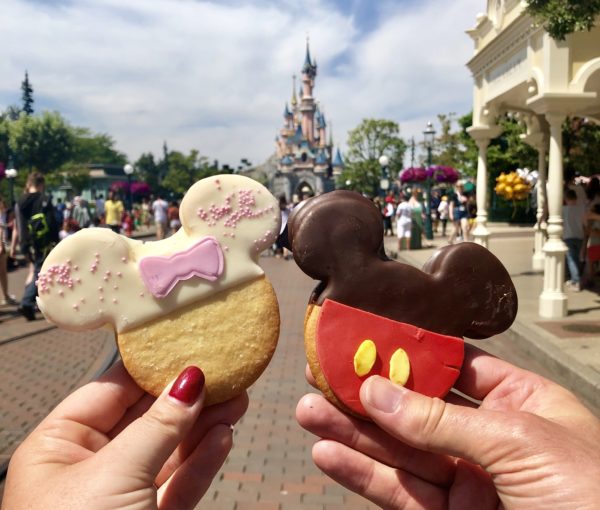
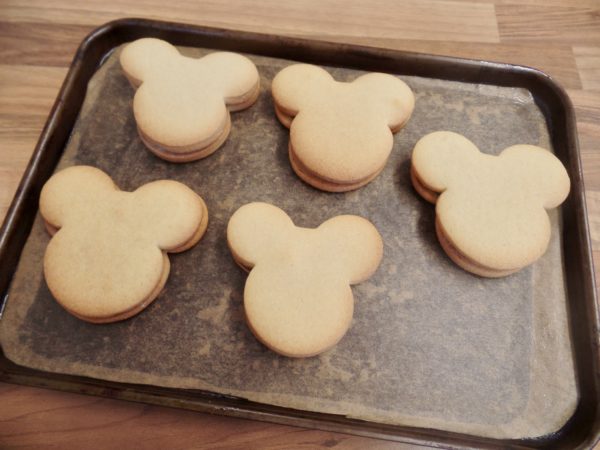
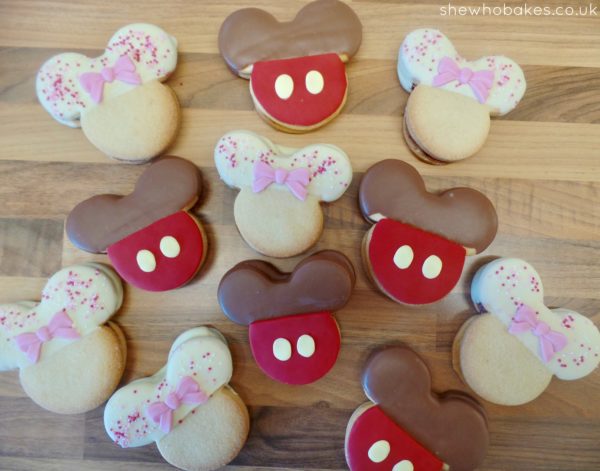
I had the Minnie Mouse cookie which was two biscuits, sandwiched with jam, dipped in white chocolate and decorated with sprinkles and a bow. Tim had the Mickey Mouse cookie which was two biscuits, sandwiched with Nutella, dipped in milk chocolate and decorated with sugarpaste.

Here were the ones we had while we were sitting on Main Street, in front of the iconic pink and blue castle.

For this recipe, I recommend my no spread cookie dough which really helps the biscuit keep it’s distinctive shape.

Remember, for each cookie, you’re going to need two biscuits. Because of this, I doubled my usual recipe to have enough dough.

Make sure to follow the recipe, including chilling the dough and then the cut out cookies for at least 30 minutes before baking. Once baked, leave to cool completely before decorating.

You can find the cutter I used here.

Minnie Mouse Cookie

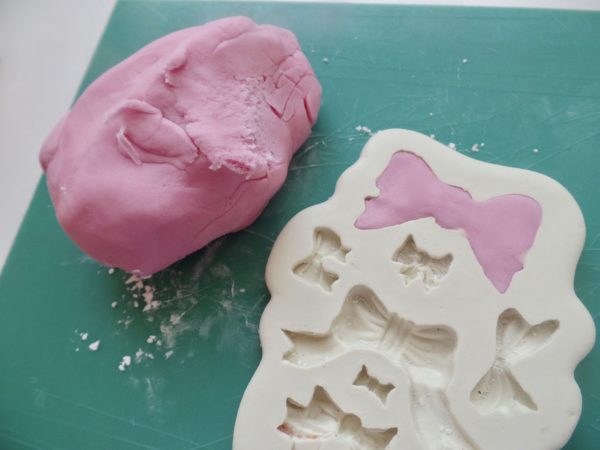
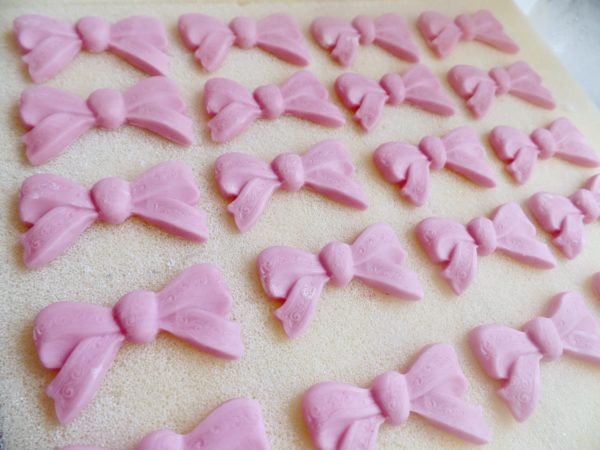
I’m going to start with Minnie. Firstly I’m going to make the little pink bow decoration. I’m using pink modelling paste and a silicone bow mould. I’m pretty sure by looking at it the Disneyland Paris cookies bow was made using a plunger cutter but I don’t have one of those! I kneaded the pink modelling paste and pressed it into the mould. I then pushed it out and left it to dry overnight on foam.

I also massively overestimated how many cookies I’d actually be making…

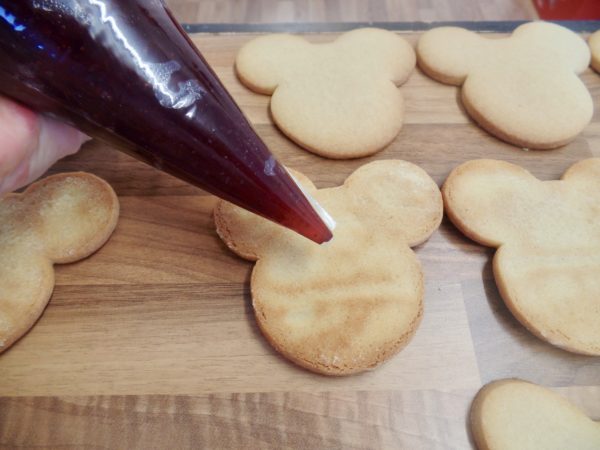
Next, I sandwiched the baked and cooled cookies with about a tablespoon of strawberry jam using a piping bag. I then put these in the fridge for half an hour to firm up a little. While the cookies were chilling, I melted 400g white chocolate with a little coconut oil. The coconut oil helps with white chocolate consistency and makes it better for dipping.

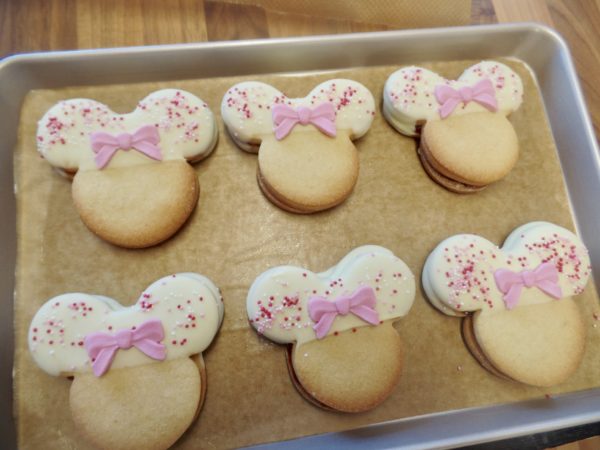
I then half dipped the chilled cookies into the melted white chocolate. I then laid them onto a tray lined with greaseproof paper.

To decorate, I added a few sprinkles (again, slightly different to the Disneyland Paris ones as I used what I had in!) and finished with the little pink bow in the middle. I then left these to set completely in the fridge.

Mickey Mouse

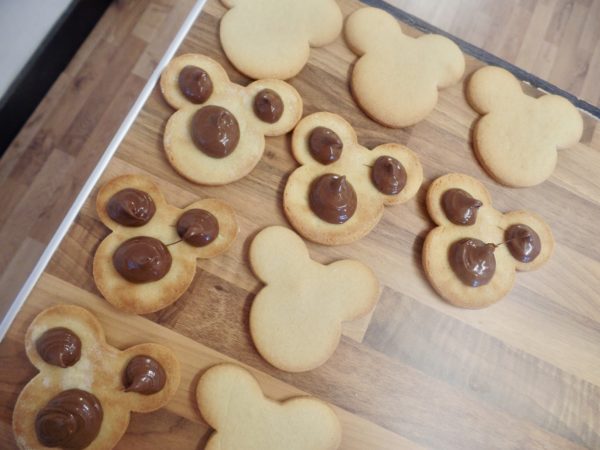
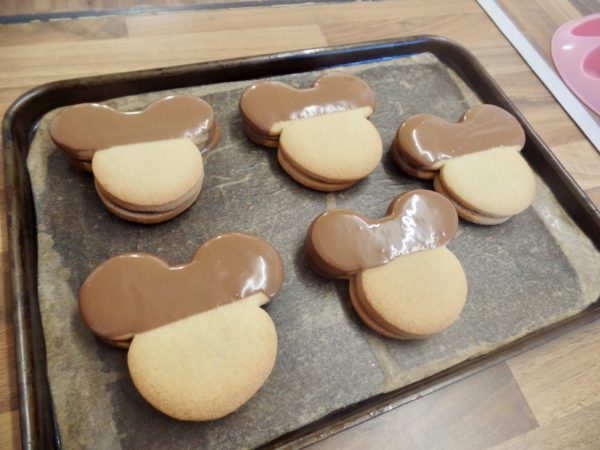
For the Mickey cookies, I didn’t have to make any decorations in advance as everything was going to be placed onto the cookie itself. So I first sandwiched with a tablespoon of Nutella and then left to set in the fridge for 30 minutes. Again, while the cookies were chilling, I melted 400g milk chocolate with a little coconut oil. I then again, half dipped the chilled cookies into the melted milk chocolate and then laid them onto a tray lined with greaseproof paper.

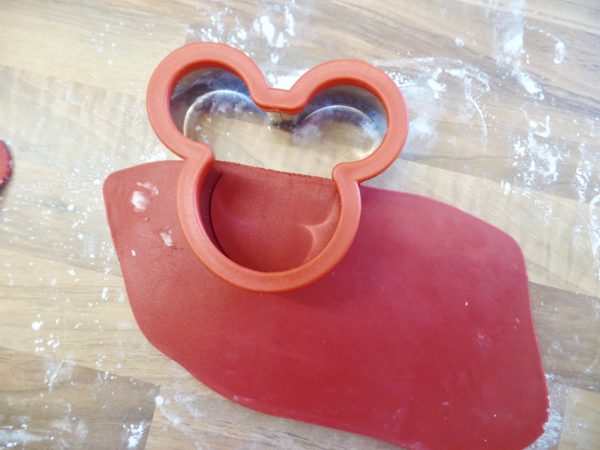
As for the decoration, while the chocolate on the cookies were setting, I rolled out red sugarpaste and cut out shapes using the same cutter I used to cut out the cookies. I then trimmed accordingly, using the original picture of the cookies as a guide. I then stuck this to the dipped cookie with a little edible glue.

Once the red was on, I rolled out yellow sugarpaste and cut out two small circles. I squished them with my hands until they became an oval shape (an oval cutter would work wonders here but I either don’t have one or can’t find it. I’ve lost count of exactly how many cutters I actually own…) I stuck down the oval shape to the red with a little edible glue and  I then left these to set completely.

They are a little different to the treats we enjoyed in Disneyland Paris but I’m so pleased with how they turned out! They are making me really excited for our next trip over there. Ok, that’s a lie. I was excited already. It’s absolutely one of my favourite places to be!

If you’re baking any of my recipes or using any of my blogs, let me know how you get on, either on Facebook or Twitter or Instagram.

To see another Disneyland Paris inspired bake, check out my Chocolate Chip Mickey Mouse Cookies here.

Happy baking!

Britt xo

For more information on how to decorate your cake and go from home bake to showstopper, check out my list of latest online cake decorating courses here.

If you want to turn your baking hobby into a career, check out my book Cakes, Bakes & Business for everything you need to know about running a successful baking business, including pricing, marketing, insurance and much more!

My Captain Marvel Birthday Cake!

07/19

Last week was my 31st birthday and I had the most amazing time! A personalised escape room built by Tim to find all my presents, a spa break at Rowhill Grange Hotel followed by a day out in London completing the Sherlock Holmes Escape Room (with the Sherlock Holmies – thats our escape room group name!), cinema trips, beach days, lots of tasty food and drink, it’s honestly been wonderful. Tim has just been amazing the whole time and my friends have helped make it magical as usual.
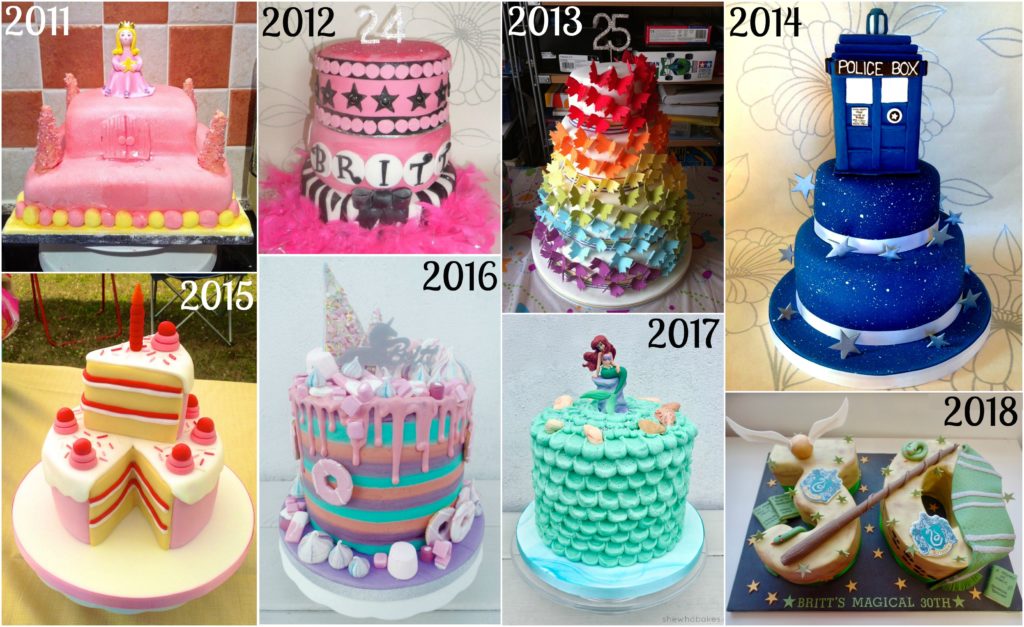
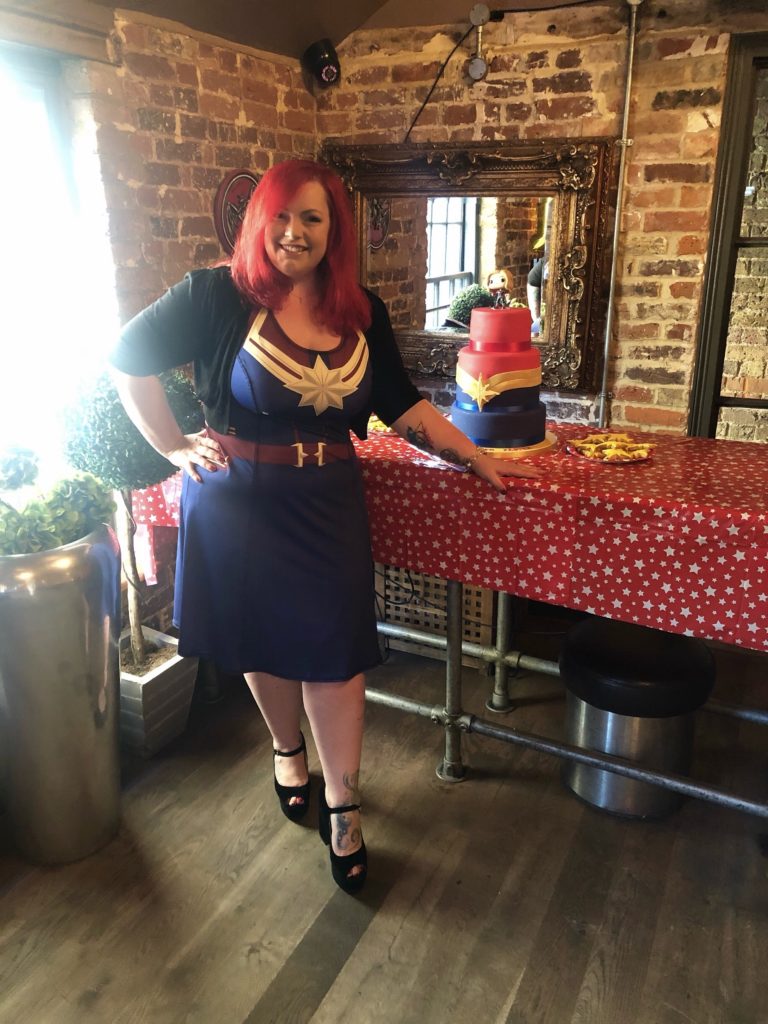
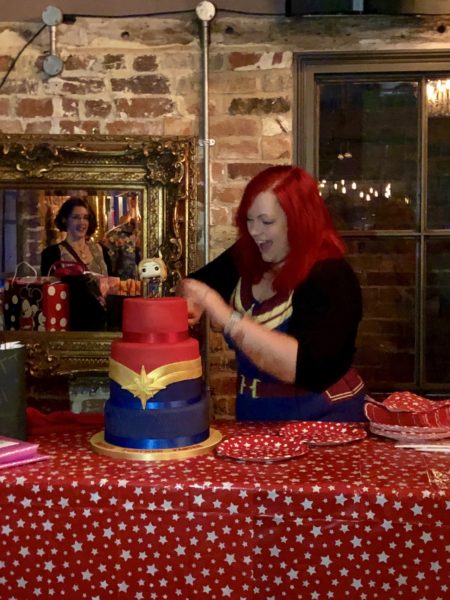
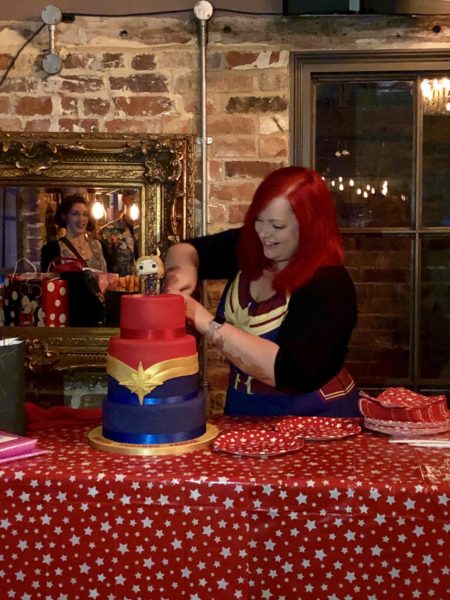
In the middle of it all on Friday night, I had a party at a private bar and, as always, I made my own birthday cake for it. It’s something I’ve been doing since I started baking back in 2010 and even though I always complain about it, I always enjoy it really!

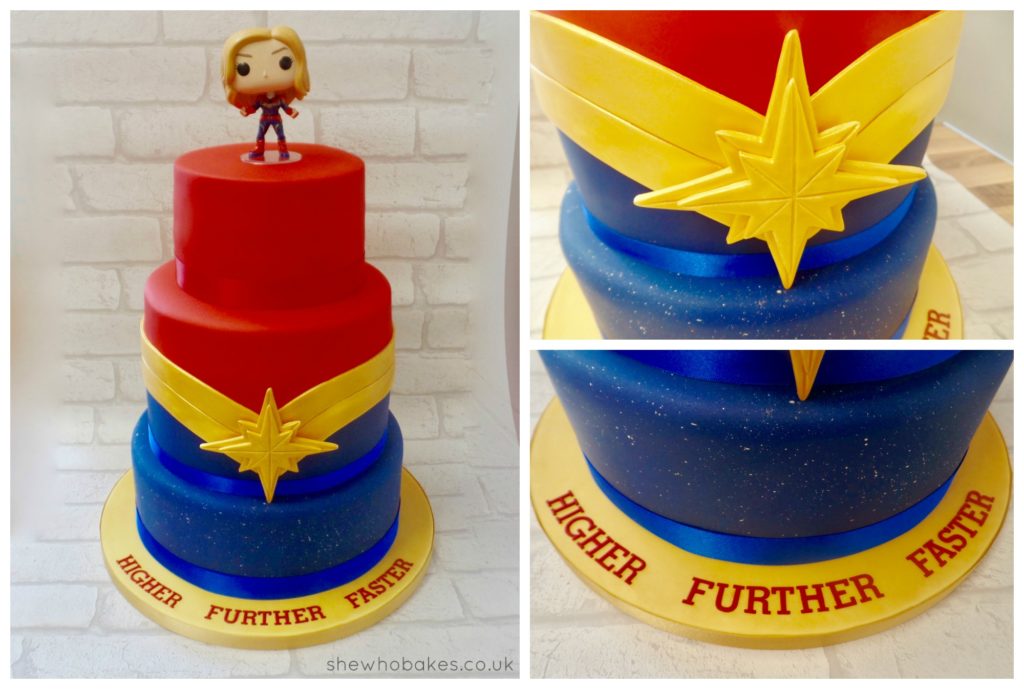
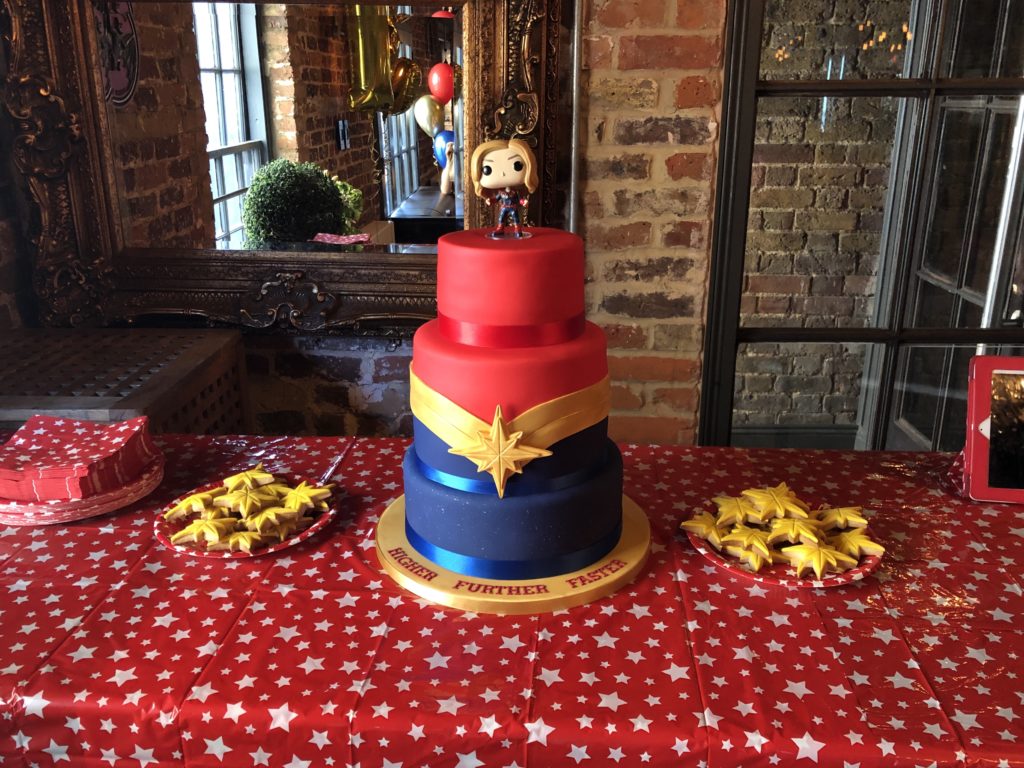
Previous years themes have included Unicorns, Mermaids, Rainbows and last year was a Harry Potter/Slytherin special. But this year, I knew what the theme was going to be from very early on. Ever since I walked out of the cinema at the end of Captain Marvel back in March, I wanted my cake to be a celebration of my favourite superhero in red, gold and blue.

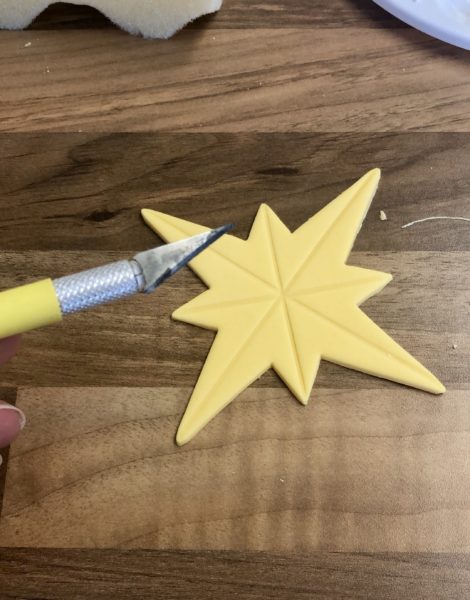
I knew I wanted the cake to look like Captain Marvel’s final red, gold and blue outfit but at first I wasn’t sure how I was going to do the star. I’m not very good at cutting anything out freehand and I struggled to find the right shape and size cutter. That was, until I found this set of three 3D printed cutters on Ebay. They came all the way from Australia and were perfect!

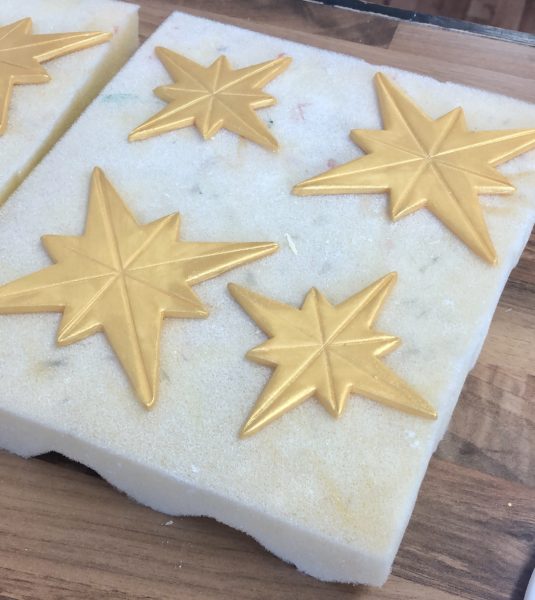
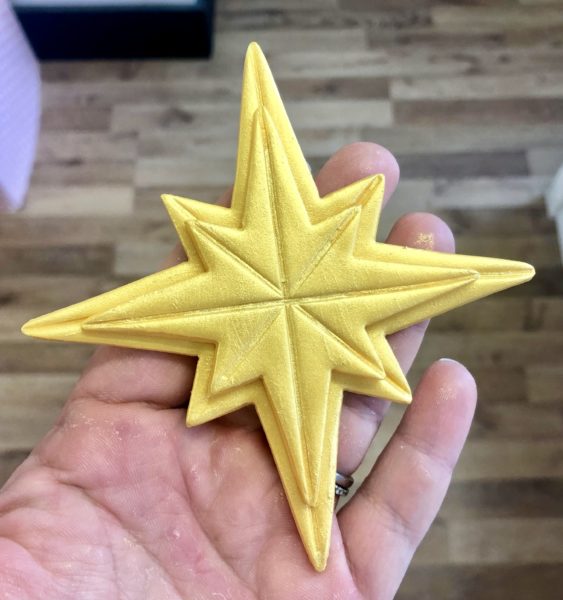
I cut the stars out with modelling paste that I coloured yellow with Sugarflair Egg Yellow. I indented them with a stainless steel ruler to create a nice effect and then I painted them gold using Rainbow Dust Metallic Golden Sands mixed with a little rejuvenator spirit. I left them to dry on foam and once they were completely dry I stuck a smaller one on top of a bigger one using a little royal icing.

There are so many made in the second picture because if I’m only having one delicate decoration I like to make a few incase one (or two) breaks.

For the actual cakes themselves, I knew I wanted three tiers as I thought this would create a nicer effect for the suit and colours. However, with only about 50 people coming to the party, three tiers of cake would have been a waste. So the bottom tier was a 10″ round polystyrene dummy which I iced blue well in advance. This meant no cake would go to waste. I regularly use polystyrene dummies for bottom tiers of cake when I know it simply won’t get eaten. The bottom two tiers of our wedding cake were polystyrene for this exact reason. It also means you can decorate them months in advance to get ahead of schedule.

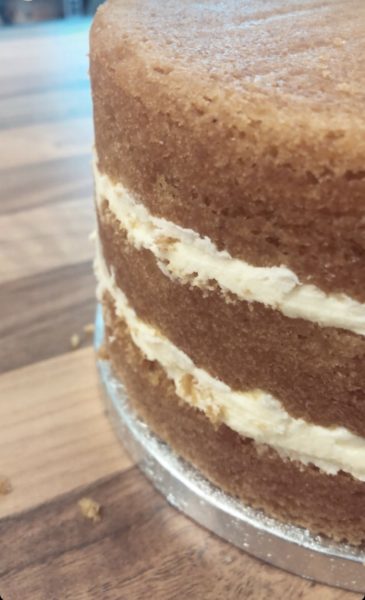
The middle tier was an 8″ round salted caramel, fudge and white chocolate with salted caramel buttercream and the top tier was a 6″ round lemon madeira with lemon buttercream. Two of my favourite flavours! Because I wanted the middle tier to be much deeper than the other two, I baked two 8″ round cakes which I planned on stacking.

Firstly, I split the two 8″ round cakes in two. Then I turned one cake upside down so the very bottom would be super flat, then I filled the both the cakes with salted caramel buttercream and stacked them together using more buttercream. The 6″ round lemon, I split as I usually do, twice, making three layers of cake and two of lemon buttercream.

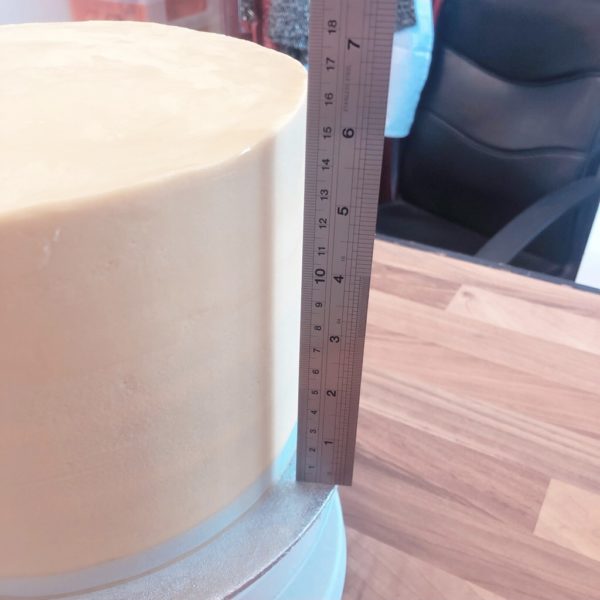
I secured both of these cakes on cake boards of the same size using a little buttercream and chilled for 10 minutes. Once this was set, I crumb coated (spread a thin layer of buttercream around the outside of the cakes) both of them in their buttercream flavours and chilled again. Finally I did a second layer of crumb coat, left to set and then they were ready to be iced! Once the middle tier was crumb coated it was already at nearly 7″ high!!

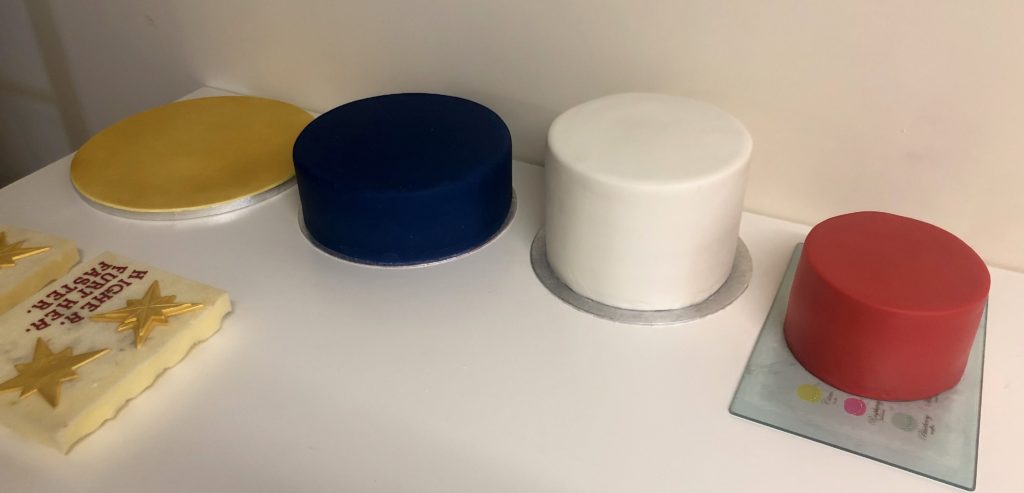
The bottom tier was iced using Renshaw Sapphire Blue Sugarpaste and the top tier was iced using Renshaw Poppy Red Sugarpaste. I will usually buy white Renshaw Extra paste and colour it myself using Sugarflair Concentrated colours but I made exceptions for black, red, dark blue and dark green. For these, I find it’s much easier to buy it pre-coloured.

As the middle tier was going to be iced in two different colours, I first iced it in a very thin layer of white sugarpaste. This meant it was so much easier to decorate as I didn’t have to worry about buttercream squidging out between the two different colour layers.

I also iced the 13″ round board in white sugarpaste I coloured using Sugarflair Egg Yellow and when dry, sprayed gold using lustre spray. I also cut out the wording I wanted ‘Higher, Further, Faster’ which is a line from the movie, using Mexican paste I coloured with Sugarflair Red Extra and tappit cutters. I left everything to set overnight before decorating. It all looked like this –

When it came time to decorate, I firstly wanted to give the bottom tier a bit of a ‘starry speckle’. I did this by mixing Pearl Rainbow Dust with a little rejuvenator spirit. I used a large brush and essentially flicked paint onto the cake, creating a night sky effect. I left this to dry for 30 minutes before sticking the bottom tier to the iced board using royal icing. I also stuck the letters to the board using a thin paintbrush and a little edible glue.

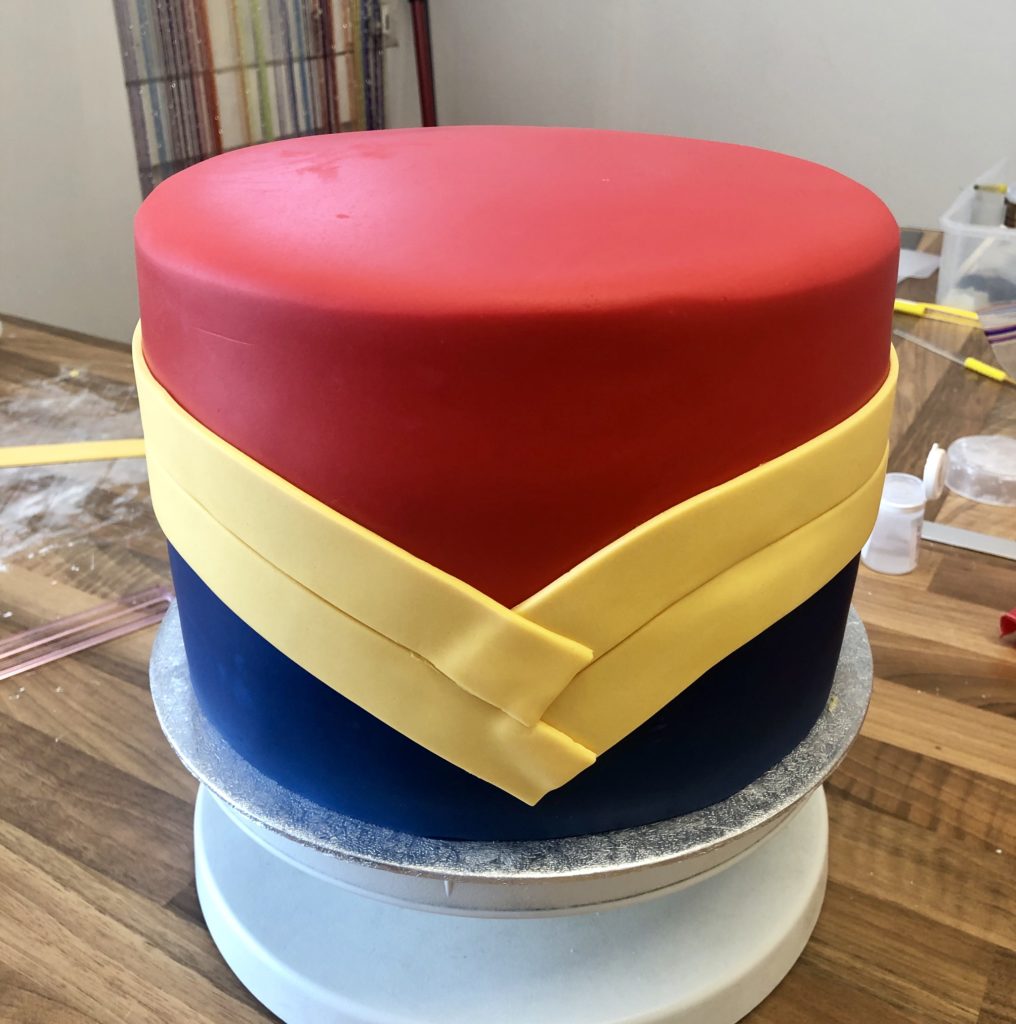
For the middle tier, this one was tricky and a little ‘trial and error’ (as all baking is I feel). I rolled out a long strip of the Renshaw Sapphire Blue sugarpaste and gently rolled it up. I unrolled it around the cake, checking it would fit and making marks where I wanted to cut it to size as I had the blue shallower at the front of the cake than the other sides. I then gently took the sugarpaste off the cake and cut as necessary using a pizza cutting wheel. Once I was happy with the size, I painted on edible glue to the white iced cake. I then unrolled and stuck down the blue sugarpaste where I wanted it.

Once I had done this, I rolled out the Poppy Red sugarpaste to size. Then I gently lifted it up using a rolling pin and plated it onto the cake. Using a scribe, I tried onto the icing around the cake where the blue was so I knew where to cut the red to meet it. I also made sure the front of the red was hanging lower than the rest to create the V-shape in icing. Once I was happy I carefully removed the icing from the cake, cut to size and stuck down with edible glue.

I’ll be completely honest, in 32C heat which it was last week, this bit was not fun. In hindsight, I would have used modelling paste and matched the colour to make my life easier but I was still happy with the results. I then cut out strips of modelling paste coloured with Sugarflair Egg Yellow using a strip cutter and stick these down over the red/blue joins using a little edible glue. Once the strips were dry, I painted them gold in the same way I did the big star.

Don’t be fooled by this picture. The red/blue join wasn’t neat in the slightest. But cake decorating is a bit smoke and mirrors isn’t it. Haha.

Once everything was set, it was time to stack the cakes. I inserted 5 bamboo dowelling rods into the 8″ cake and cut them to size. I then carefully lifted this monster of a cake and stuck it down to the polystyrene 10″ round using a little royal icing. Finally I stuck down the 6″ round cake on top, again with royal icing.

With the cake stacked, it was just left to do the finishing touches. I used 15mm golden ribbon to decorate the outside of the cake board, using 3mm double sided sticky tape. I also used 25mm royal blue and red ribbons to go around the bottom and top tiers, stuck together at the back with the same double sided sticky tape. The middle tier was meant to have the 25mm blue ribbon but I by the time I had decorated there wasn’t enough room. Luckily, I had some 15mm ribbon of the exact same colour in my drawers (it really helps to keep EVERYTHING) and so I used this instead.

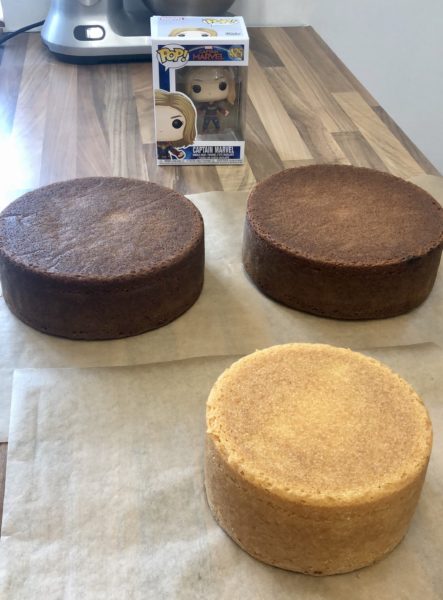
For the topper, I was very tempted to make a Captain Marvel out of modelling paste but time constraints, schedule, the heat and to be perfectly honest my tiredness levels meant it was an impossibility so I went with a plastic Captain Marvel Funko Pop. I actually collect these, I’ve got quite a few now, so I thought it would make a great topper!

To finish the front of the cake, I stuck down the star right in the middle using royal icing.

I loved how this cake turned out. Don’t get me wrong, I cried a few times when I was making it. The kitchen was so very hot, the icing wasn’t playing ball and I was tempted to sack it off and go buy a Colin Caterpillar. But I’m really glad I persevered with it. Even though I’ve done this for years and have made thousands of cakes, it’s always the ones I make for myself that stress me out. I think it’s the pressure to be honest.

Getting the cake down to the venue was also stressful. It was the hottest day of the year and the venue was a 25 minute drive away on the motorway. I sat in the back with it on a folded down car seat so I could keep an eye on it! I had with me a piping bag full of royal icing, spare stars and tools as a ‘recovery kit’. Thankfully it wasn’t needed!

The cake looked great at the venue all set up on the table. I even made some Captain Marvel cookies to go with it, using one of the smaller cutters of the three and this recipe.

I guess the saddest part of this story, is that I didn’t get any of it! I cut it all up for my friends to enjoy and at the time I had a few drinks so was more focused on dancing (standard) and there was none left for me! I never seem to actually EAT any of my birthday cakes haha! I’ll just have to make myself one to enjoy this week!!

I loved how it looked and I also loved that it matched my dress perfectly. I had this dress shipped over from Torrid in America (Thank you Colin!)

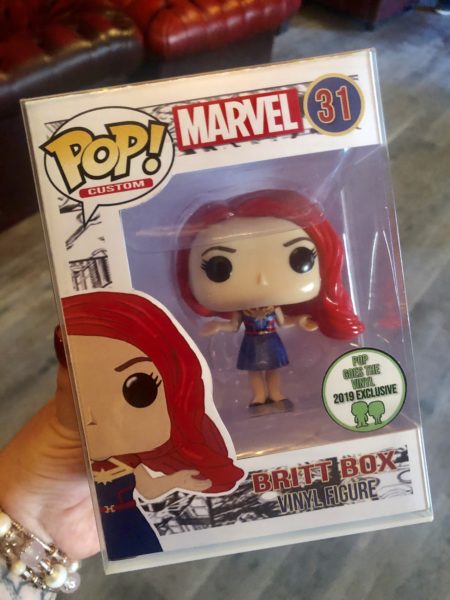
I also want to give a big shout out and thank you to Pop Goes The Vinyl! Tim got in touch with them to order and they made me two custom Funko Pops for my birthday and I think they are fabulous. A She Who Bakes one and a Britt Box one (wearing my birthday dress!) to show both sides of my personality!

If you or anyone you know also collects Funko Pops (or even if you don’t!) they make wonderful gifts!!

I hope you’ve enjoyed all of these tips and tricks. I always love writing about the cakes I make in the hope that it may help someone else making something similar!

If you’re baking any of my recipes or using any of my blogs, let me know how you get on, either on Facebook or Twitter or Instagram.

For more information on how to decorate your cake and go from home bake to showstopper, check out my list of latest online cake decorating courses here.

If you want to turn your baking hobby into a career, check out my book Cakes, Bakes & Business for everything you need to know about running a successful baking business, including pricing, marketing, insurance and much more!

Happy baking!

Britt xo


How To Make A Present Cake

06/19

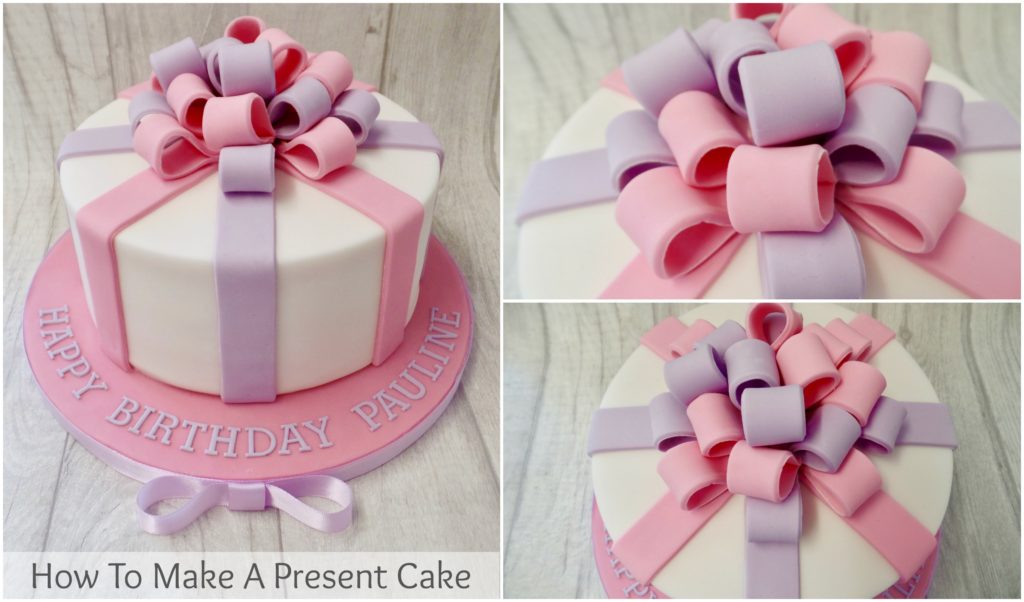
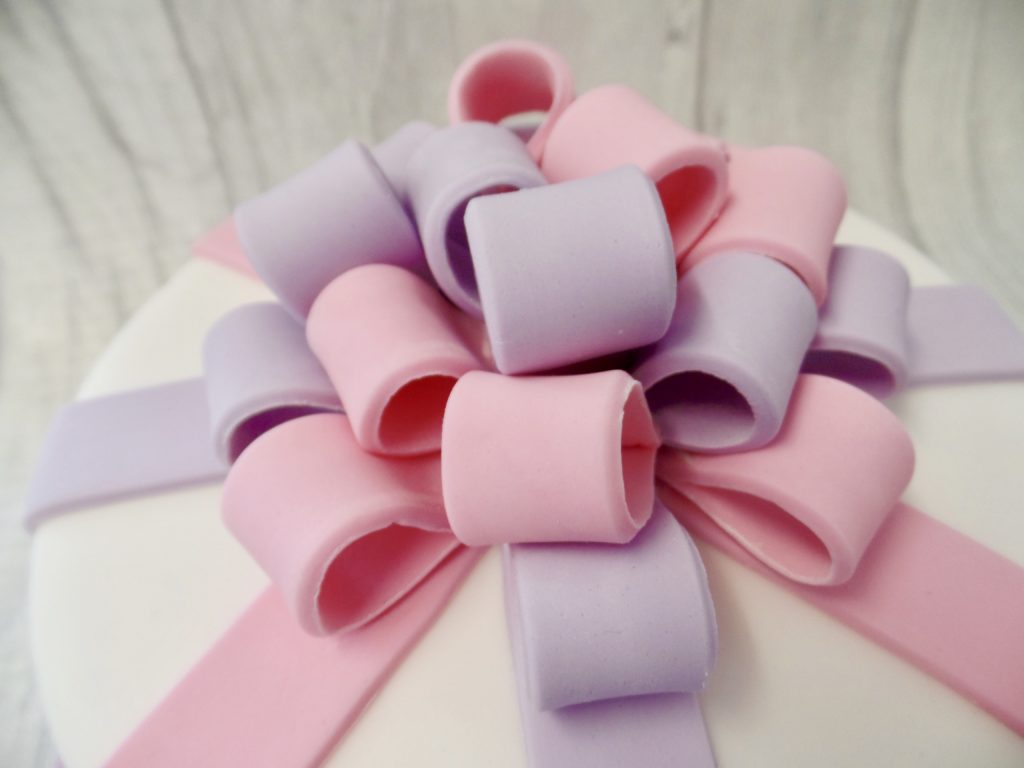
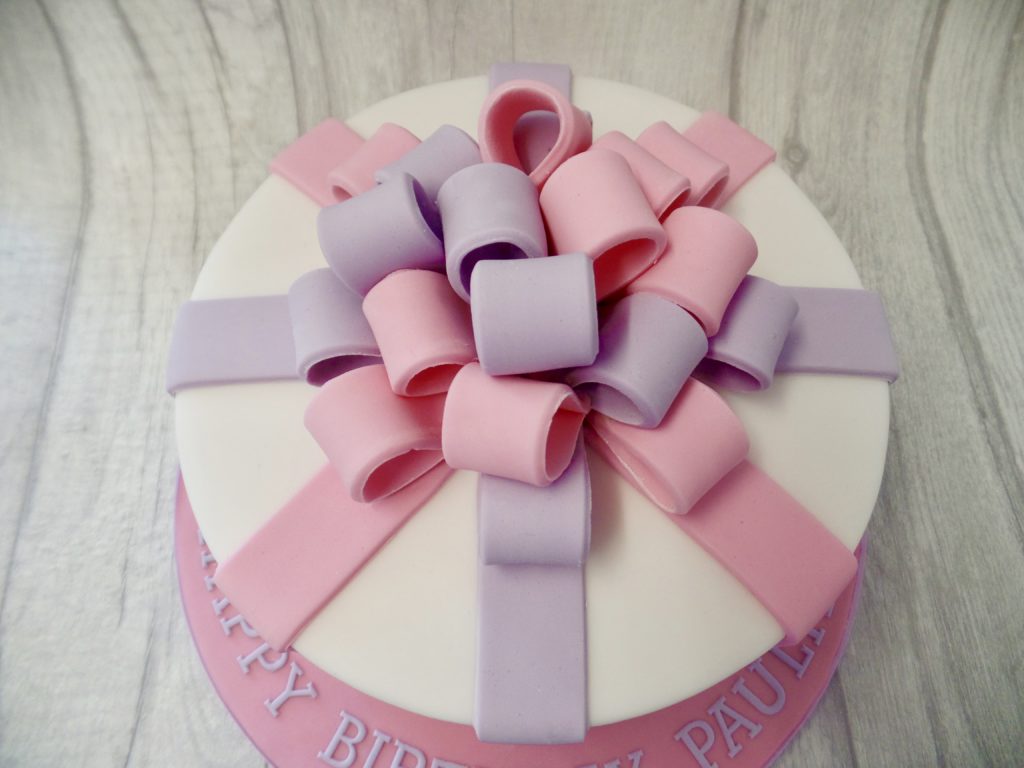
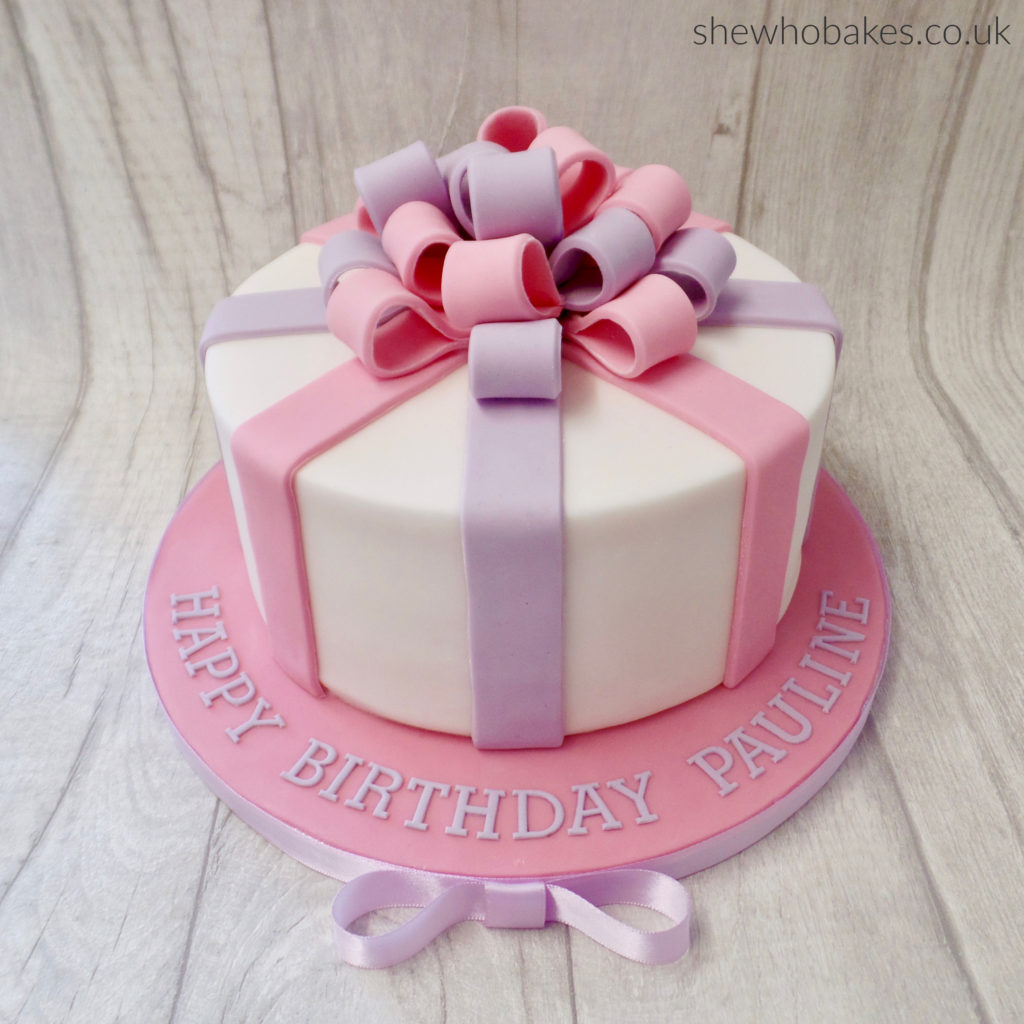
Last week was my lovely mother-in-law Pauline’s birthday and I wanted to surprise her with a birthday cake. I didn’t have a lot of spare time but I still wanted to make something pretty that I thought she’d love. A ‘Present’ cake is one that can be done at relatively short notice, it doesn’t need a lot of extra ingredients or equipment and can be adapted for any size, shape or theme of cake or occasion!

I really enjoy making them and wanted to take you through how I made this one!

Firstly, you’ll need an iced cake. For this, I made a vanilla madeira with pink vanilla buttercream. I went with a coloured filling for a little surprise when the cake was cut into.

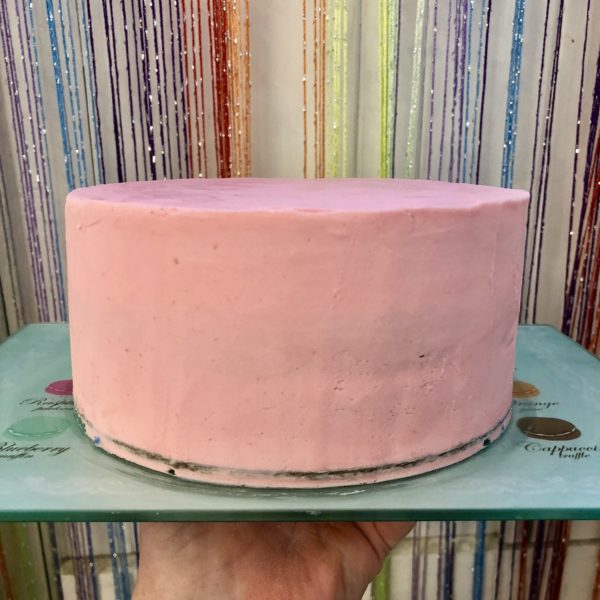
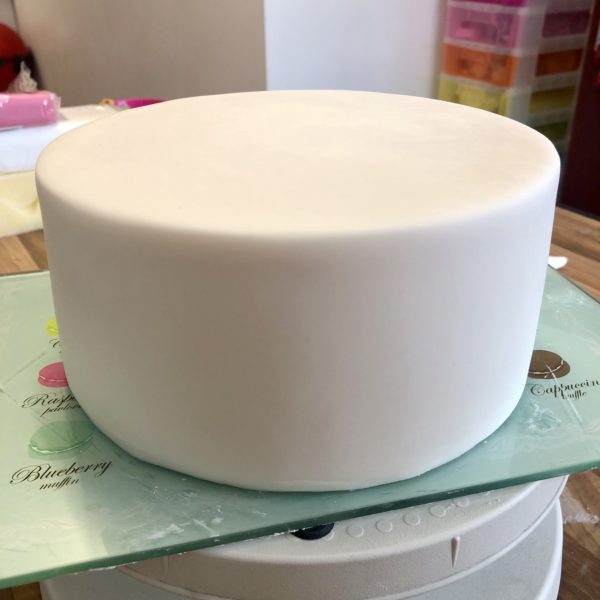
I split the 7″ round cake into three sections and filled with lovely pastel pink buttercream. I then crumb coated the cake and covered it in a layer of white sugarpaste. I also iced the 10″ round board with a pink sugarpaste and I left both the cake and board to set overnight before decorating.

You can see how I ice my cakes in my Professional Finish online cake course here.

On the same day that I iced the cake and the board, I started making the bow decorations as these too, had to set overnight before using otherwise they would become soft and limp and wouldn’t create the 3D effect on the top of the cake. For these I’m using modelling paste, a sugar stronger than sugarpaste. I don’t advise using roll out icing for these bows as it can crack and bend very easily. I’m using white modelling paste which I have coloured with Sugarflair Baby Pink and Sugarflair Lavender.

To make these you will need;

  • Modelling paste in desired bow colours
  • A small rolling pin
  • Small spacers
  • A strip cutter
  • A cutting wheel
  • Edible glue
  • Paintbrush

All equipment needed for this cake can be purchased at Iced Jems.

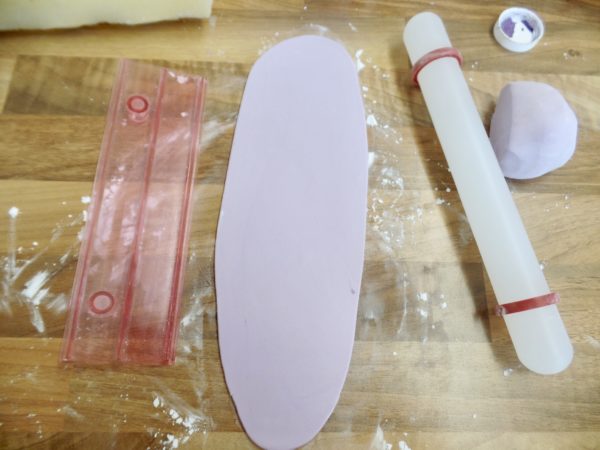
  1. Roll out your modelling paste on a surface dusted with cornflour using spacers if you have them (this just makes sure the strip is a nice even thickness).
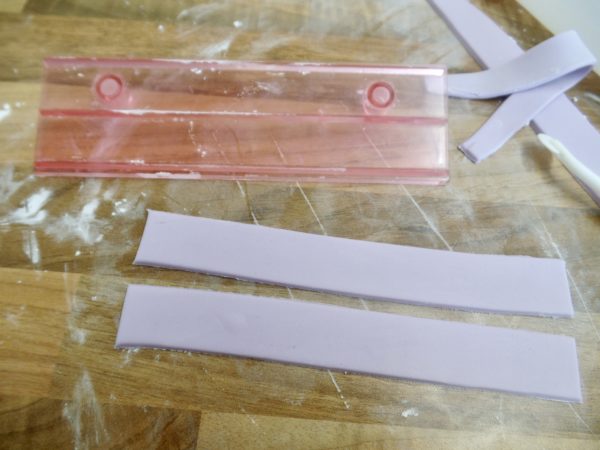
  2. Cut out strips using a strip cutter, tidy up any edges if necessary with a cutting wheel. Again, this is just for uniformity, if you don’t have one of these, a ruler and a sharp knife/cutting wheel will do. Simply mark out your strips and cut them out.
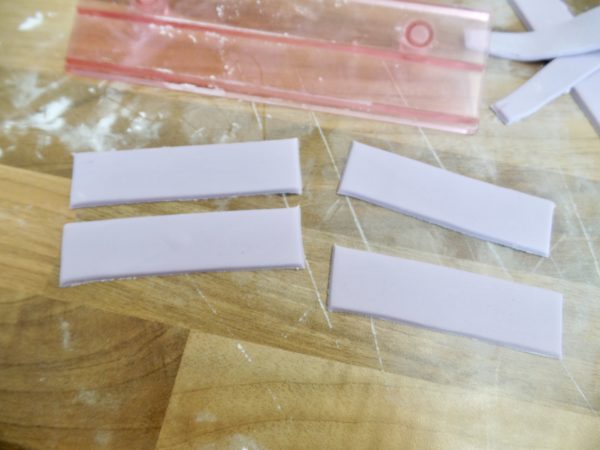
  3. Halve the strips so that each one is around 2 inches long.
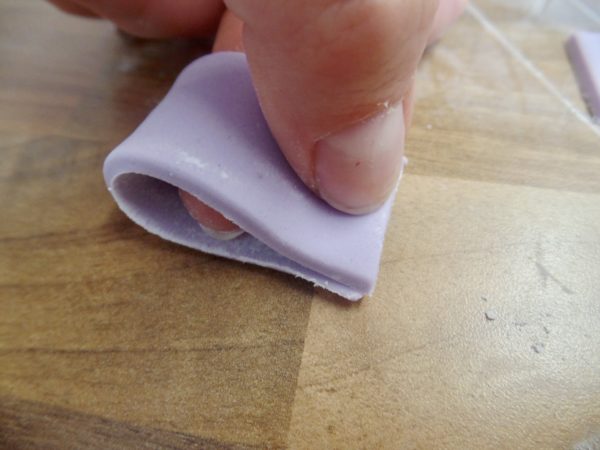
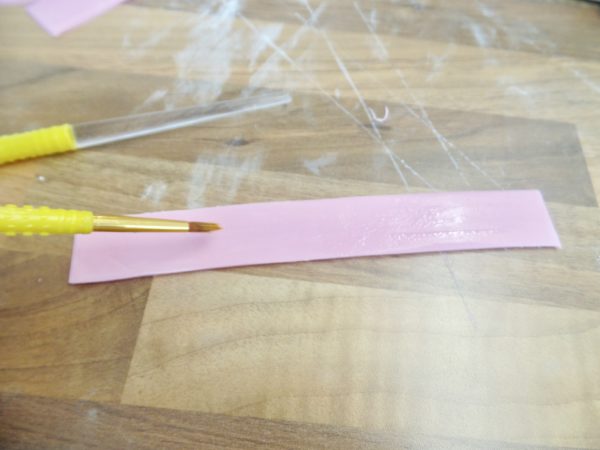
  4. Using a paintbrush, paint a little edible glue on the end of a strip.
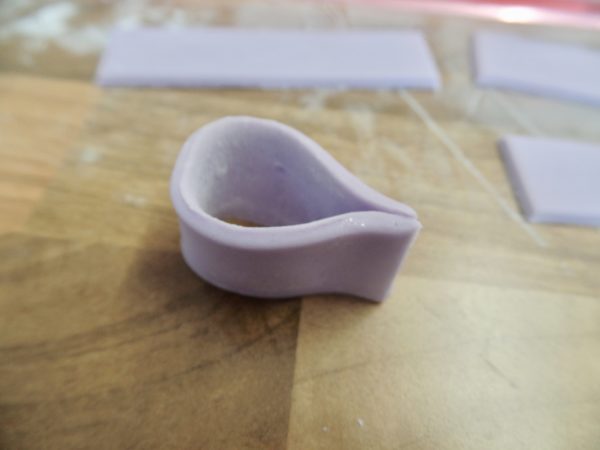
  5. Fold the strip over on itself and press down to secure.
  6. It should look like this.
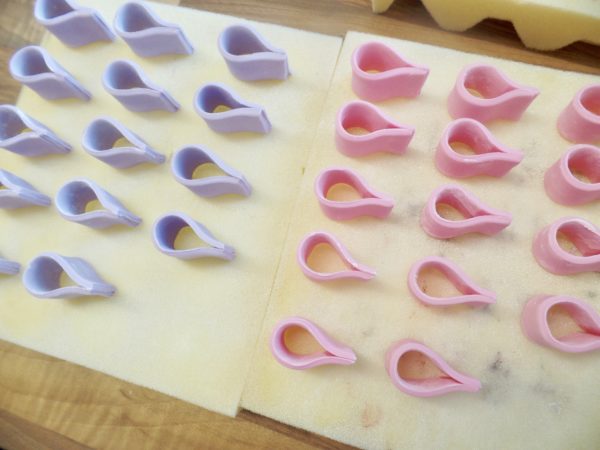
  7. Leave to dry, on it’s side on foam overnight.
  8. Continue with making bows in whatever colours you like. For this 7″ round cake I made 14 purple and 14 pink and had a few spares leftover.

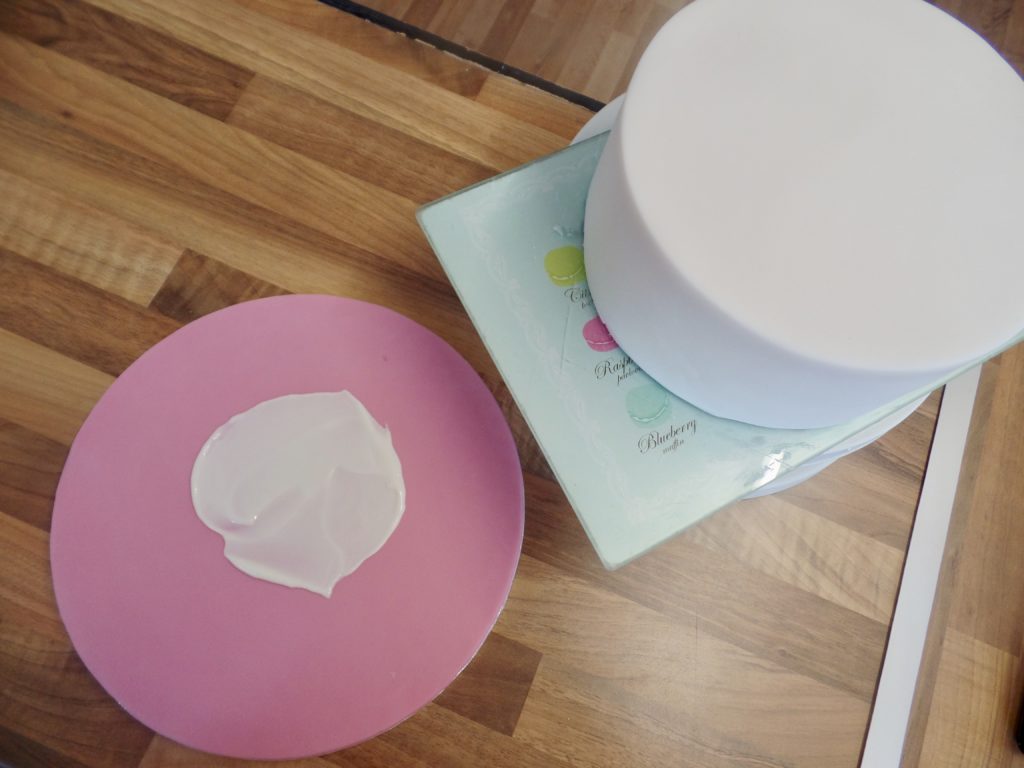
Once your cake and board icing is set the following day, secure the cake to the board using a little royal icing. I use pre-made tubbed royal icing for this.

I will always have a thin cake card of the same size as the cake underneath to keep the sponge safe and allow for ease of movement.

Carefully lift up the iced cake and drop it down onto the board. I tend to have my cakes off centre ever so slightly so I can add a message onto the board.

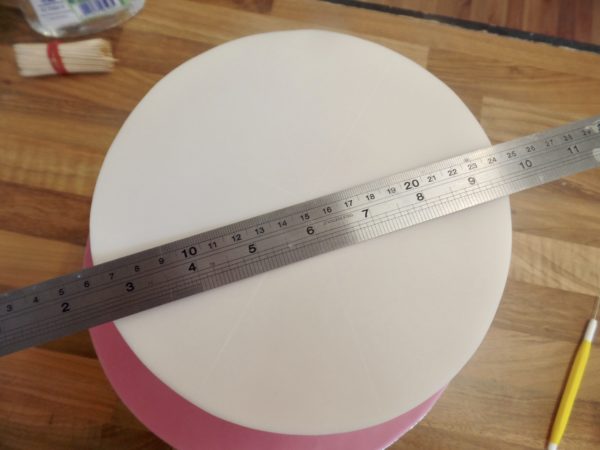
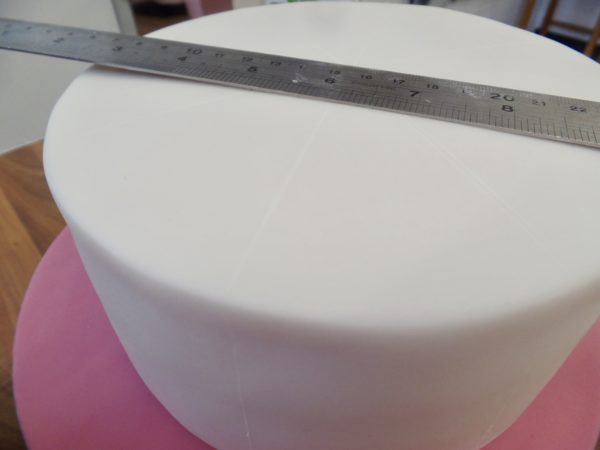
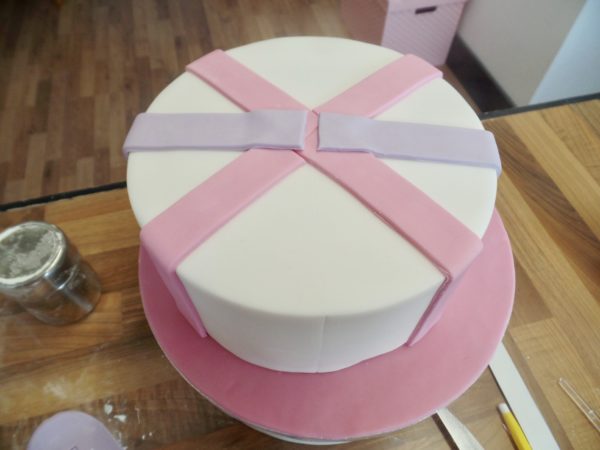
When your cake is secure, using a ruler and a scribe, mark even lines on your cake where you want the ribbons to go. I found the halfway point of my cake and scored a line. Then I did the same the other way to make a cross. Then I did the diagonal lines. Once you’ve done this, score lines down the sides of your cake to keep it all nice and even.

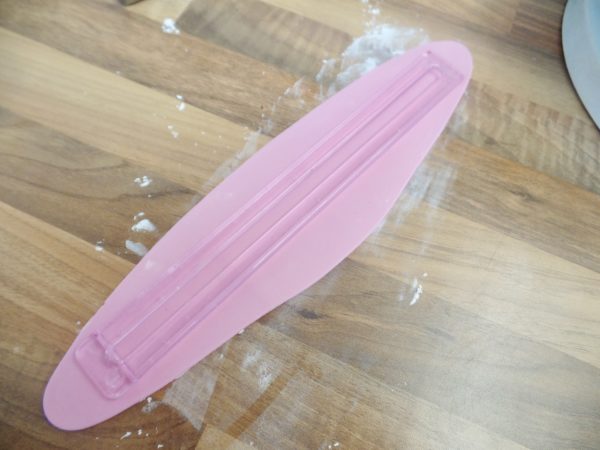
I’m using modelling paste again for the ribbons on top and down the sides of the cake and I’ve matched the same colours I’ve used for the bows. I’m also using a slightly longer strip cutter than I used for the bows. This one came with my Tappit letter cutting set and I find it perfect for this. You can always cut your own strips however.

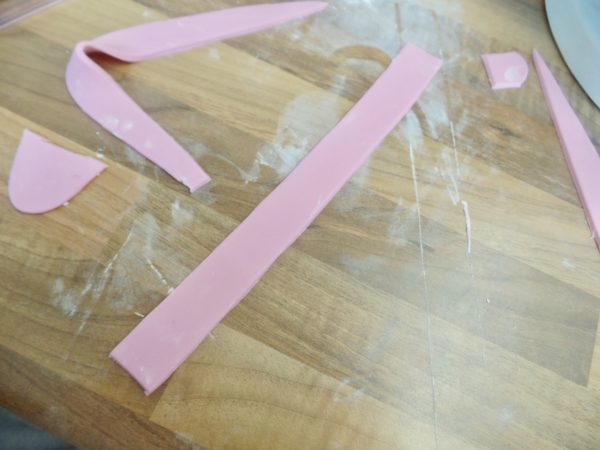
  1. Roll out the modelling paste on a cornflour dusted surface.
  2. Cut out the strip using either a strip cutter or cutting wheel.
  3. Place the strip onto the cake on top of the scores you made and make a mark where the middle is.
  4. Cut to size and paint the back with a thin layer of edible glue.
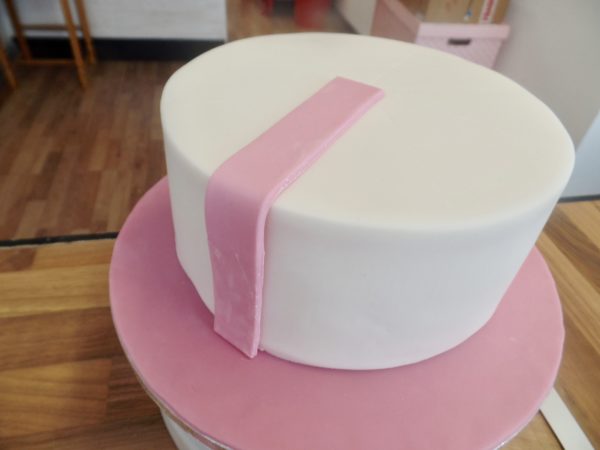
  5. Stick the strip onto the cake and do the same for the other side. Don’t worry about the line as we will be covering the middle with bows.
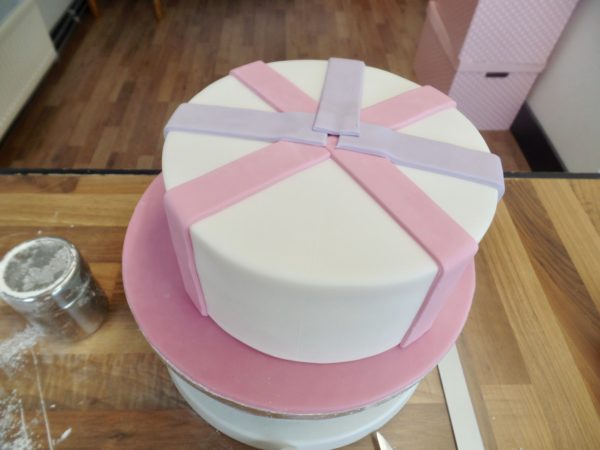
  6. Repeat so you have a cross as pictured.
  7. Next, do the other cross either in the same or a complimentary colour.
  8. It doesn’t matter if the strips overlap or you see the joins.

For the bow –

Stick down alternating colours of your pre-made bows using royal icing. I start by going around in a bigger circle with the first layer and then building the second layer up with a smaller circle until I get to the middle where I stick 2-3 bows upright to finish off the design.

Finishing Touches –

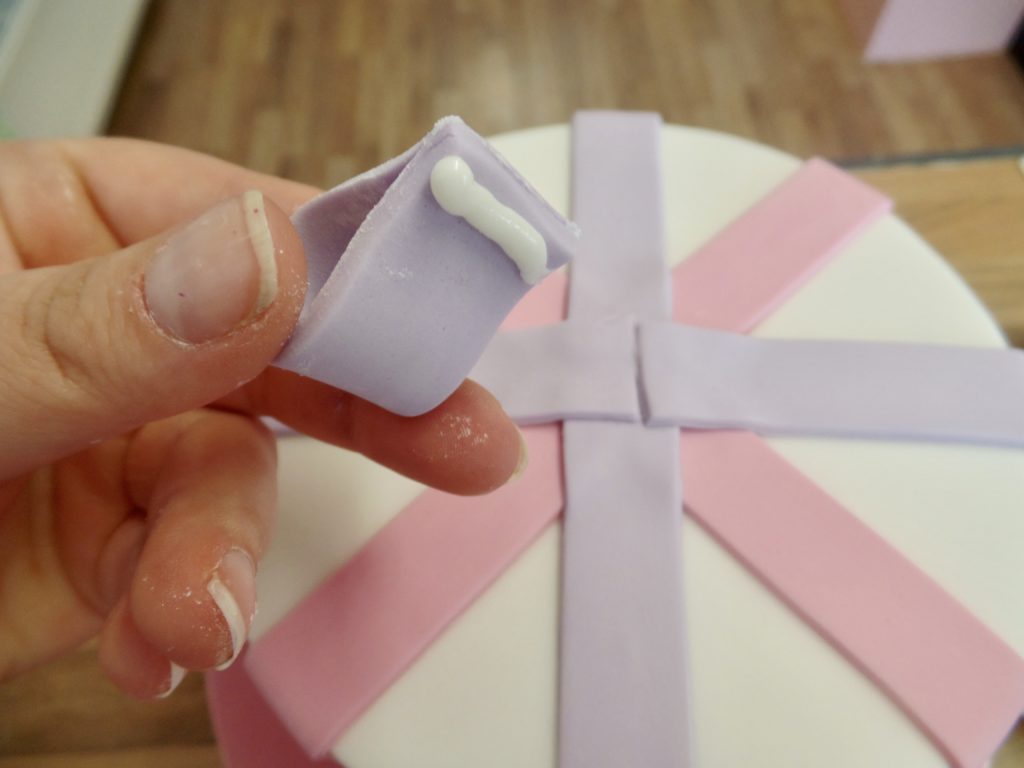
To finish off the cake I cut out a message using Mexican paste and my favourite, Tappit cutters (you can see more on how to use those here), and a 15mm lilac ribbon around the edge of the cake board stuck down using 3mm double sided sticky tape. I also created a little ribbon bow on the front (you can see how to make this little bow halfway down this blog post).

I then left the whole thing to set in a cool dry room, all the royal icing to dry before boxing it up and taking it over to surprise Pauline! She really loved it and I’m so pleased I got to make it for her.

This really is one of those cakes you can make in a short amount of time but still leave a lasting impression!

Happy baking!

Britt xo

If you want to turn your baking hobby into a career, check out my book Cakes, Bakes & Business for everything you need to know about running a successful baking business, including pricing, marketing, insurance and much more!

How To Bake And Ice A Number Cake

05/19

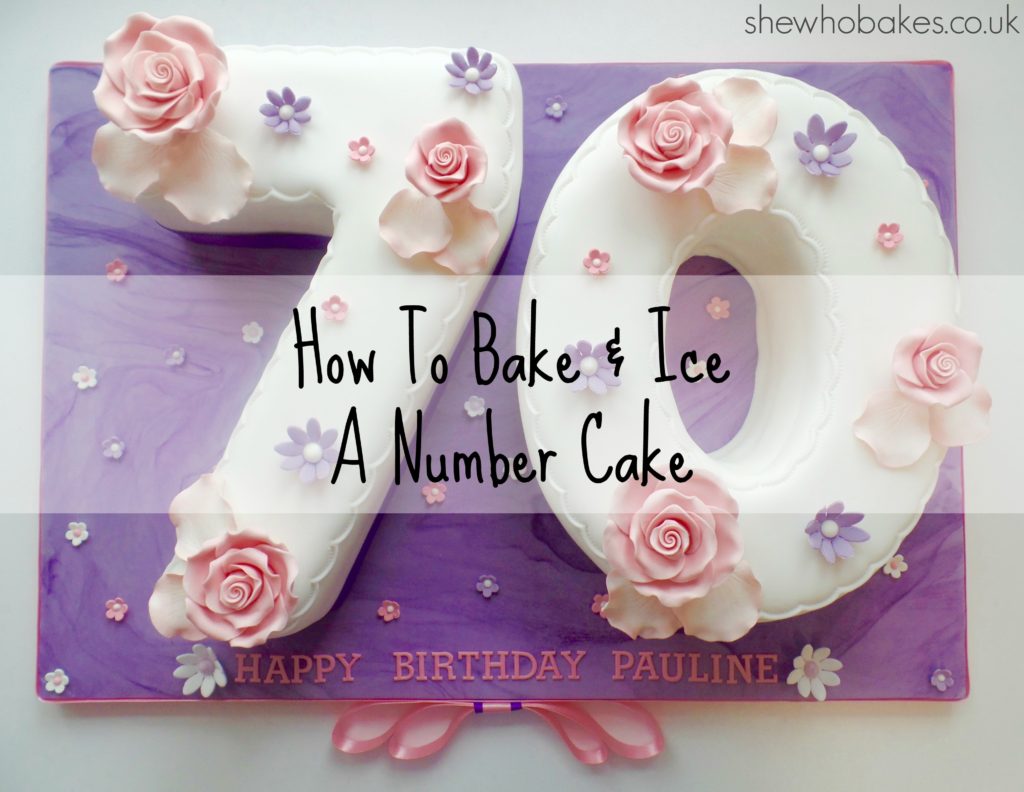
This week, I made a 70th birthday cake for my partner Tim’s wonderful mum, Pauline. Back when I was making cakes every week, I made my fair share of number cakes and I can remember when I first started doing them, what a nightmare they were! So, I took the opportunity to document what I did and how I did it in the hopes it may help you when baking and icing number cakes in the future!

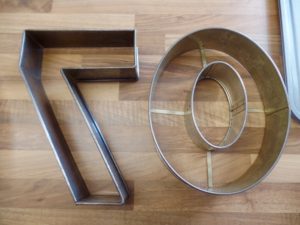
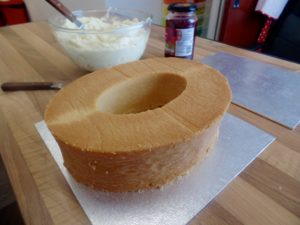
The first thing you will notice with a lot of number tins, is that they are bottomless. They are basically shaped frames to bake in. I hired these from my local cake shop.

Lining The Tin

So, the first thing we need to do is create a bottom for the cakes and line them, and for that you will need a few things;

  • Number tins
  • A baking tray per number
  • Greaseproof/baking paper
  • Tin foil
  • Scissors
  • Pencil
  • Cake release
  • Silicone pastry brush

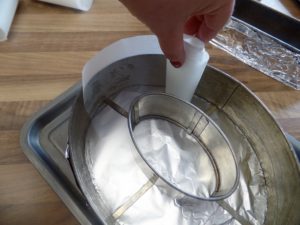
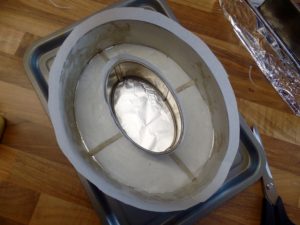
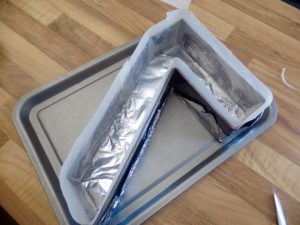
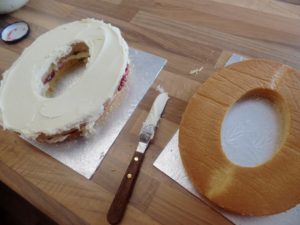
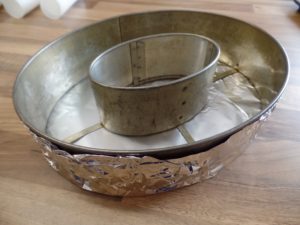
Because I flip my cakes over and use the top as the bottom to make it nice and level, I need to make sure I flip my tin over so it bakes the wrong (right) way around, otherwise I will have a back to front 7! As per picture 1.

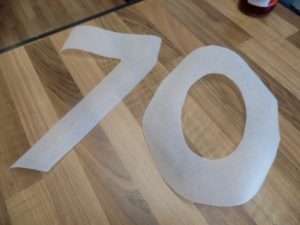
Draw around the inside of your numbers onto the greaseproof paper and cut them out. Put these to one side for now.

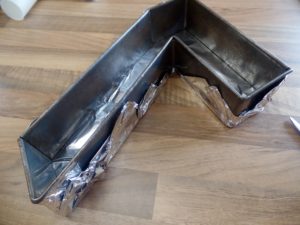
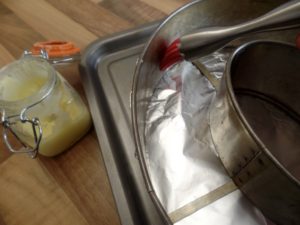
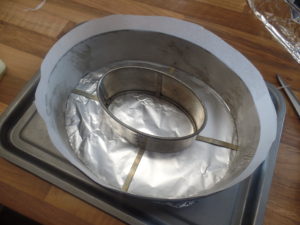
To create the ‘bottom’, place the number onto a sheet of tinfoil, then, fold up the sides of the tinfoil tightly around the number.

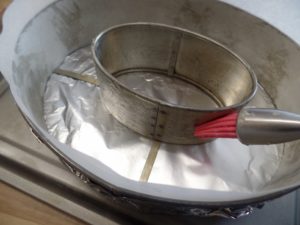
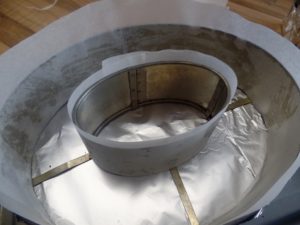
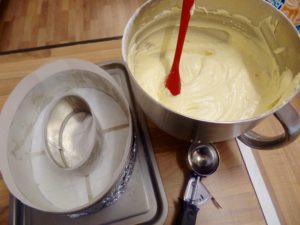
To properly line the tin, paint the inside with cake release. Then, gently unravel a strip of greaseproof paper along the inside, pressing it firmly against the sides to stick down (to know how to get the right size strip, check out my lining a tin step by step here). Then, do the same for the middle of the number, wrapping this in a strip of greaseproof paper also.

Then, paint the bottom of the foil ‘tin’ we have made and stick down the greaseproof number we cut out earlier. Repeat this for any other numbers you are doing.  *Note* When lining a zero, make sure to cut the inside hole a little bigger to fit over the frame.

Baking The Cake

For this cake, I am using my vanilla madeira recipe which I have adjusted. This recipe will also fit an 8″ round cake.

This recipe makes one number cake in these tins.

Ingredients

  • 300g self raising flour
  • 300g caster sugar
  • 300g Stork/butter
  • 85g plain flour
  • 5 eggs
  • Teaspoon vanilla

Method

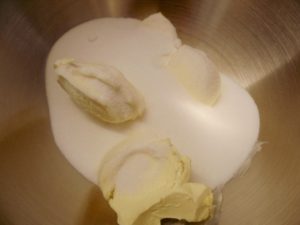
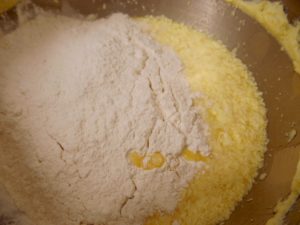
  1. Cream together the caster sugar and Stork/butter
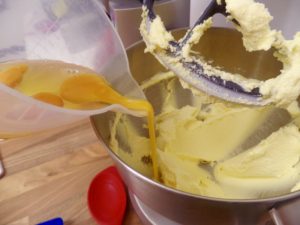
  2. Pour in the eggs, mix well
  3. Add in the flour, mix well
  4. Finally, add the vanilla
  5. Mix on a high speed for 4-6 minutes

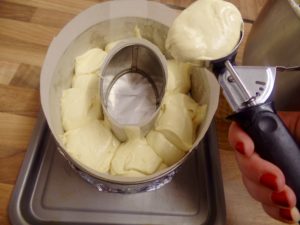
I find the best way to get cake mix into awkwardly shaped tins is by using an ice cream scoop. You have more control over it and you’re less likely to get it all over your greaseproof paper and sides.

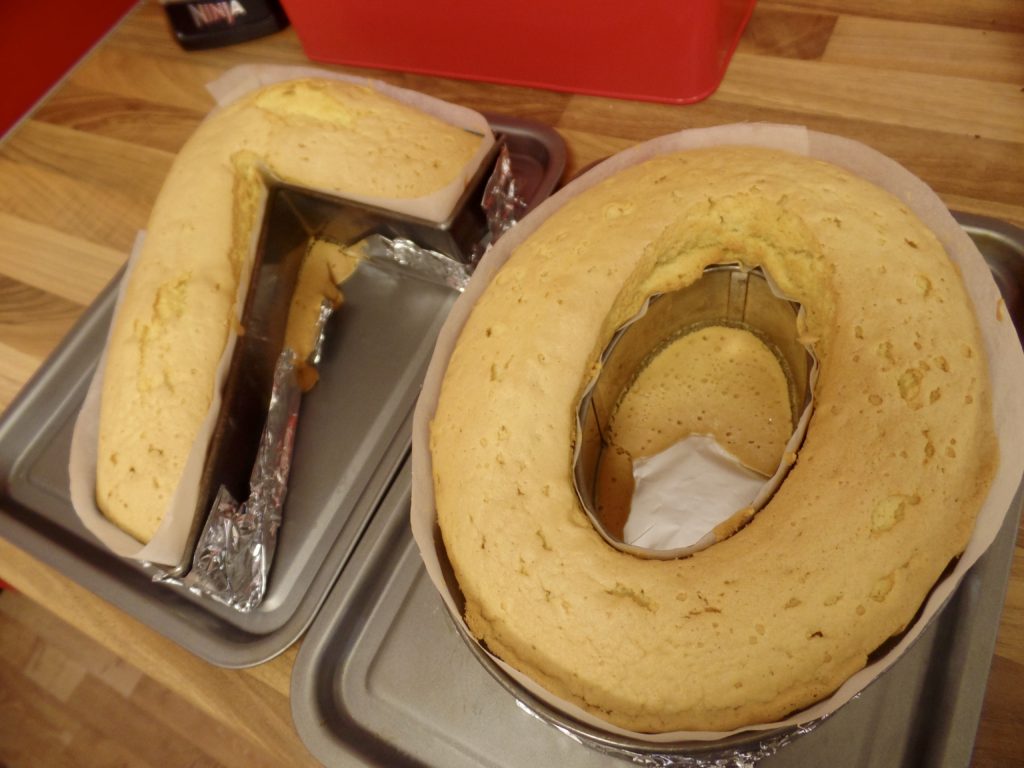
Bake this at 140C for 1 hour 30 minutes or until a skewer comes out clean.

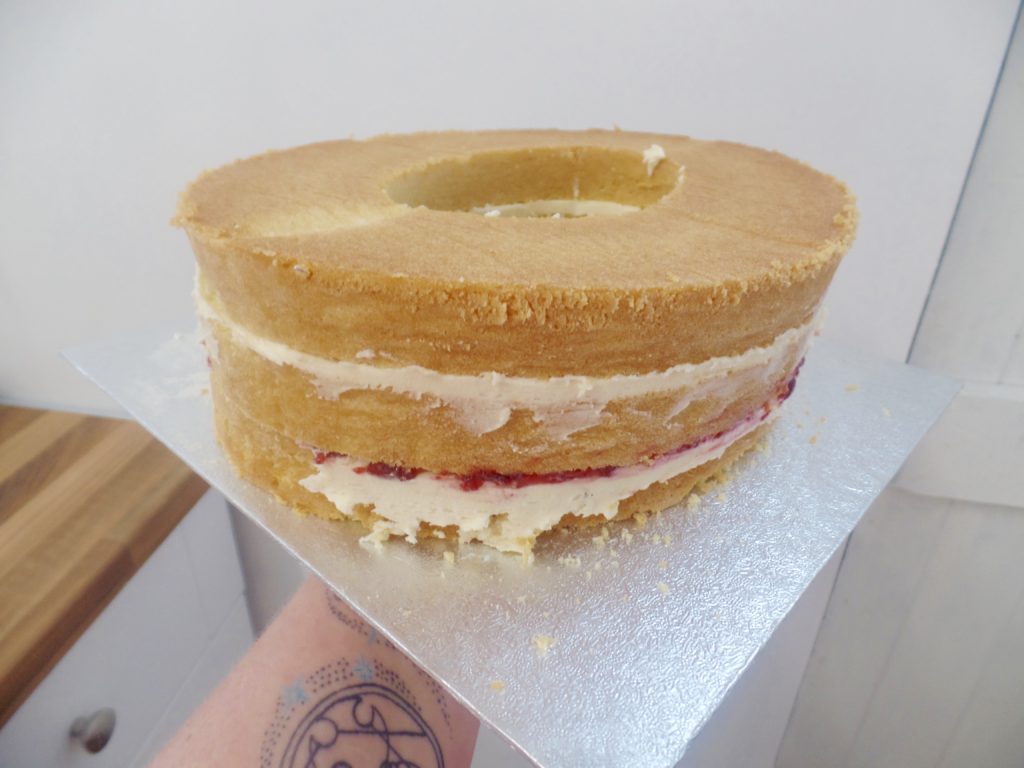
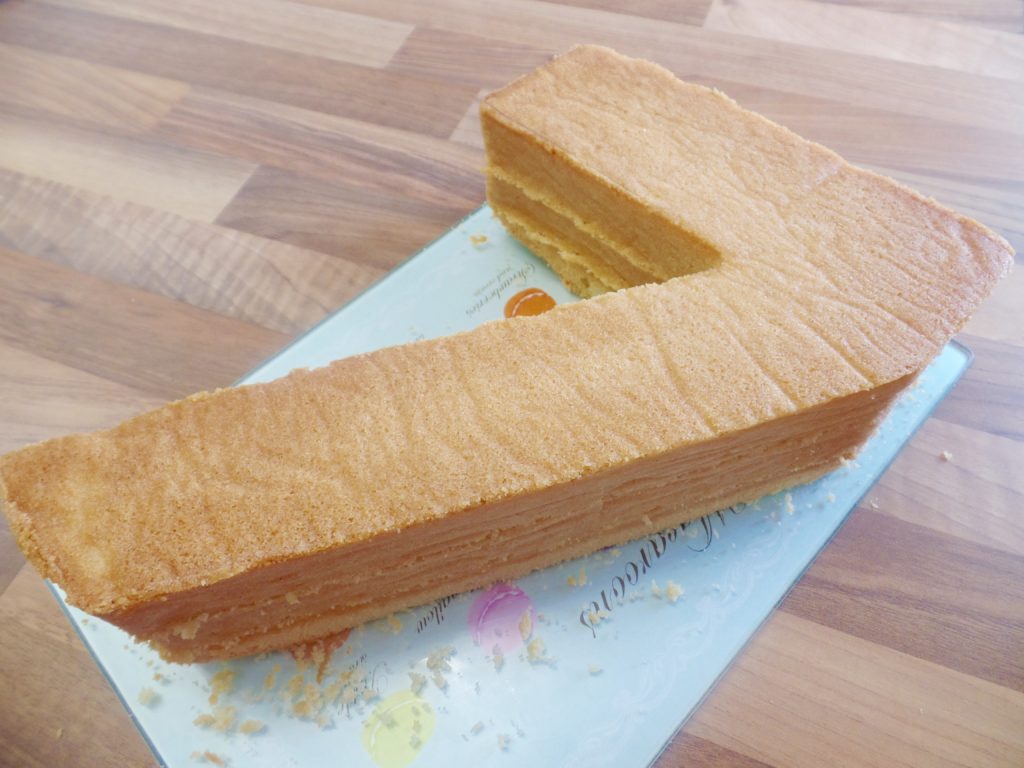
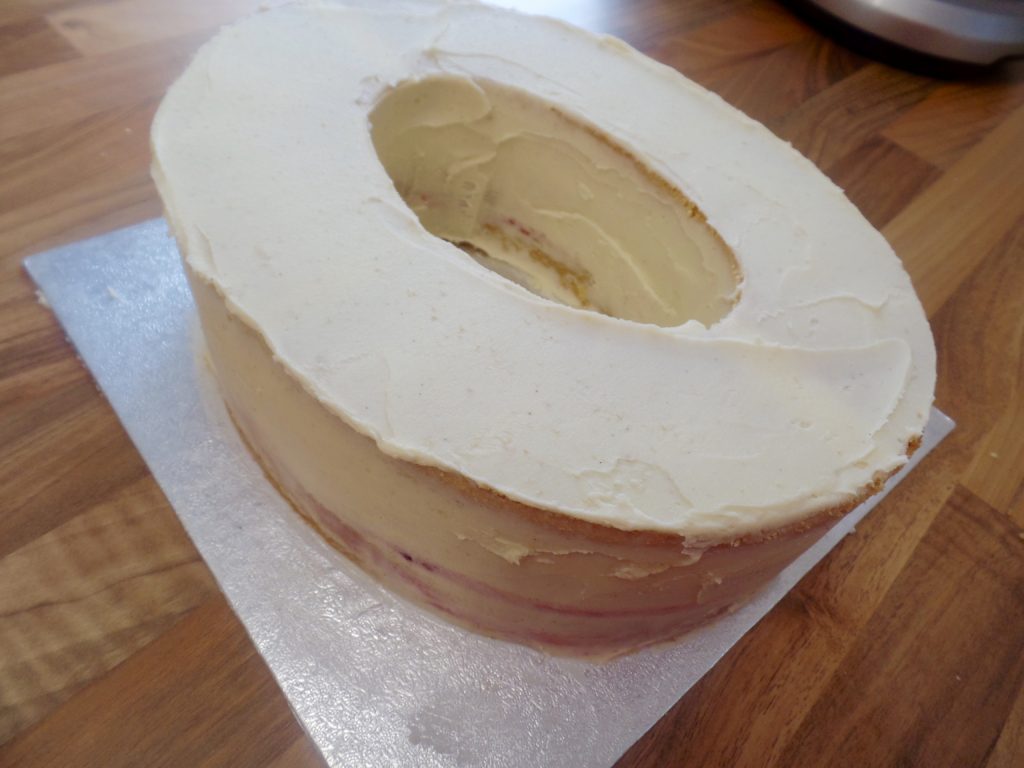
Now that the cake is baked, you can see there was a slight bit of leakage when it was baking in the corner of the 7 and the hole of the 0 but a little bit is absolutely fine, it means we get a little snack! Normally I would say to turn the cakes upside down and leave them to cool on greaseproof but I don’t use this method for number cakes as they can be very fragile. Instead, I let them cool like this in the tin for a few hours with a tea towel over the top just to make sure nothing can get into it. I’ll turn them upside down later.

Once cool, carefully slip them out of the tin and wrap in clingfilm and leave overnight. Because these can be so delicate, giving it time to firm up will really help us when we come to split and fill it.

Splitting & Filling

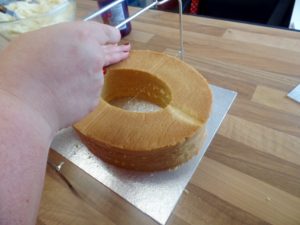
Firstly, level the cake by cutting off and excess rise using a cake leveller. I highly recommend using one of these over a knife for precision. Then very gently flip the cake over. I put a silver cake board on top if it and then used the green one below it to flip it over carefully.

I will be filling my cake with a dense vanilla buttercream for stability. I have used 500g unsalted butter to 1kg icing sugar and two teaspoons of good vanilla and this was enough for both numbers. If you’re only doing one number you can halve this recipe.

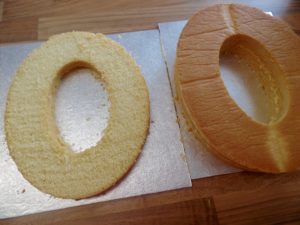
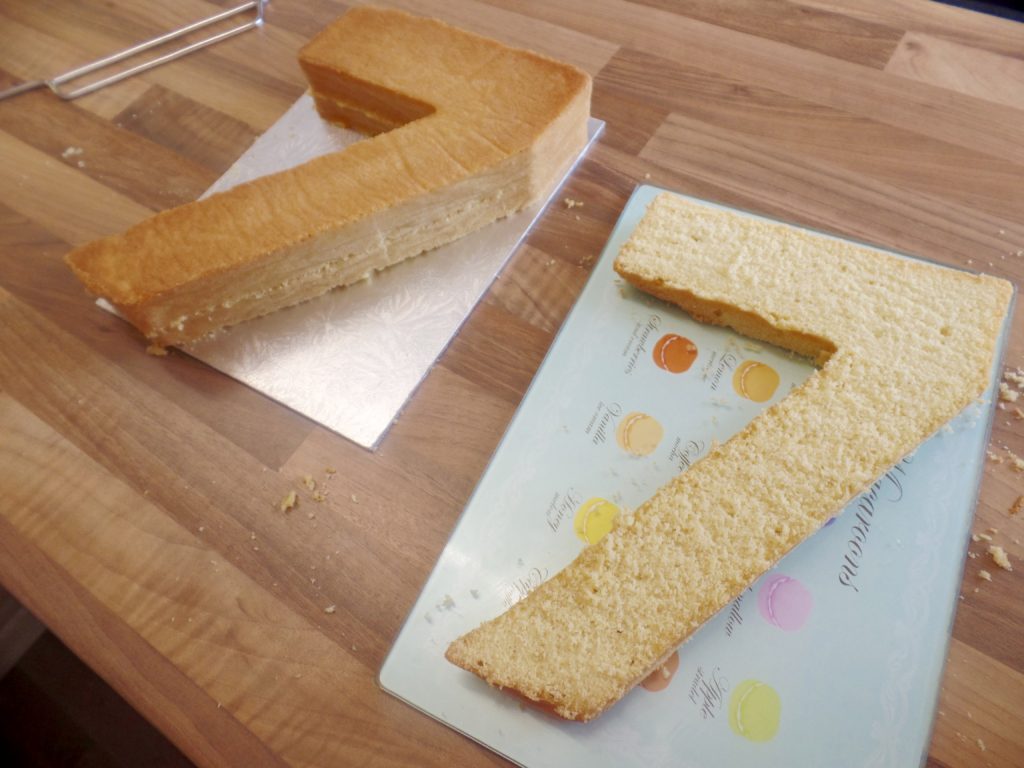
Using a cake leveller, cut into your cake. I always split mine twice so I can even out the filling and it looks pretty when you cut into it too! So I make the first cut 1/3 of the way up the cake, and another halfway between the first cut and the top of the cake.

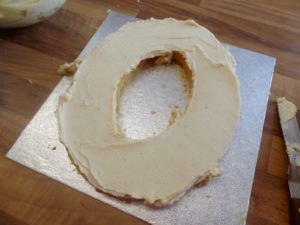
Use another thin cake board to slip between the layers and lift up the rest of the cake, otherwise you may risk breaking the sponge as it will be thin around the edge. Spread over your buttercream filling and jam if you’re using it and by using the thin cake board, you can slide the top section of the cake back onto the filled section. Repeat for the second layer.

Pop this into the fridge to firm up for 15 minutes while you do the same for the second number.

Once your cake has chilled you can ‘crumb coat’ it. This is when you spread a layer of buttercream on the outside of the cake to keep the crumbs in, help keep the cake fresh and to act as an adhesive for the sugarpaste/icing. Once you have done one layer, pop it back in the fridge briefly for about 5 minutes then do a second layer. This ensures a nice and smooth finish under the suparpaste/icing.

Icing The Cake

I am going to be covering my number cakes in a layer of sugarpaste, also known as icing. For this, I am using 1KG of icing per number. Roll out your icing onto a surface dusted with cornflour between spacers or to ¼” thick.

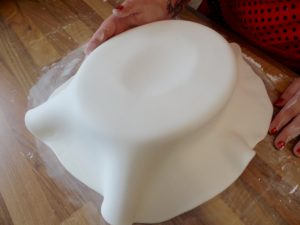
Using your rolling pin, gently lift up the icing and place gently over your cake. Start to smooth it with your hands in a ‘scooping up’ movement so as not to tear the edges. Then, carefully cut away the excess icing.

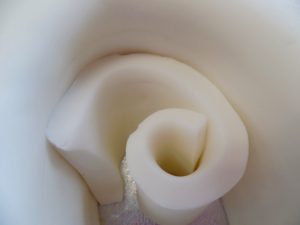
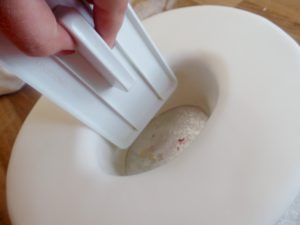
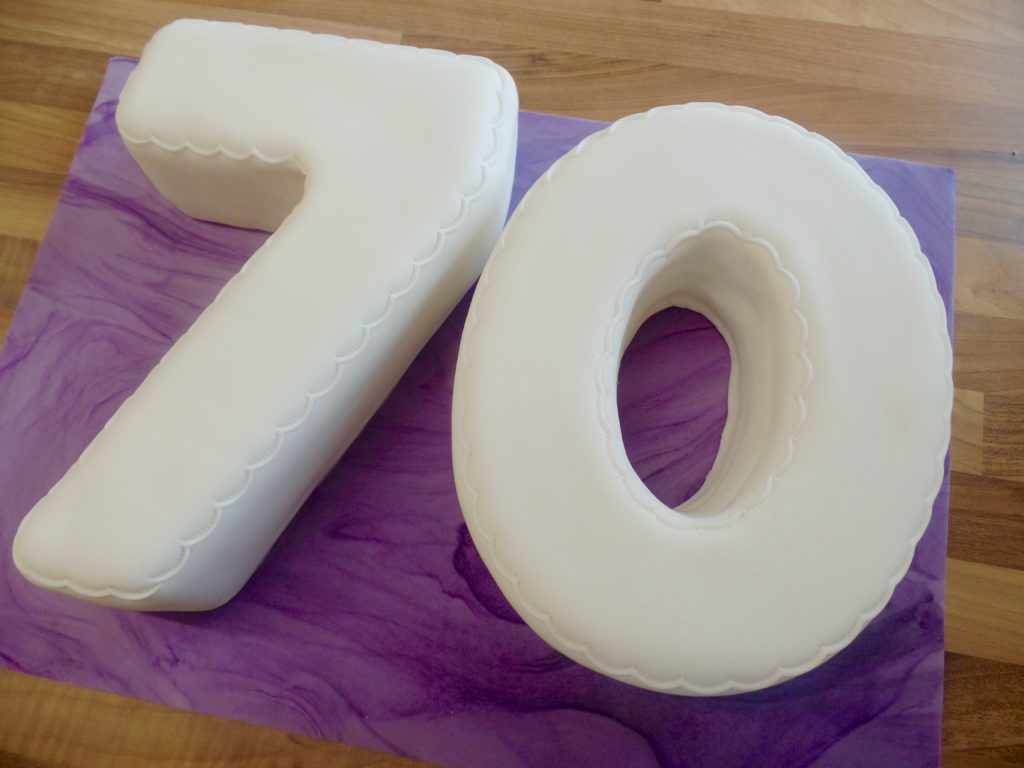
For the hole in the middle, make a small cut using a sharp knife in the middle of the hole and smooth down the icing into the hole as far as it will go. Don’t try and make it touch the bottom as there won’t be enough and you risk ripping and tearing the inner edge. Instead, cut a strip of sugarpaste and place it in the middle of the hole like the middle picture. Using your hands, gently push this onto the cake, smoothing down as you go. There will be a small trace of a line, but nothing noticeable. Complete this with a smoother as per picture three and smooth the rest of the cake too.

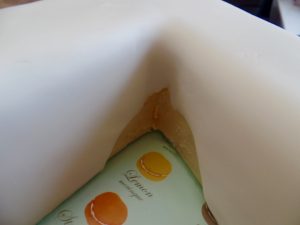
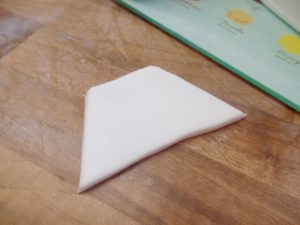
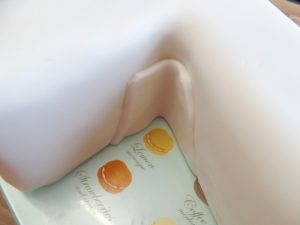
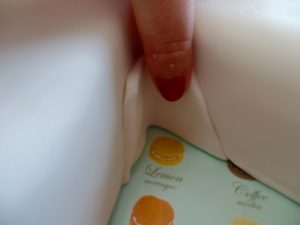
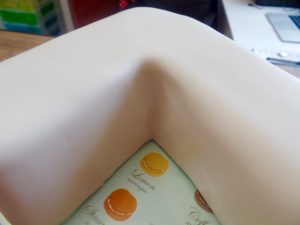
For the 7, the place you will have difficulty is the inner corner as you can see in picture 1 above. To cover this, cut a shape loosely like the gap and push this into place. Smooth it down with your fingers at first in circular motions to stick down, then use a smoother to finish. If you’re going to “crimp” the outline of your cake as I have done, do this now.

Leave these cakes to set overnight before trying to move them or decorate them. It’s much easier to work with harder, set icing than soft icing where you risk damaging it.

Now is when I recommend icing the board too. I’ve gone for a marbled purple style but the choice is yours! I’ve used a 20″ x 14″ cake board to fit both numbers. A single number would only need an 18″ x 14″ board. To find out more about how and why to cover boards, check out my article here.

Assembling The Cake

It’s now the following day and it’s time to assemble the cake. The best way to stick down a cake to an iced board is by using royal icing, the cement of the cake decorating world. Having measured roughly where I wanted to place my cake onto the board, I have painted an 0 with royal icing as you can see in the picture one above. I’m then using two large palette knives to carefully lift the number into place. Be careful when pulling the palette knives out. Pull them out straight and not angles otherwise you risk damaging your sugarpaste/icing.

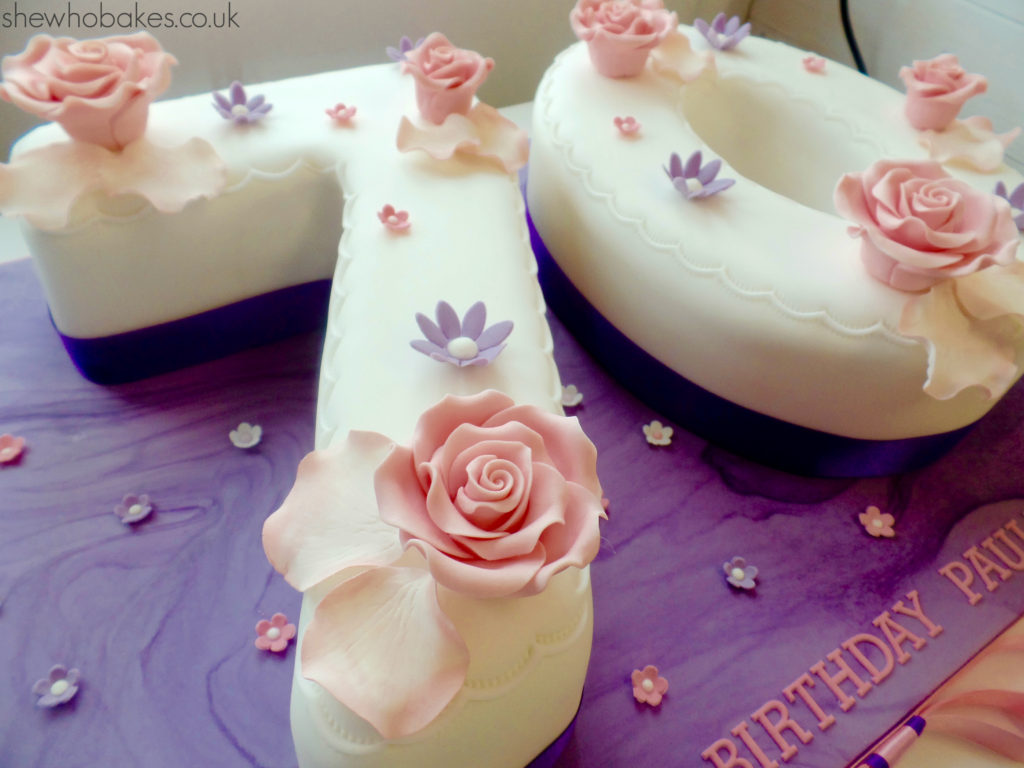
Then, leave the cake to set on the board before decorating as desired! I have used edible flowers and petals on the cake, small sugar blossoms on the board and a 25mm purple ribbon around the border of the cakes, stuck down with a dab of royal icing. I have also given the board a ribbon edge using 15mm satin ribbon and thin 3mm double sided sticky tape.

And there you have it! How to bake and ice a number cake start to finish! This madeira cake recipe will last up to two weeks from the day you bake it, about a week once split and filled and 3-4 days once you’ve cut into it.

You can watch me bake a madeira cake in real time on my Facebook page here; PART 1PART 2.

Give it a go and let me know how you get on, either on Facebook or Twitter or Instagram.

If you want to turn your baking hobby into a career, check out my book Cakes, Bakes & Business for everything you need to know about running a successful baking business, including pricing, marketing, insurance and much more!

Happy baking!

Britt xo

Coffee & Dark Chocolate Cake

02/19

This week I made this super easy and very tasty coffee and dark chocolate cake for when my good friends Freddie & Alvin popped over.

It’s made from my Classic Maderia Cake recipe but with a few tweaks!

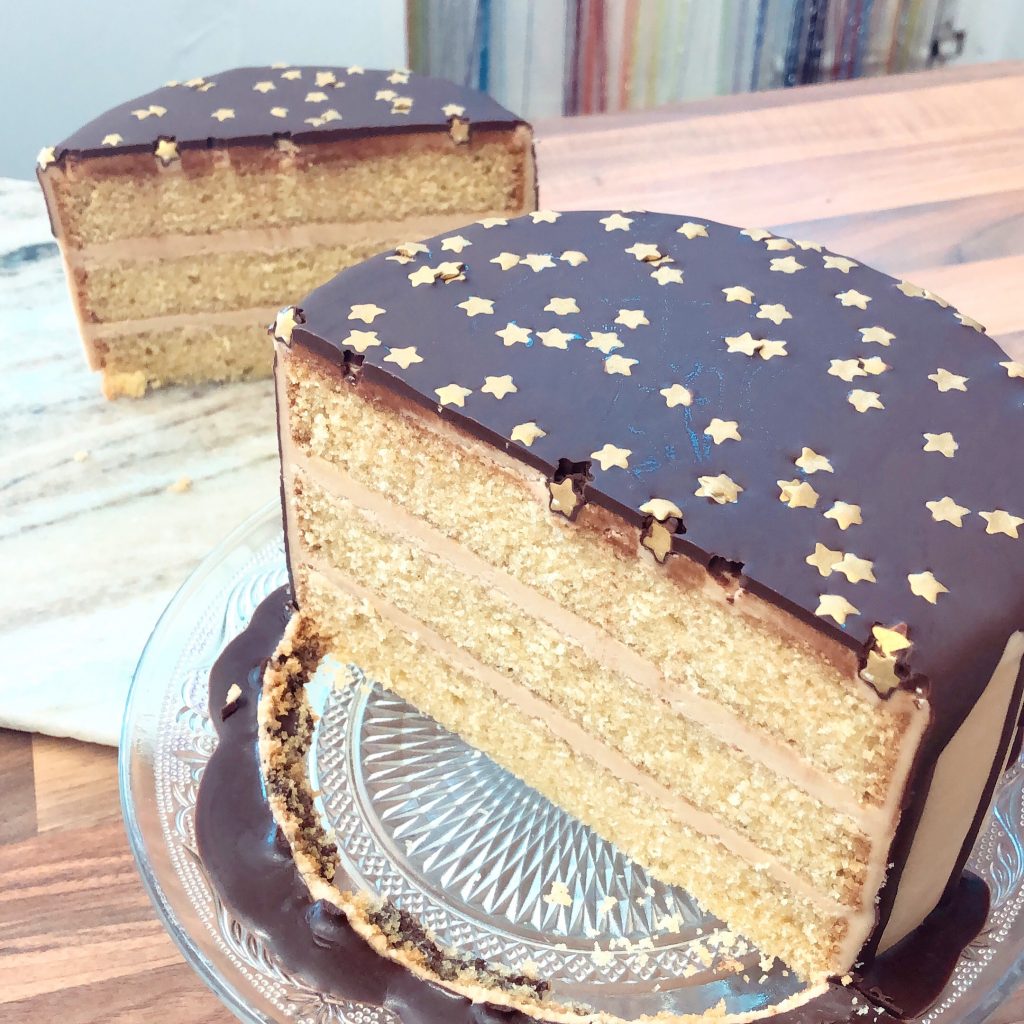
Once I’d completely made the mix I added in 2 tablespoons of strong coffee (made from 2 teaspoons of instant coffee and 50ml boiling water). You could also use coffee extract or flavouring but I find instant coffee works just as well!

Then I did the exact same thing and added it to the vanilla buttercream recipe also listed on the madeira cake recipe.

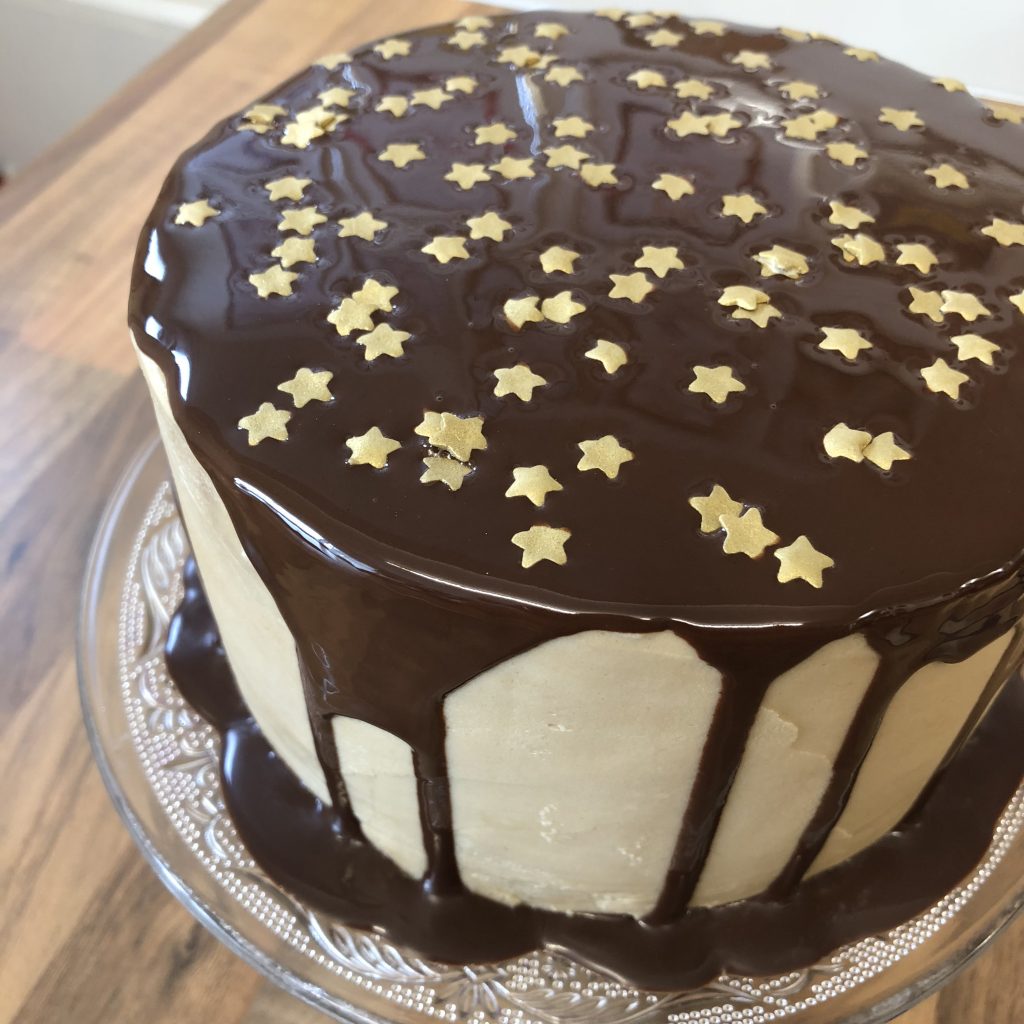
Once I had stacks the layers and coated it in a layer of coffee buttercream, I melted 100g dark chocolate. I then mixed in about a teaspoon of vegetable oil to give it a better, pourable consistency.

Then, when the chocolate was still soft, I topped it with gold edible stars from Sainsbury’s.

Give it a go and let me know how you get on, either on Facebook or Twitter or Instagram.

If you want to turn your baking hobby into a career, check out my book Cakes, Bakes & Business for everything you need to know about running a successful baking business, including pricing, marketing, insurance and much more!

Happy baking!

Britt xo


Rice Krispies Christmas Puddings!

12/18

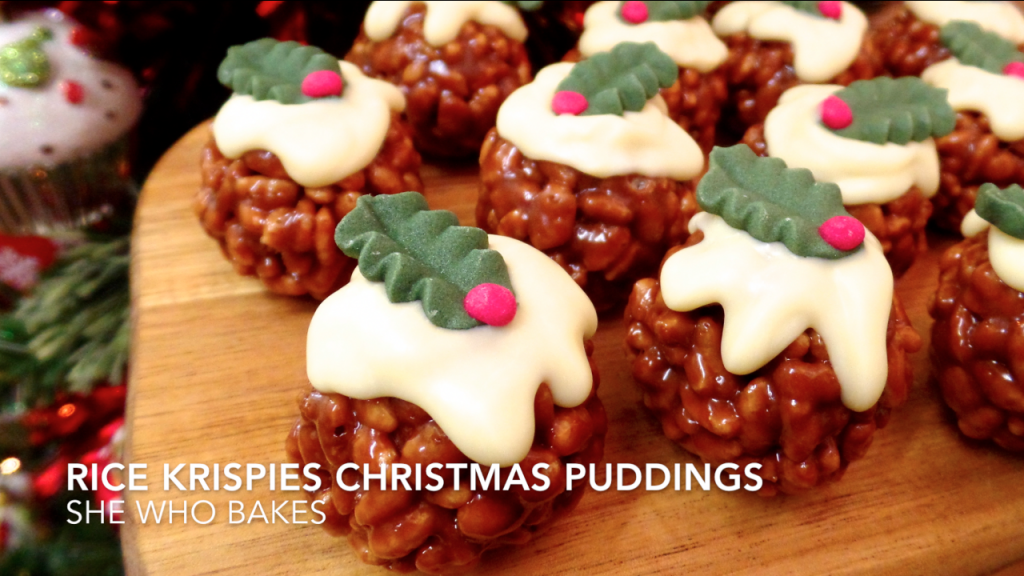
My latest quick video shows you how to make a no- bake sweet festive treat in no time at all!

You will need;

  • 50g unsalted butter
  • 180g marshmallows
  • 100g Rice Krispies
  • 200g milk chocolate
  • 100g white chocolate
  • Holly leaf decorations (I got mine from Sainsbury’s but they are available from most supermarkets)

Method;

  1. Melt the butter and chocolate in a pan.
  2. Add marshmallows and stir until they have melted.
  3. Add in your Rice Krispies. Take off the heat and stir well.
  4. Once they have cooled a little, spoon a tablespoon of mixture out into your hands and roll into a ball. Put these on a lined baking tray and then chill for 15 minutes.
  5. Melt your white chocolate and pour into a piping bag. Pipe a little white chocolate on top of each Christmas pud and top with a holly leaf icing decoration.
  6. Pop back in the fridge to firm up for a further 15 minutes.
  7. Enjoy!

They will last a good few weeks in the fridge!

If you want to turn your baking hobby into a career, check out my book Cakes, Bakes & Business for everything you need to know about running a successful baking business, including pricing, marketing, insurance and much more!

Give it a try and let me know how you get on either on Facebook or Twitter or Instagram.

Happy baking and Merry Christmas!

Britt xo

All of my online cake decorating courses are currently HALF PRICE! Grab a bargain here.

Sign Up to my Newsletter

Subscribe here to my newsletter!

Designed by Clockwork Moggy